Get a Free Quote

Edit Template

Author name: 2m54a

How Much to Tip Movers Long Distance—Full Guide
Moving and Packing Services

How Much To Tip Movers Long Distance

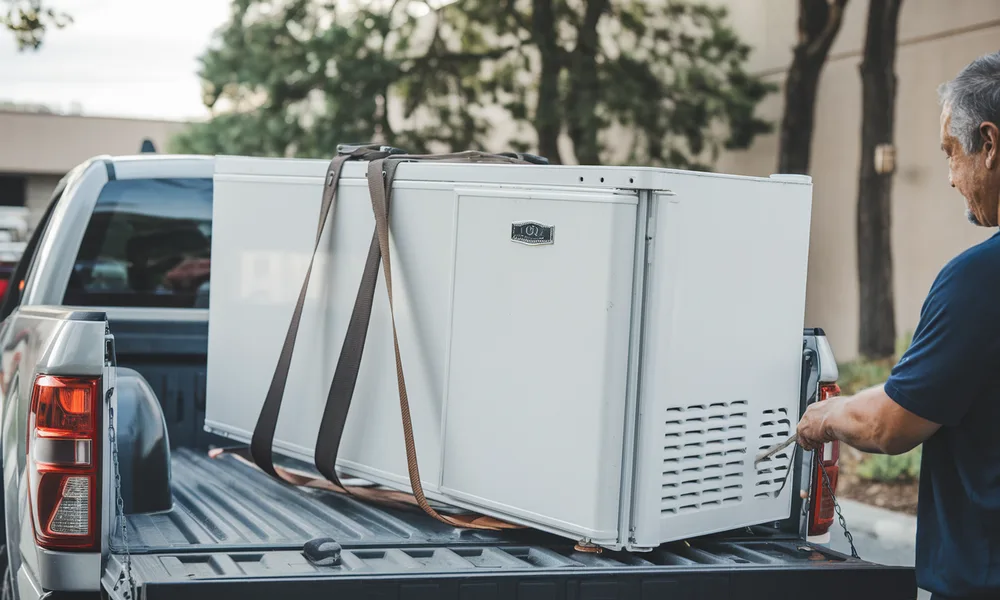
How much to tip movers long distance can be a confusing question for many people, especially during the stress of planning a major move. While tipping is a common practice in many service industries, understanding the proper tip for movers isn’t always straightforward—particularly when it comes to tipping long distance movers. The complexity of the transfer, the level of service, and the overall cost are some of the variables that may affect the amount. Knowing industry norms and etiquette helps ensure you show appreciation appropriately without over- or under-tipping. Being informed about what’s customary in the moving industry can help you make confident decisions and express gratitude fairly to the hardworking crew. Do You Tip Movers? Yes, tipping movers is generally considered a common and appreciated practice, although it’s not strictly required. Here’s a detailed explanation covering industry norms, expectations, and cultural nuances—plus addressing common questions like “is it typical to tip movers?” and “what to tip movers?” Is It Typical to Tip Movers? Yes, it is typical to tip movers in many places, especially in the United States and Canada. Tipping is a common way to express gratitude for excellent service, even though it’s not required, particularly if the movers:  Handled your items carefully Worked efficiently Dealt with stairs, heavy items, or difficult conditions Were polite and professional Tipping tipping may be more situational and less frequent or anticipated in other nations. What to Tip Movers A few standard guidelines can help you decide what to tip movers: Flat Rate: Tipping tipping may be more situational and less frequent or anticipated in other nations. Percentage: Some people tip 5%–10% of the total moving cost and split it among the crew. Cash is Preferred: Most movers prefer cash, but some companies may allow tips through credit card or apps. Optional extras: You can also offer snacks, water, or lunch—especially during long or tough moves. Industry Norms and Common Practices Professional Moving Companies: While companies don’t require tipping, many movers rely on tips as part of their income. Local vs. Long-Distance: Local moves tend to be more tip-friendly. For long-distance moves, it’s still appreciated, but less consistent. Hourly vs. Fixed-Rate Movers: If you’re charged by the hour and they move efficiently, a tip reflects appreciation for speed and care. Regional and Cultural Differences United States and Canada: Tipping is typical and expected. UK and Australia: Less common, though still appreciated for excellent service. Europe and Asia: Tipping may be rare or considered unnecessary depending on local customs—though it’s not usually refused if offered. You can read about moving services in Los Angeles. How Much to Tip Moving Company A considerate way to express gratitude for your movers’ diligence and professionalism is to tip them. While it’s not mandatory, many people still wonder what a fair tip for movers should be. Whether you’re tipping long-distance movers or moving locally, this article will help you grasp the basic tipping expectations. General Tipping Ranges When determining the appropriate tip amount, there are two typical methods: 1. Dollar Amount Per Mover Half-day move (4 hours or less): $20–$40 per mover Full-day move (8 hours or more): $40–$80 per mover Challenging moves (stairs, heavy items, bad weather): Think about tipping on the higher end of the spectrum. 2. Percentage of Total Cost Divided among the workers, 5% to 10% of the overall move costFor instance, a 5% tip for a $2,000 relocation would be $100, divided between two and four movers. National Averages & Recommendations In the U.S., the national average tip for movers is typically: $25–$50 per mover for local moves For longer or more intricate transfers, $50 to $100 per mover For tipping long distance movers, consider a higher flat amount, since they often work multiple days, travel far, and handle logistics: $150–$200 total split among the crew or $50 to $100 per person, depending on the length and quality of the service. Cash vs. Other Types of Tips Cash Still the most appreciated and preferred form of tip Hand it directly to each mover if possible Non-Cash Alternatives Lunch (e.g., pizza, sandwiches, or a local meal) Cold drinks (especially in hot weather) Snacks for longer moves Positive online reviews, which can be just as valuable to movers Factors to Consider When Tipping Movers It’s useful to consider factors other than the cost of the move when determining how much to tip. While the question “is it typical to tip movers?” is often answered with a yes, the amount and whether to tip at all should depend on the quality and difficulty of the service. Here are some important things to think about while deciding how much to tip movers. 1. Quality of Service The professionalism and hard work of the moving crew should be reflected in the tip. Consider tipping more if your movers: Arrived on time and stayed on schedule Handled items with care and prevented damage Were courteous, helpful, and respectful Worked efficiently and without complaints A larger tip is a heartfelt way to express gratitude when the service surpasses your expectations. 2. Complexity of the Move A higher tip is more justified for moves that are more challenging. Examples include: Multiple flights of stairs Uncomfortable or heavy objects (such as safes or pianos) Fragile items that require extra attention Limited access to the property (tight hallways, no elevators, long walk from the truck) These added challenges require more physical labor and care, which can help guide what to tip movers. 3. Weather Conditions or Unusual Circumstances Movers working in extreme heat, rain, snow, or high humidity face tougher conditions. If they remain professional and hardworking despite the weather or any unexpected obstacles, consider tipping on the higher end of the range. 4. Length and Duration of the Move Time plays a big role in tipping norms: Half-day move: $20–$40 per mover Full-day move: $40–$80 per mover Multi-day move: $50–$100+ per mover, per day If you’re still wondering is it typical to tip movers for shorter jobs, the answer is

How to Pack Sneakers Without Damaging Them
Moving and Packing Services

How To Pack Sneakers For Moving

Packing your sneakers the right way can help maintain their shape, prevent damage, and save space—whether you’re traveling, moving, or organizing your collection. Improper packing often results in creased uppers, scuffed surfaces, or warped soles, especially when sneakers are crammed into tight spaces or stacked carelessly in boxes. To avoid these common mistakes, it’s important to use proper techniques. In this guide, we’ll walk you through the best way to pack shoes and sneakers in a box, including tips for protecting them during travel and maximizing storage without sacrificing their condition or cleanliness. Whether you’re storing them long-term or prepping for a trip, these practical methods will keep your kicks looking fresh and ready to wear. Key Considerations When Packing Shoes in a Suitcase Before packing shoes in suitcase, consider the activities, weather, and dress codes at your destination. Limiting yourself to a few versatile pairs can save space and reduce luggage weight. Keep Shoes Clean and Dry Pack only clean, dry shoes to prevent bad odors and potential damage to your clothing. This is especially important if you’re traveling for several days. Maintain Shoe Shape To protect your shoes from becoming squashed or deformed, stuff them with socks, tissue paper, or small items of clothing. One of the greatest methods for packing shoes without wasting room is this one. Separate Shoes from Clothes Always use shoe bags, plastic covers, or even disposable shower caps to keep dirt and germs away from your clothes. This helps keep everything clean and organized. Position Shoes Strategically When packing shoes in a suitcase, place heavier shoes like sneakers near the bottom or along the sides to maintain balance. Lighter shoes can be tucked into corners or packed on top. You can read about moving services in Los Angeles. How to Pack Sneakers for a Move in 6 Easy Steps Whether you’re relocating across the city or heading to a new country, packing sneakers the right way can save space, protect your footwear, and keep the rest of your belongings clean. Here’s the best way to pack shoes—especially sneakers—so they arrive at your new home in perfect condition. Step 1: Clean Your Sneakers First Before packing shoes in suitcase, take the time to wipe off any dirt, mud, or debris. Clean sneakers not only prevent odor and stains on your clothes, but also help preserve the shoe material during transport. Step 2: Dry Them Completely Moisture can lead to mold or unpleasant smells. Let your sneakers air dry for a few hours after cleaning. Packing damp shoes is one of the most common moving mistakes. Step 3: Stuff the Inside To help sneakers retain their shape, stuff them with socks, dryer sheets, or soft clothing. This trick not only keeps the form of your shoes but also saves a bit of space in your luggage. Step 4: Use Shoe Bags or Plastic Wrap Wrap each pair in a shoe bag or plastic wrap. This creates a barrier between your shoes in suitcase and the rest of your items, keeping everything clean and organized. If you don’t have shoe bags, resealable plastic bags or even shower caps work well. Step 5: Place Heaviest Shoes at the Bottom When packing shoes in suitcase, put the heaviest sneakers at the bottom near the wheels (if it’s a rolling suitcase). This adds stability and prevents your shoes from crushing lighter items like clothing. Step 6: Fill Gaps Smartly Maximize space by tucking smaller shoes or sandals around your sneakers. You can also slide shoes along the edges of your suitcase to utilize every inch. This is truly the best way to pack shoes efficiently without wasting space. By following these six simple steps, you’ll be able to keep your sneakers protected, your suitcase tidy, and your move a little less stressful. Whether you’re fitting a few shoes in a suitcase or packing an entire collection, a little strategy goes a long way. How to Pack Shoes in a Duffel Bag When a suitcase isn’t an option, a duffel bag offers a lightweight and versatile solution for travel or short-distance moves. Packing several pairs of shoes in a duffel takes some strategy to keep them organized, clean, and damage-free. Here’s how to do it efficiently. Pick the Right Duffel Bag Begin by choosing a duffel bag that suits the number and size of shoes you plan to bring. For larger footwear like boots or multiple sneakers, go with a medium to large duffel that has a wide opening. If possible, opt for a bag with built-in compartments to mimic the structure of packing shoes in a suitcase. Place Heavier Shoes First To maintain balance and structure, pack heavier shoes—such as sneakers or boots—at the bottom of the bag. This base layer helps stabilize the duffel, making it easier to carry. Lighter footwear can be layered on top or tucked around the sides. Use Shoe Bags or Packing Cubes Prevent dirt and damage by placing each pair in a shoe bag, plastic bag, or packing cube. This not only keeps the shoes separated from clothes but also avoids scuffing between pairs. It’s one of the best ways to pack shoes in a duffel neatly and cleanly. Keep Sneakers Protected Preserve the shape of your shoes by stuffing them with socks, small towels, or packing paper. If you’re packing more delicate or high-value sneakers, wrap them in soft clothing or bubble wrap for extra cushioning and protection. Organize Based on Quantity For one or two pairs, position them at opposite ends of the bag for balance. If you’re packing several pairs, place shoes heel-to-toe and alternate directions to maximize space. This technique is great when you’re short on room but want to stay organized. By following these steps, you can pack shoes in a duffel bag efficiently, whether you’re heading out for a weekend getaway or moving to a new place. With a little planning, your shoes will stay in good shape and easy to access. Tips on Saving Space

How to Choose a Moving Company | 5 Tips for a Smooth Move
Moving and Packing Services

How To Choose A Moving Company

How to choose a moving company is a crucial question many people face when preparing for a move, whether it’s across town or across the country. With so many moving-related details, deadlines, and emotional choices, moving can be a very stressful and complicated process. Selecting the appropriate moving company can mean the difference between a seamless relocation and a logistical nightmare because there are so many factors to consider. Understanding how to choose a mover that is reliable, trustworthy, and experienced is essential for protecting your belongings and easing the overall burden. In this guide, we’ll break down the process into five clear steps to help you with finding good movers who meet your specific needs and ensure your move goes as smoothly as possible. How to Choose a Moving Company in Five Easy Steps Whether you’re relocating across town or across the country, choosing a right moving company can make all the difference. Follow these five simple steps to make a smart, stress-free decision. Step 1: Do Thorough Research Start by gathering information. Use online resources like the Better Business Bureau (BBB), Google, and Yelp to read reviews and ratings. Ask friends, family, or coworkers for referrals. When selecting a moving company, prioritize those with a strong reputation and positive feedback from previous customers. Step 2: Verify Legitimacy and Credentials A trustworthy moving company should have proper credentials. Verify the company’s USDOT number across the United States for interstate moves. Department of Transportation. Make sure they have the proper licenses and insurance to protect your belongings. Step 3: Get Multiple Quotes Don’t settle for the first estimate you receive. Obtain a minimum of three written quotations from various businesses. When choosing a right moving company, compare not just the price, but also the services included—packing, insurance, delivery timelines, and any special handling. Step 4: Ask the Right Questions Before committing, get clarity on key details: What’s included in the estimate? Are there any hidden fees? What is the cancellation or rescheduling policy? Asking these questions ensures transparency and helps you avoid unexpected charges. Step 5: Review the Contract Carefully Before signing, read the contract thoroughly. Confirm the moving dates, services promised, and the final cost. Make sure everything is documented—don’t rely on verbal agreements. You can avoid headaches later if you take a few more minutes here. Looking for dependable movers in Los Angeles? Choose Chamomile Go—your trusted local experts for hassle-free, affordable, and professional moving services. When it comes to relocating, let us demonstrate why picking the best moving company begins with us! For moving services in Los Angeles, contact us. How to Choose Furniture Movers Specifically When it comes to relocating your home or office, choosing the right moving company makes all the difference—especially when it involves bulky, delicate, or valuable furniture. While general movers handle a broad range of items, furniture moving specialists bring a unique skill set and tools specifically designed for transporting large, heavy, or antique pieces with care and precision. Difference Between General Movers and Furniture Specialists General movers typically manage everything from boxes of clothes to kitchenware and electronics. However, they may lack the experience or equipment needed to handle oversized sofas, fragile antiques, or custom-made furniture. On the other hand, furniture specialists focus solely on the safe handling, protection, and transport of furniture—ensuring that every piece arrives in the same condition it left. What a Furniture Mover Should Have If you’re focused on finding good movers who are up to the task, keep an eye out for the following: Experience with Large/Heavy Items: Ensure the team has a proven track record handling oversized pieces, from pianos to sectionals and heirloom cabinets. Ask about past jobs similar to yours.   Specialized Equipment and Packaging Methods: Look for movers that use the right tools—furniture dollies, custom padding, shrink wrap, and lift systems—to protect both your belongings and your property during the move.   Insurance for Valuable or Antique Items: Accidents are rare but can happen. A reputable company will offer full-value insurance or special coverage options for high-value furniture.   Trust Chamomile Go for Specialized Furniture Moving At Chamomile Go, we understand that your furniture is more than just function—it’s personal, valuable, and sometimes irreplaceable. That’s why we specialize in furniture moves with a dedicated team, professional-grade equipment, and packaging that protects even the most delicate pieces. When choosing a right moving company, don’t settle for generalists. Choose a team that treats your furniture with the care and respect it deserves. Choose Chamomile Go—where peace of mind moves with you. Red Flags to Watch Out For When finding good movers, it’s crucial to be vigilant and do your due diligence to avoid falling victim to scams or poor service. Here are some red flags to look out for when selecting a moving company: No physical address or only a generic email – A trustworthy moving business ought to have a physical address and easy-to-find contact information. If all you get is a vague email address or an untraceable phone number, this is a huge red flag. A professional company will be transparent about where they are located. Large upfront deposits – While some down payment is common, be cautious if a company asks for a significant amount of money before your move. Moving scams often involve collecting a hefty deposit and then failing to show up or providing poor service. Always ensure that payment terms are clear, and try to find movers that request payment only after the job is completed. Unmarked trucks or unclear branding – One sign of an untrustworthy company is the use of unmarked or poorly branded trucks. Professional moving companies will usually have clearly marked vehicles with their company logo and contact details. If you can’t identify the company by the truck alone, it could be a red flag. Poor or no reviews – Before hiring, always check reviews on third-party websites like Google, Yelp, or the Better Business Bureau. If you find little to no feedback

How to Transport a Refrigerator in a Pickup Step-by-Step
Moving and Packing Services

How To Transport A Refrigerator In A Pickup

How to transport a refrigerator in a pickup requires careful planning to avoid damage. The size and weight of the fridge make it challenging to load, and improper handling could lead to internal issues. To ensure a smooth move, it’s important to unplug the refrigerator, secure the door, and clean and dry it before loading. When considering how to load fridge in truck, using proper equipment like moving straps or a dolly is crucial for lifting and positioning the appliance. Loading refrigerator in truck should be done carefully, ensuring it stays upright to prevent fluid damage. A pickup truck can be an ideal solution for transportation when prepared correctly, reducing the risk of harm during the move. How to Move a Refrigerator Moving a refrigerator can be a challenge, but with the right planning and tools, it can be done safely. Here are some key considerations to keep in mind when moving a fridge: 1. Measure the Refrigerator and Truck Bed Measure the refrigerator and the pickup truck bed before you begin. This guarantees that the refrigerator will fit into the truck and through doorways. Refrigerators come in different sizes, so it’s important to know the exact dimensions to avoid any surprises. 2. Consider the Weight and Size Refrigerators can weigh anywhere from 150 to 400 pounds. Moving one requires careful handling, especially when using a dolly or hand truck. Make sure you have help and avoid tilting the fridge to prevent damage to sensitive parts. 3. Essential Tools and Equipment Dolly (Hand Truck): Use a heavy-duty dolly to roll the fridge easily across flat surfaces. Straps: To keep the refrigerator steady while being transported, fasten it using straps. Blankets: Cover the refrigerator with blankets to prevent scratches on the truck bed and refrigerator. Pickup Truck: When it comes to moving big refrigerators, a pickup truck refrigerator configuration is ideal. Use a ramp to load the refrigerator and make sure the truck bed is big enough. Steps for Moving a Refrigerator: Prepare the Fridge:If required, empty the refrigerator, disconnect it, and allow it to defrost.   Wrap and Secure: Secure the refrigerator with straps on the dolly after wrapping it in blankets.   Load into the Truck: Secure the refrigerator with straps after loading it onto the truck bed using a ramp. Drive Carefully: Keep the fridge upright and drive slowly to prevent shifting. You can contact us for moving services in Los Angeles. Can You Lay Down a Refrigerator? While it might seem easier to lay a refrigerator down during transport, it’s generally not recommended due to several risks. Here’s why you should avoid laying it down and what you can do instead. Risks of Laying a Refrigerator Down A refrigerator can sustain serious damage if it is placed on its side or back. Here are the main risks: Oil and Gas Leakage: Refrigerators rely on a compressor and refrigeration system that contains oil and gas. Laying the fridge down can cause the oil to move out of the compressor and into the refrigerant lines, leading to potential leaks or system failure. Compressor Damage: One of the refrigerator’s more vulnerable parts is the compressor. When the fridge is laid down, it can put unnecessary strain on the compressor, which may cause it to malfunction or break. Alternatives to Laying It Down If you need to transport a refrigerator, here are safer options: Keep the Fridge Upright: A refrigerator is best moved while it is standing upright. Loading the refrigerator in a truck upright minimizes the risks associated with oil and gas leakage, as well as protecting the compressor. Properly Fastening the Fridge: To keep a strapped refrigerator from toppling over or shifting while being transported, fasten it to both the truck and the dolly. Ensure that it is stable and upright in the truck bed, with plenty of padding to avoid scratches. How to Transport a Refrigerator in a Pickup Truck | Easy Steps Transporting a refrigerator in a pickup truck can be done safely with the right preparation and equipment. Follow these step-by-step instructions to ensure your fridge arrives in one piece. 1. Preparation: Disconnecting the Fridge and Removing Shelves Make sure your refrigerator is fully unplugged from all power sources before you begin strapping it up or placing it onto the truck. Unplug the fridge and let it sit for at least 30 minutes to an hour to allow the coolant to settle. After that, take out the refrigerator’s shelves, trays, and other contents to keep them from shifting or shattering while being transported. 2. Positioning the Pickup Truck Ensure the pickup truck refrigerator area (the truck bed) is clean and free of debris.Both the vehicle and the refrigerator are less likely to sustain scratches or other damage when the bed is kept clean. Lay down a moving blanket or protective cover in the truck bed to cushion the fridge. 3. Lifting the Refrigerator When learning how to load a fridge in a truck, it’s crucial to have the right technique.Lift and roll the refrigerator into the vehicle using a dolly. If you don’t have a dolly, enlist the help of a second person to lift the fridge safely. To prevent injury, always lift with your legs and never twist your back. 4. Securing the Refrigerator It’s time to fasten the refrigerator after it’s in the truck bed. Straps are necessary while moving a refrigerator to prevent it from shifting or falling while being transported. Secure the refrigerator firmly in position with sturdy moving straps. Use additional blankets to shield it from dings and scrapes. To avoid the coolant moving incorrectly when traveling, make sure the refrigerator is upright. 5. Transporting the Refrigerator Take extra care to drive smoothly when you’re ready to get behind the wheel. Avoid sharp turns, sudden stops, or fast accelerations to prevent the fridge from moving or tipping over. Keep an eye on your load during transit to ensure everything stays in place. 6. Unloading the Refrigerator Once you’ve reached your

How to Pack Toiletries for Moving | Step-by-Step Guide
Moving and Packing Services

How To Pack Toiletries For Moving

How to pack toiletries for moving can feel like a small task, but it plays a big role in making your move smooth and stress-free. While most people focus on furniture or electronics, packing bathroom items the right way is just as important. Your bathroom toiletries list likely includes everyday essentials like shampoo, toothpaste, deodorant, razors, and medicine things you’ll need right away at your new home. To avoid spills or broken items during the move, start by sealing bottles tightly and placing them in leak-proof bags. Wrap fragile items like glass containers in towels or bubble wrap to keep them safe. Pack similar items together and label the box clearly so it’s easy to find when you unpack. Taking a few extra steps now can help you stay organized and prevent unnecessary mess when you settle into your new space. Sort Out Your Bathroom Items First Before packing bathroom items, go through everything and declutter. Throw away whatever you don’t use, including almost empty bottles and expired goods. This is a great time to simplify your bathroom toiletries list and keep only what you actually need. Group by Category Organize your items into categories to make packing and unpacking easier. Create groups such as: Daily essentials (toothbrush, toothpaste, deodorant) Occasional-use items (face masks, extra razors) First-day box (must-haves for your first night in the new place) This helps you stay organized and prevents digging through boxes later. Check for Hazardous Items Before sealing up your boxes, double-check for any restricted or flammable items like aerosol sprays, nail polish remover, or rubbing alcohol. Movers may not allow these, so plan to transport them separately or safely dispose of them. How to Pack Toiletries for Moving in Six Easy Steps How to pack toiletries for moving doesn’t have to be complicated. With a little planning and the right approach, you can avoid spills, broken items, and first-night frustration. Whether you’re relocating across Los Angeles or just down the street, follow these six simple steps to make packing bathroom items easy and efficient. Plus, you’ll end up with a neat bathroom toiletries list and only the items you truly need. Step 1: Sort and Simplify Before packing, go through your bathroom and declutter. Check cabinets, drawers, and shower storage for old, nearly empty, or unused items. Toss what you don’t need. This helps you lighten your load and focus your bathroom things list on just the essentials. Group everything into categories: Everyday items (toothbrush, shampoo, deodorant) Occasionally used items (face masks, bath oils) First-night must-haves (toilet paper, soap, face wash) This step makes packing more organized and unpacking quicker. Step 2: Gather Your Packing Tools You’ll need a few basic supplies to start packing bathroom items safely: Ziplock or resealable bags (great for liquids and small accessories) Plastic wrap (to seal bottle openings) Small bottles or travel containers (for bulky products you only need a little of) Tape, markers, and labels Small or medium boxes (they’re easier to carry when full) Having these ready keeps the process smooth and prevents last-minute scrambling. Step 3: Leak-Proof All Liquids To avoid messy accidents, prep your liquids properly. Take off the cap, cover the opening with plastic wrap, then screw the lid back on tightly. After that, place each bottle into a zip-top bag. Keep them upright in the box. This step helps prevent leaks that could damage the rest of your stuff—or other boxes during the move. Step 4: Protect Fragile Items Delicate items like glass jars, perfume bottles, or ceramic containers should be padded. Wrap them using bubble wrap, towels, or even thick socks. Pack these in the center of the box with softer items around them for extra cushioning. Be sure to mark these boxes as “Fragile” so they’re handled with care. Step 5: Pack Smart and Label Well Put lighter goods on top of the box and heavier ones at the bottom. Keep similar items together—like all skincare in one spot and all dental care in another. Use clear labels such as “Bathroom – Essentials” or “Bathroom – Occasional Use” to help you find things faster after the move. Step 6: Make a First-Night Essentials Bag Set aside a small bag with your must-have items for the first night in your new home. This might include a toothbrush, toothpaste, face wash, moisturizer, towel, and toilet paper. Having these ready means no digging through boxes when you’re tired from moving. Need help with packing services in Sherman Oaks? Reach out to Chamomile Go your trusted partner for a smooth and stress-free move. How to Pack Makeup for Moving When it comes to packing bathroom items like makeup, it’s important to do so carefully to avoid damage. Here’s a step-by-step guide to ensure your makeup stays intact during the move: Organize by Type Start by sorting your makeup items into categories—powders, creams, and tools. This helps you pack them more efficiently and ensures you keep track of everything on your bathroom things list. Group powders and compacts separately from liquids, gels, and creams, as they each require different packing methods. Use Bubble Wrap or Padded Containers for Fragile Makeup Makeup items such as glass jars, perfume bottles, or high-end compacts are fragile and need extra care. Wrap these items individually in bubble wrap or pack them in padded containers to protect them from breaking or cracking during the move. For extra protection, consider placing these items inside a sturdy box with additional padding around the sides. Store in Temperature-Safe Boxes Makeup products, especially creams and liquids, can be sensitive to extreme temperatures. If you’re moving during hot weather, it’s essential to store your makeup in boxes that protect against heat. Opt for insulated boxes or simply store your makeup in cooler parts of the moving truck to keep them safe from melting or warping. Label the Box as FRAGILE and KEEP UPRIGHT Once everything is packed securely, label the box as FRAGILE and include a note to KEEP UPRIGHT. This ensures movers

How to Pack Dishes for Moving Without Paper | Easy Tips
Moving and Packing Services

How To Pack Dishes For Moving Without Paper

How to pack dishes for moving without paper can feel like a daunting task, especially when you’re dealing with delicate and breakable kitchenware. Traditionally, many people have relied on newspapers to wrap their plates, bowls, and glasses, but this method comes with its own set of challenges like ink stains on your dishes and a considerable amount of paper waste. As more people become conscious of their environmental impact, alternative methods for packing dishes without paper have gained popularity. These eco-friendly solutions not only help reduce waste but can also be just as effective, if not more so, at keeping your fragile items safe. Whether you’re using soft cloths, towels, or even clothing, packing dishes without newspaper is a practical and sustainable way to protect your kitchen essentials during a move. Why Is Proper Dish Packing for Moving Important? When it comes to packing dishes and packing plates to move, taking the time to do it right can save you money, stress, and heartache. Dishes are among the most fragile and frequently damaged items during a move, so careful packing is essential. 1. Preventing Breakage and Damage Because they are fragile, dishes can quickly break, chip, or crack if they are not properly fastened. Using bubble wrap, packing paper, and sturdy boxes when packing plates to move creates a protective barrier that helps absorb shocks and vibrations during transit. 2. Cost and Sentimental Value of Dishes Replacing broken dishes can be expensive—especially if you’re dealing with fine china or specialty sets. Even worse, some items hold sentimental value that can’t be replaced. When dishes are packed properly, they are guaranteed to arrive at your new house safely. 3. Reducing Stress During Unpacking Unpacking dishes that were carefully packed is much easier and less stressful. You avoid the mess of broken items, and your kitchen can be set up more quickly and efficiently. 4. Good Packing vs. Rushed Packing The difference between good and rushed packing is huge. Good packing involves planning, using the right materials, and ensuring items are tightly secured. Rushed packing often means tossing items into boxes with minimal protection, increasing the risk of damage. For packing services in Los Angeles, contact the best, Chamomile Go. Materials You Can Use Instead of Paper While paper is a common choice for packing dishes, there are several reusable and eco-friendly alternatives that can offer just as much—if not more—protection. Here are some smart substitutes: 1. Soft Cloths, Dish Towels, or Tea Towels These are perfect for wrapping individual plates and bowls. They save room by offering padding and being able to be packed with your kitchenware. 2. T-Shirts and Other Soft Clothing Using soft clothing items like cotton T-shirts or leggings is a great way to pack plates to move while reducing the number of boxes needed for clothes. 3. Bubble Wrap (Reusable Option) Though not the most eco-friendly, bubble wrap can be reused multiple times. It’s particularly useful for recipes that are particularly emotive or delicate. 4. Foam Plates or Cardboard Dividers To stop chipping and scratches, sandwich ceramic plates with foam plates. Cardboard dividers work great for keeping glasses or mugs separated in a box. 5. Reusable Silicone or Fabric Wraps Products like beeswax wraps or silicone mats can be molded around dishes for a snug fit, and used again in your new home. How to Pack Dishes for Moving Without Paper If you’re looking for an eco-friendly, efficient approach to packing dishes without paper, you’re in the right place. Using household items like cloths and clothing can protect your dishes just as well while cutting down on waste. Here’s a step-by-step guide: 1. Sort and Prepare Dishes Spend some time doing the following before you begin packaging dishes without paper: Group similar items (e.g., plates with plates, mugs with mugs). To prevent packing broken parts, check each item for any chips or cracks. 2. Wrap Each Dish Securely Instead of using packing paper: Use soft cloths, tea towels, T-shirts, or even socks to wrap each dish separately. For extra protection, double-wrap fragile objects, such as glassware or fine china, with a second layer of fabric or bubble wrap. 3. Layering and Box Setup Use folded towels or a small blanket to create a thick layer of padding at the bottom of the box. Place heavier dishes at the bottom, stacking lighter or more fragile items on top. Use foam plates, cardboard dividers, or rolled-up clothing between layers to prevent movement. 4. Seal and Label Clearly To reduce moving, stuff soft things into any empty spots in the box. Tape the box securely on all seams. To guarantee careful handling, clearly mark the box with “FRAGILE – DISHES” and indicate which side should be facing up. You can also use our moving services in Los Angeles. Four Step Dish Packing Guide Without Newspaper If you’re aiming to move your kitchen items safely and sustainably, this dish-packing guide without newspaper offers a clean and efficient solution. Ditch the ink-stained paper and use what you already have at home to protect your dishes the smart way. Gather Alternative Wrapping Materials Start by collecting soft, reusable items like dish towels, T-shirts, tea towels, or even scarves. These materials cushion your dishes well and can be reused at your new place—saving money and reducing waste. Wrap Each Dish Individually Cover each bowl, cup, and plate with a delicate coating of its own. Tuck the ends in securely, and for delicate items like glass or china, double up with an extra layer of fabric or a bit of bubble wrap if needed. Pack Vertically with Padding and Layers Use folded towels or a small blanket to provide padding along the bottom of the box. Place dishes on their edge (like records) rather than stacking them flat, which helps prevent breakage. To keep things snug, use garments or foam sheets in between layers. Secure and Label the Box Fill in any remaining gaps to stop items from shifting during the move. Once the

How to Pack Plates for Moving | Step-by-Step Guide
Moving and Packing Services

How To Pack Plates For Moving

How to pack plates for moving is one of the most important steps in ensuring a smooth and damage-free relocation. Plates are among the most fragile items in any kitchen, and without proper preparation, they can easily break or chip during transport. Taking the time to pack them correctly not only protects your belongings but also saves time and money by preventing replacements. Improper packing of plates can lead to a range of problems, from minor scratches to complete breakage. Plates that aren’t cushioned well or are loosely placed in boxes may shift during the move, increasing the chance of damage. That’s why understanding the right method for packing plates for moving is crucial. Whether you’re relocating across town or across the country, proper packing for dishes reduces stress and ensures your kitchenware arrives safely at your new home. Materials You’ll Need to Pack Your Plates When it comes to packing plates for a move, it’s all about having the right tools and a little patience. Nobody wants to open a box of shattered dishes, right? Whether you’re packing your fine china or everyday dinnerware, here’s a checklist of everything you’ll need to do it right: What You’ll Need for Packing Dishes: Sturdy Boxes Go for dish pack boxes or heavy-duty moving boxes. They’re built to handle the weight of plates and keep them snug. Cushioning Materials You’ve got options here—pick what works best for your budget and your dishes: Packing Paper (wrap each plate individually) Bubble Wrap (extra protection for fragile items) Foam Sheets (thin but effective) Towels or Soft Cloths (a great eco-friendly alternative) Dividers or Cardboard Inserts These are lifesavers. They keep your plates from bumping into each other during the move. Packing Tape Make sure your boxes are sealed tight. Double-tape the bottoms just in case. Marker for Labeling Label each box: “Dishes – FRAGILE – This Side Up.” Trust us, future-you will be thankful. Pro Tips for Packing Plates: Rather than stacking plates flat, pack them vertically, much like records. It reduces pressure and helps prevent breaks. Fill in any empty spaces in the box with extra paper, towels, or even socks! Don’t overpack. Use more boxes if you need to—your plates (and your back) will thank you. If you want packing services in Los Angeles, then contact no other than Chamomile Go. Step-by-Step How to Pack Plates for Moving Packing up your kitchen? Let’s talk about the best way to pack dishes for moving—especially those fragile plates. Whether you’re moving across town or across the country, following a step-by-step method will help make sure your dishes arrive in one piece. This is your go-to packing plate guide for a stress-free and safe move: Step 1: Prepare the Box Choose a sturdy box—a dish pack box with built-in dividers is ideal. Line the bottom with a thick layer of padding: crumpled packing paper, towels, or foam sheets all work great. This creates a soft base that absorbs shock during the move. Step 2: Wrap Each Plate Individually Wrap each plate completely with bubble wrap or packing paper. Going green? You can also use soft cloths or old t-shirts as a sustainable wrapping option. If needed, secure the wrapping with a little tape to keep it in place. Step 3: Stack Plates Vertically Always stack plates vertically—like you’re filing records in a box. Why? It helps distribute pressure better and reduces the chance of breaking. Add a layer of padding between each plate using paper, foam sheets, or cloth. Step 4: Fill in Gaps Use extra crumpled paper, rags, or bubble wrap to fill in any gaps in the box. This prevents plates from shifting around and getting damaged while in transit. Step 5: Seal and Label the Box The package should be sealed using sturdy packing tape. Clearly label the box with: FRAGILE: Plates This Side Up You can also read about moving services in Los Angeles. How to Pack Dishes for Moving Without Paper Looking for a more sustainable way to move your kitchen? You’re in luck—packing for dishes doesn’t always require piles of packing paper. There are plenty of eco-friendly (and budget-friendly) alternatives that still offer solid protection for your fragile items. The ideal method for packing dishes for moving without using conventional packing material is as follows: Use What You Already Have: Dish Towels – Perfect for wrapping plates, bowls, and mugs. Thick and cushy! T-Shirts – Great for wrapping and layering between dishes. Bonus: you’re packing clothes too! Reusable Cloths – Think microfiber or any soft fabric you’re not afraid to use for cushioning. Newspaper (as a last resort) – Works in a pinch, but be careful: the ink can rub off on your dishes. Why Go Paper-Free? Eco-Friendly – Less waste, more reuse! Cost-Saving – No need to buy extra packing supplies. Multi-Functional – Towels and clothes pull double duty during your move. A Quick Caution: Verify the cleanliness of any materials you use to wrap your dishes. Dirty or colored fabrics can leave marks or even stains on your dishware—especially on white or light-colored pieces. Common Mistakes to Avoid Packing dishes might seem straightforward, but it’s easy to make a few mistakes that could cost you your favorite plates or bowls. Whether you’re moving across town or across the country, here’s what to avoid when packing plates for moving: Stacking Plates Flat Mistake: Placing your plates flat in the box can increase the risk of them breaking due to pressure.   Solution: Stack plates vertically like records. This distributes the pressure more evenly, reducing the chances of damage.   Leaving Space Unfilled Mistake: If your box has gaps between the dishes and the walls, your plates can shift during transport.   Solution: Fill in gaps with extra packing material—crumpled paper, towels, or bubble wrap work great. This keeps your plates secure and prevents movement that could lead to breakage.   Using Weak Boxes Mistake: Weak or flimsy boxes can give way under the weight of your plates, increasing

How to Move with Plants Without Stress or Damage
Moving and Packing Services

How To Move With Plants

How to move with plants can be a surprisingly tricky task, especially for those who consider their greenery part of the family. Plants are sensitive to changes in environment, temperature, and handling, which can make the process of moving with plants stressful for both the plants and their owners. Without proper care, a sudden move can lead to damaged leaves, broken pots, or even the loss of a beloved plant. For this reason, preparation is necessary to guarantee a seamless transition. From understanding the best ways to pack your plants to knowing how to care for them before, during, and after the move, this guide will walk you through each step of moving a plant successfully. Whether you’re relocating across town or across the country, we’ve got tips to help your leafy companions thrive in their new home. How to Care for Plants While Moving It can be challenging to relocate a plant, particularly if you want to maintain its health and well-being. Here’s how to move plants without killing them: 1. Protect Plants from Extreme Temperatures Plants are sensitive to cold, heat, and sudden changes in climate. Whether you’re moving across town or across the country, avoid leaving them in hot cars or exposing them to freezing air. Transport them in a temperature-controlled setting if at all possible. 2. Use Breathable Containers Plastic bags or sealed containers can suffocate your plants. Instead, use breathable materials like paper or fabric wraps, or leave them in their pots with good airflow. 3. Secure with the Right Packing Materials To preserve your plants’ fragile leaves and branches, cushion them with newspaper or bubble wrap. Pots should be placed in strong boxes with ventilation holes; fill in any spaces to keep the pots from moving. 4. Label and Secure to Avoid Tipping Clearly label boxes as “Live Plants” and “This Side Up.” Secure each pot so it doesn’t tip during the move use towels or packing paper to keep them steady. With a little prep, moving plants without killing them is totally doable. Just treat them like fragile passengers, and they’ll adjust to their new space in no time. You can also read about packing services in Los Angeles. How to Move with Plants in a Car If you’re moving with plants, keeping them happy and healthy during the car ride is all about planning and care. Here’s how to do it right: 1. Maintain Ideal Car Temperature and Airflow Plants don’t love extremes. Keep your car at a moderate, consistent temperature, ideally between 60–75°F (15–24°C). Crack a window slightly for airflow, but avoid direct cold or hot drafts blowing on them. 2. Avoid the Trunk—Place Plants Inside the Cabin Never put your plants in the trunk! They need light, air, and a stable temperature. Place them upright on the floor behind the seats or use a seatbelt to gently secure larger pots on the seat. 3. Use Boxes or Plant Carriers for Stability To avoid tipping, group smaller plants in open boxes or sturdy plant carriers. Line the bottoms with towels or newspaper to cushion the ride and prevent soil spills. 4. During lengthy drives, check on your plants. If you’re going on a road trip, plan to check on your plants during breaks. Make sure they’re still upright, not overheating, and not getting too much sun through the windows. With a little care and attention, moving with plants in your car can be smooth and stress-free for both you and your green companions! How Do You Transport Large Potted Plants? When it comes to moving plants without killing them, large potted ones can be the most challenging. Their size, weight, and fragility require special care. Here’s how to safely transport plants that are big, beautiful, and a bit bulky: 1. Choose the Right Equipment Use dollies or plant caddies to roll heavy pots, especially if you’re moving them across long distances or rough surfaces. Straps and moving blankets will help secure the pot and cushion it from bumps during the move. 2. Keep the Pot Safe and Secure the Soil Before moving, cover the top of the soil with plastic wrap or a breathable fabric to prevent spills. Wrap ceramic or clay pots in blankets or bubble wrap to avoid cracking during transport. 3. Carefully Maneuver Through Tight Spaces Moving large plants through doorways or hallways can be tricky. Measure door widths ahead of time, and tilt the plant gently when needed, being mindful of low-hanging branches or vines. Having a second person guide from the other side can help prevent damage. 4. Trim or Partially Repot if Necessary If your plant is especially large or unwieldy, consider trimming back excessive growth or even partially repotting it into a lighter container just for the move. This reduces weight and makes it easier to manage. Whether you’re shifting a tall fiddle-leaf fig or a decades-old monstera, a bit of prep goes a long way. With the right approach, you can transport plants safely while moving plants without killing them. For moving services in Los Angeles contact no other than Chamomile Go. How Will a New State Affect Your Plants? When you’re moving to a new state, it’s not just you adjusting; your plants are, too. Different climates, air quality, and light conditions can all affect how well they adapt. Here are some tips to assist them in settling in: 1. Adjusting to New Climate, Humidity, and Light Every state has its own vibe hot and dry, cool and damp, bright and sunny, or somewhere in between. These changes can impact your plant’s ability to absorb water and light. For example, succulents may thrive in dry climates but rot in high humidity, while tropical plants might struggle with low moisture levels in the air. Observe your plants closely and consider using humidifiers, shade cloths, or grow lights to help mimic their previous environment. 2. Quarantine Period to Monitor for Stress or Pests After the move, isolate your plants for 7–10 days in

Where to Get Free Boxes for Moving Without Spending
Moving and Packing Services

Where To Get Free Boxes For Moving

Where to get free boxes for moving is one of the first things people wonder when planning a move. Boxes are an essential part of the moving process they keep your belongings organized, safe, and make transportation easier. However, buying brand-new boxes can add up quickly, both in cost and environmental impact. That’s why finding free moving boxes is a smart way to cut down expenses and reduce waste. In this guide, we’ll not only show you where to get free boxes for moving, but also help you figure out how many you might need, compare the cost of purchasing new boxes, and reveal 20 places where you can score free boxes easily. How Many Moving Boxes Do I Need? Planning a move can feel overwhelming, and one of the most common questions is: how many moving boxes do I need? The answer depends on several factors, including the size of your home, the number of people living there, and how much stuff you’ve accumulated. Let’s break it down. Factors That Affect the Number of Boxes You Need Before diving into general estimates, consider these factors: Home size and layout: Larger homes typically mean more belongings. Lifestyle: Minimalists may need fewer boxes; collectors or hobbyists may need more. Length of stay: If you’ve lived in one place for many years, chances are you’ve gathered more items. Room usage: A home office, large kitchen, or gear-packed garage adds to the box count. General Guidelines for Box Estimates While every move is unique, here’s a rough idea based on home size: Studio Apartment: ~10–20 boxes 1-Bedroom Apartment: ~20–30 boxes 2-Bedroom Apartment or Small House: ~35–50 boxes 3-Bedroom Home: ~50–75 boxes 4+ Bedroom Home: 75+ boxes (and likely some specialty boxes too) Remember, these numbers include small, medium, and large boxes. Tips for Estimating Based on Item Types To get a more accurate count, think about specific categories: Clothing: Use wardrobe boxes or medium-sized boxes. Each adult’s closet typically needs 3–5 boxes. Books: These are heavy, so stick to small boxes. One shelf of books might fill one small box. Kitchenware: Medium and small boxes are best for dishes, glassware, and utensils. Plan for at least 5–10 boxes just for the kitchen. Decor & Miscellaneous: Art, picture frames, vases, and knick-knacks can easily add 5–10 boxes. Where to Get Free Boxes for Moving Looking to save money? You might be wondering where to get boxes free. Fortunately, there are several options for finding free boxes for moving: Local stores: Check grocery stores, liquor shops, and bookstores—they often give away boxes. Online marketplaces: Browse Craigslist, Facebook Marketplace, and Freecycle. Workplace or schools: Office supply shipments come in sturdy boxes—just ask! Friends and neighbors: Put out a call on social media; many people are happy to give away their used moving boxes. How Much Do Cardboard Boxes Cost? When you’re preparing for a move, one of the first things you’ll need is a pile of boxes to pack up your belongings. But how much do cardboard boxes actually cost? Here’s a breakdown of what you can expect to pay for new boxes and some tips on saving money by finding free boxes for moving. Price Ranges for New Boxes by Size The cost of moving boxes can vary depending on the size and type of box you need. Here’s a general price range for each: Small Boxes: $1–$2 Great for books, small kitchen appliances, or other heavy items. Medium Boxes: $2–$3 Perfect for clothes, kitchenware, and small electronics. Large Boxes: $3–$4 Ideal for bedding, pillows, or large but light items like comforters and lamps. Specialty Boxes: $5+ These include wardrobe boxes for clothes, dish boxes with dividers, and mirror or TV boxes. Specialty boxes tend to be sturdier and designed for specific items, but they can be significantly more expensive. The Costs Can Add Up Quickly While it might seem manageable at first, the costs of new moving boxes can add up fast. For example, a 2-bedroom apartment could need 30–40 boxes, and if you’re buying all of them new, you’re looking at a total cost of $90–$160, or even more if you have large or specialty items to pack. In addition, you’ll likely need to purchase packing tape, bubble wrap, and other supplies, which can further increase the total moving cost. So, the expenses can really add up quickly, especially if you’re moving a larger household. You can also read about moving services in Los Angeles. 20 Places to Get Free Moving Boxes Affordable Professional Packing Services Finding free boxes for moving doesn’t have to be a stressful task. You can save a significant amount of money and still get sturdy, reliable boxes by checking out these 20 options, organized into categories for convenience. Online Sources If you prefer the convenience of searching from home, there are plenty of online platforms where you can get free boxes for moving: Facebook MarketplacePeople often give away their used moving boxes on Facebook Marketplace. You can search for “free boxes” or check local listings for moving materials. Nextdoor AppThis neighborhood-focused app lets you connect with people nearby. Post a request for where to get boxes free, or check out local listings from others who are offering boxes. Craigslist (Free Section)In the “Free” section of Craigslist, you can find moving boxes that locals are giving away. Just make sure to act fast since these go quickly! OfferUpSimilar to Facebook Marketplace, OfferUp allows people to list free or low-cost moving boxes. Search within your area and message sellers to arrange pick-up. Freecycle NetworkThe Freecycle Network is a great place to find free boxes for moving. Members often post boxes or other packing materials they no longer need. Local Community or Businesses If you’re looking for where to get boxes free locally, these businesses and locations can be perfect places to ask for used boxes: Grocery Stores (Produce or Dry Goods Section)Check with the manager of your local grocery store. They typically get shipments in sturdy boxes that are

What Do Movers Do? A Complete Guide to Moving Services
Moving and Packing Services

What Do Movers Do? A Complete Guide

What do movers do when you’re facing the chaos of packing, lifting, and transporting your life from one place to another? Moving is more than just putting items in boxes and loading a truck it’s a complex, often stressful process that requires planning, physical effort, and time. That’s why many people turn to professional movers to take the weight off their shoulders literally and figuratively. Whether it’s a short move across town or a long-distance relocation, movers provide essential services that make transitions smoother and more manageable. But what exactly do they handle, and how can they help make your move less overwhelming? Let’s dive into what movers actually do and why their expertise matters. What Do Movers Do? If you’ve ever asked yourself what does a mover do?, the answer might be more comprehensive than you think. Movers are professionals who specialize in helping individuals and businesses relocate, handling everything from packing up belongings to safely transporting them to a new location. The goal of moving services is to make the transition smoother, faster, and less stressful for clients. Core Responsibilities of Movers: Packing belongings: Movers are trained to carefully wrap and pack household or office items to prevent damage during transit. Loading and unloading: They handle the heavy lifting, ensuring your items are safely loaded onto the moving truck and unloaded at your destination. Transporting items: Using properly equipped moving vehicles, movers transport your belongings across town or across the country. Providing moving supplies: Many movers supply boxes, packing tape, padding, and other essentials to make packing more efficient. Furniture disassembly/reassembly: Large furniture pieces may need to be taken apart for transport and reassembled at the new location. Unpacking: Some movers even help with unpacking, placing items where they belong in your new space. Storage services (optional): If your new space isn’t ready, many moving companies offer temporary or long-term storage solutions. Types of Movers: Local vs. Long-Distance Movers: Local movers handle shorter relocations within a city or region, while long-distance movers manage state-to-state or cross-country moves. Residential vs. Commercial Movers: Residential movers specialize in home moves, whereas commercial movers focus on relocating businesses, offices, or warehouses. For those looking for movers that do everything, many full-service moving companies offer end-to-end solutions, taking care of every aspect of the move so you don’t have to lift a finger. Benefits of Hiring Professional Movers When planning a move, one of the smartest decisions you can make is hiring professional movers. Whether you’re moving across town or across the country, working with movers full service like Chamomile Go can make a world of difference in how smoothly the process goes. Why Choose Full Moving Services? Here are some of the top benefits of going with full moving services in Los Angeles offered by Chamomile Go: Stress Reduction & Time-Saving: Chamomile Go handles the entire moving process, allowing you to focus on getting comfortable in your new space. From packing to transport, everything is taken care of with precision. Safety and Protection of Belongings: Our experienced team knows how to safely manage fragile, heavy, or valuable items, reducing the risk of any damage during the move. Efficiency and Experience: At Chamomile Go, our trained crews work quickly and efficiently using proven techniques to make your move as seamless as possible. Access to Proper Equipment: We come fully equipped with dollies, ramps, padding, and custom packing materials to ensure your belongings are moved with care. Insurance and Liability Coverage: Chamomile Go offers comprehensive coverage options to give you peace of mind throughout your move. Optional Add-On Services: As movers full service, we provide extra conveniences like professional packing, unpacking, storage solutions, and even furniture assembly/disassembly. If you’re looking for reliable and professional full moving services, Chamomile Go is here to handle every detail and make your move a stress-free experience from start to finish. How Much Will Full Moving Service Cost? If you’re considering hiring movers full service, one of the first questions that probably comes to mind is: how much will it cost? The price of full moving services can vary widely depending on several key factors. Factors That Affect Moving Costs: Distance of the Move: Local moves (typically under 100 miles) are usually charged by the hour, while long-distance moves are priced based on mileage and weight. Volume/Weight of Items: The more belongings you have, the more time, labor, and truck space are required directly impacting your final cost. Services Selected: Choosing add-ons like packing, storage, or furniture assembly will increase the total cost of full moving services. Time of Year and Demand: Peak moving seasons (like summer months) tend to have higher rates due to increased demand. Typical Cost Ranges: Local Moves: For short-distance moves, you can expect to pay anywhere from $500 to $2,000, depending on the size of your home and services selected. Long-Distance Moves: Cross-country or out-of-state moves usually range from $2,000 to $7,500 or more, depending on the total distance, weight, and service level. Tips for Getting Accurate Quotes: In-Home Estimates: Having a moving specialist assess your belongings in person is one of the most accurate ways to receive a realistic quote. Online Moving Calculators: Many movers full service offer online tools to help you estimate the cost of your move based on your location, size of home, and services needed. When evaluating pricing for full moving services, it’s essential to get multiple quotes, ask for detailed breakdowns, and clarify what’s included to avoid unexpected fees. A transparent, reputable company like Chamomile Go will always provide clear pricing and flexible options to fit your needs and budget. How Much Time Will a Full Service Move Take? One of the biggest advantages of a full service move is the convenience but how long does the entire process actually take? The timeline can vary depending on several factors, but with the right planning, a professional moving team like Chamomile Go can help streamline the entire experience. Factors That Influence the Time Needed: Size of the Home:

Our Client's Reviews

Get In Touch With Us!

Find Us

Office Address

    Los Angeles, California

Office Phone

    +1 310-895-3517

Email Address

  Chamomilemoving@gmail.com

Let’s get you moving! Grab your FREE quote now.

Chamomile Go offers premier moving services throughout Los Angeles County, CA, ensuring a hassle-free relocation experience for all our clients.

+1 310-895-3517

24/7 Support

© 2025 Created by LocalPro1