Get a Free Quote

Edit Template

Author name: 2m54a

How Long Does It Take to Move? Time Guide by Home Size
Moving and Packing Services

How Long Does It Take To Move

How long does it take to move? That’s a common question with more than one answer. The moving time depends on a mix of factors like the size of your home, distance to the new location, how prepared you are, and whether you’re hiring professional movers or doing it yourself. Each situation is different, and so is the moving duration. In this guide, we’ll break down how long moving takes based on home size—from studio apartments to large houses. You’ll also see side-by-side comparisons between DIY moves and hiring moving companies, so you can plan your time and energy wisely. Whether you’re just curious or need to schedule your moving hours accurately, this article covers all the must-know details to help you move smoothly and on time. What Affects the Time It Takes to Move? When planning a move, one of the most common questions people ask is, “How long will the move take?” The truth is, moving time can vary greatly depending on several key factors. Whether you’re planning a local move in Los Angeles or a long-distance relocation, understanding what influences your moving hours can help you prepare better and avoid surprises on moving day. 1. Size of the Home or Apartment The bigger the home, the more time it usually takes to move. A studio apartment might take just 2–4 moving hours, while a 4-bedroom house can take 8+ hours or more. More rooms mean more furniture, boxes, and items to load and unload. 2. Distance of the Move (Local vs. Long-Distance) Local moves generally take less time, especially if you’re moving within the same city like Pasadena, Sherman Oaks, or Beverly Hills. However, long-distance moves involve more logistics, travel time, and sometimes overnight stays, which can increase overall moving time by a day or more. 3. Number of Movers The number of movers handling your relocation plays a big role in determining total moving hours. For example, two movers might need 6 hours for a job, while four movers could complete the same move in 3–4 hours. More hands mean faster loading, unloading, and setup. 4. Packing Status (Packed vs. Unpacked) If everything is packed and ready to go, your move will move much faster. However, if boxes aren’t sealed, items are still in drawers, or fragile belongings need extra care, expect longer moving time. Being fully packed in advance is one of the best ways to save time on moving day. 5. Accessibility (Stairs, Elevators, and Parking) Easy access can make a big difference. If movers have to walk long distances, climb stairs, wait for elevators, or deal with tight parking situations, it adds more time. Inform your movers ahead of time about the layout of your location so they can plan efficiently and keep moving hours under control. 6. Weather and Traffic Conditions Unpredictable weather and Los Angeles traffic are two major wild cards. Rain, extreme heat, or heavy traffic during rush hour can all slow things down. Movers work cautiously during bad weather to protect your belongings, and road delays can increase your total moving time unexpectedly. Need Fast and Reliable Help with Your Move? If you’re looking for trustworthy, time-efficient moving services in Sherman Oaks, Chamomile Go is here to help. We offer professional local and long-distance moving tailored to your schedule. Whether you’re moving a small apartment or a large home, our experienced team ensures your move is done right—and right on time. Book your move today with Chamomile Go and let us make your move smooth, simple, and stress-free. How Long Do Movers Take? One of the biggest concerns during a move is understanding how long the entire process will take. If you’re planning a move within Los Angeles or nearby areas like Sherman Oaks, Pasadena, or Culver City, it’s helpful to know the average duration professional movers need—and what factors influence that time. Let’s break it down clearly so you know what to expect on moving day. Average Duration Professional Movers Need Depending on the size of the move, movers typically take the following amount of time: Studio/1-bedroom apartment: 2–4 hours 2-bedroom home: 4–6 hours 3-bedroom home: 6–8 hours Larger homes (4+ bedrooms): 8+ hours or even a full day These are estimates and assume normal conditions. Every move is unique, so your actual moving hours may vary. How Experience and Number of Movers Impact Time The experience level of the movers plays a huge role. Skilled, trained movers work faster, pack more efficiently, and avoid common slowdowns.Also, the number of movers assigned to your move affects the overall moving time: 2 movers = longer duration 3–4 movers = faster and smoother move Hiring more experienced professionals usually means a shorter, more efficient moving process—even if the job seems complex. Benefits of Hiring Professional Movers When you hire professional movers, you’re not just paying for muscle—you’re investing in efficiency, speed, and expert planning. Here’s what that includes: Strategic loading and unloading to minimize wasted time Safe handling of fragile and heavy items Optimized use of truck space (fewer trips = less time) Less stress for you = more energy for unpacking and settling in With pros, your moving time is more predictable and usually shorter than if you handled it solo. Common Delays Movers May Face Even with the best planning, some factors can slow down the move: Traffic delays in busy areas like Los Angeles or Santa Monica Weather conditions (rain, heatwaves, or wind) Packing not being finished when movers arrive Limited access to the property (tight hallways, no elevator, distant parking) Last-minute changes in the move plan Understanding these potential delays helps you better prepare and reduce your actual moving hours. You may read about How Much Do Movers Cost For A One Bedroom Apartment. Moving a Small/Studio Apartment When it comes to moving a small or studio apartment, many assume the process will be quick and simple—and it often is. But the actual moving time still depends on how prepared you are, how many movers

How Much Money Should I Save Before Moving Out 2025?
Moving and Packing Services

How Much Money Should I Save Before Moving Out

How much money should I save before moving out is one of the most important questions to ask before taking the next step toward independence. Whether you’re relocating across town or planning a long-distance move, having a clear moving out budget can save you from unexpected financial stress. Most experts recommend saving at least $3,000 to $8,000, depending on your lifestyle, income, and location.  This should cover your rent, deposits, utilities, groceries, and some emergency funds. If you’re calculating the cost of moving out of state, factor in travel expenses, moving company fees, and setup costs in your new city. Budgeting ahead not only gives you peace of mind but also helps you settle into your new home comfortably. Start saving early, track your expenses, and adjust your goals based on your needs. Moving Out? Calculate Your Savings Goal & Make it Happen Moving out is a big step—whether it’s your first time or your fifth. But one of the smartest things you can do before the move is calculate your savings goal and plan ahead. Setting a clear budget not only helps you stay on track but also gives you peace of mind. Here’s how you can avoid unnecessary stress and start saving money before moving. Why Saving Ahead Matters Avoid financial stress after the move Too often, people focus only on the move itself and forget about the after-costs. Without a solid financial plan, you might find yourself stuck right after settling in. Saving ahead can prevent that. Create a buffer for surprise expenses Unplanned things happen—damage deposits, extra boxes, or needing a handyman. Having extra funds saved up gives you breathing room to handle unexpected expenses with ease. Helps with a smoother transition Whether you’re relocating across town or out of state, transitions are easier when money isn’t a constant worry. A savings goal means fewer surprises and more control. Set a Moving Budget (Based on Real Needs) When thinking about moving out price, your budget should reflect your actual situation. Here’s how to break it down: Local move vs. long-distance move A short move within Los Angeles or nearby areas (like Pasadena or Santa Clarita) will cost less than a long-distance relocation. Factor in gas, time, and moving help. DIY move vs. hiring movers Will you pack and lift everything yourself or hire professionals? Using a moving company or packing services can raise the initial cost, but it saves you energy and time—especially for fragile or bulky items. One-time vs. ongoing monthly costs Don’t just think about the day you move. Consider monthly rent, utilities, internet, and parking. Include these in your total moving out price projection. Common Costs to Plan For No matter where you’re going, these are some of the most common moving expenses you’ll need to budget for: Security deposit and rent (first + last month) Most landlords ask for both up front. This is one of the biggest expenses when moving out, especially in high-demand areas like Beverly Hills or Culver City. Utility setup fees (water, gas, electric, internet) Switching or starting new utility services often comes with one-time activation or installation fees. Don’t forget to include deposits or transfer charges. Furniture and appliances If this is your first time moving out, you’ll likely need basics like a bed, couch, or refrigerator. Even secondhand items can add up quickly. Moving company or truck rental Whether you go with local movers, a full-service logistics company, or rent a truck, these costs vary widely. Always get a few quotes and compare. Factor in extras like fuel, insurance, or equipment rental. For moving services in Sherman Oaks contact no other than Chamomile Go. Assessing Your Current Financial Situation Before you set your moving out budget, it’s important to get a clear picture of your current financial standing. Knowing how much you earn, spend, owe, and save will help you prepare for the true cost of moving out of state or even just across town. Let’s walk through the steps. Evaluate Your Income Sources Start by looking at how much money you bring in each month. This isn’t just your 9-to-5 job—include: Full-time or part-time job income Side hustles like food delivery, tutoring, or selling items online Freelance work, especially if you work in the gig economy Parental or family support, if it applies to your situation Knowing your total income helps you figure out what portion you can set aside for your moving out budget. Check Your Monthly Expenses Take a good look at where your money goes each month. Tracking your spending helps identify areas where you can cut back to start saving money before moving. Common expenses include: Subscriptions (Netflix, Spotify, etc.) Phone bills and data plans Groceries and dining out Gas, car insurance, and public transportation Shopping or miscellaneous spending Cutting even a few small costs can give your savings plan a major boost. Review Your Debt or Financial Obligations Debt impacts your budget—especially when planning for the cost of moving out of state. Make sure to factor in these obligations when estimating what you can afford: Credit card payments and interest Student loan repayments Car loans or lease payments Buy-now-pay-later services or other personal loans Paying down small debts before your move can reduce stress and monthly pressure in your new place. Determine Your Emergency Fund Status An emergency fund is your safety net. It helps cover unexpected costs, like car repairs, medical bills, or delays in income after you move. Financial experts recommend having at least 3–6 months of living expenses saved—especially if you’re planning a long-distance move. If you’re calculating your moving out budget, this fund shouldn’t be touched for move-related expenses. It’s your backup, not your plan A. You may read about How To Move From State To State? How Much Money Should I Save Before Moving Out? Planning your moving out budget starts with knowing how much you need to save. This depends on your location, lifestyle, and job situation. Whether you’re moving to Los Angeles,

How to Pack Paintings for Moving Step by Step Guide
Moving and Packing Services

How To Pack Paintings For Moving

How to pack paintings for moving is an important process to protect your artwork during a relocation. Whether you’re a homeowner or an art collector, paintings are delicate and can easily be damaged if not handled correctly. Scratches, broken frames, smudges, and tears are common issues when packing paintings for moving without proper care.  Using the right materials—like glassine paper, bubble wrap, and picture boxes—is key to keeping your art safe. Packing art for moving requires a thoughtful approach, not just placing it in any box. This guide is designed to help anyone moving with artwork, from casual collectors to gallery owners. We’ll walk you through the best practices step by step. Protecting your investment starts with how you pack it. Equipment and Tools Required for Packing of Paintings When it comes to packing paintings, using the right tools and materials is essential to protect them from scratches, dents, and moisture during transport. Whether you’re handling framed art or canvas, this guide outlines the necessary packing supplies, protective materials, and tools for fragile items used in the moving and logistics industry. Essential Packing Supplies   Glassine Paper or Wax Paper Prevents the painted surface from sticking or smudging. Ideal as the first layer of protection. Acid-Free Paper Used for wrapping artwork to avoid long-term damage such as yellowing or chemical reactions. Bubble Wrap Provides cushioning and absorbs shock. Wrap over protective paper, not directly on the painting. Painter’s Tape Secures wrapping materials without leaving residue or damaging the frame. Cardboard Sheets Adds a rigid protective barrier to prevent bending or impact. Packing Tape and Stretch Wrap Keeps layers sealed and offers added moisture resistance during moving. Corner Protectors Shields frame edges from damage, especially useful for glass-covered artwork. Mirror or Picture Boxes / Custom Crates Designed to hold flat, fragile items like paintings securely. Custom crates are preferred for high-value or oversized art. Optional Packing Tools Measuring Tape Ensures accurate box sizing and fitting of materials. Labeling Tools Markers or labels help identify fragile contents and proper orientation. Foam Boards or Padding Used inside boxes for extra cushioning or to separate multiple artworks. Gloves Prevents oils or dirt from transferring to the artwork or frame during handling. Best Ways of How to Pack Paintings for Moving When it comes to moving fragile items like paintings and canvas art, proper packing techniques are essential. Artwork is delicate, valuable, and easily damaged by moisture, impact, or movement during transport. Whether you’re moving locally or long-distance, knowing how to pack paintings for moving can help protect your cherished pieces from harm. At Chamomile Go, we specialize in careful handling of fragile items through our expert packing services in Sherman Oaks and nearby areas. This guide will show you the safest step-by-step methods for packing art for moving, including framed and unframed paintings. Step-by-Step Guide: Packing Paintings for Moving 1. Clean and Inspect the Painting Before you begin packing pictures for moving, lightly dust the surface using a soft brush or cloth. Inspect the painting for any existing damage. It’s important to note any issues beforehand, especially for insurance purposes. 2. Apply Glassine Paper or Acid-Free Tissue Cover the artwork surface with a protective layer like glassine paper or acid-free tissue. These materials shield your artwork from moisture, dust, and abrasion, which is critical when packing canvas art for moving. 3. Use Bubble Wrap for Cushioning After covering with protective paper, wrap the entire painting in bubble wrap. This adds a cushioning layer to absorb shocks. For extra safety, double-wrap the edges and corners, which are usually the most vulnerable points. 4. Secure Corners with Corner Protectors Use foam or cardboard corner protectors to safeguard the edges. These help prevent frame damage and provide more structure, especially important when packing paintings for moving in high-risk environments. 5. Sandwich Between Foam Boards or Cardboard To keep the painting flat and minimize movement, place it between two sturdy foam boards or cardboard sheets. Tape the boards together gently without pressing against the artwork. 6. Place in a Picture Box or Custom Crate Slide the protected painting into a picture box or wooden crate designed for framed art. Use packing paper or soft filler around the edges to prevent shifting inside the box. This is one of the most effective techniques when packing art for moving safely. 7. Seal and Label the Box as “FRAGILE – ARTWORK” Use strong packing tape to seal the box tightly. Clearly label all sides with “FRAGILE – ARTWORK” and indicate the upright position. Also include handling instructions like “Do Not Stack” or “Keep Dry” for extra awareness. Tips to Prevent Moisture, Impact, and Movement Avoid plastic wrap directly on artwork—it can trap moisture. Don’t pack paintings with regular household items. Always keep them separate. Use silica gel packets inside the box to reduce humidity. Store upright and avoid stacking heavy items on top. Handle with two hands and avoid placing pressure on the canvas or frame. Importance of Labeling and Handling Instructions Labeling is one of the most overlooked but crucial steps in packing pictures for moving. Movers or even family members need to know that the box contains fragile artwork. A simple label like “Handle with Care” can reduce the chances of accidental drops or mishandling during the move. Let Chamomile Go Handle Your Artwork with Care If you’re unsure about packing canvas art for moving, leave it to the professionals. At Chamomile Go, we provide expert packing services in Sherman Oaks designed to protect even your most delicate artwork. Our team uses industry-approved materials and techniques to ensure every piece of art arrives safely at your new location. Whether you’re a homeowner, artist, or collector, we’re here to take the stress out of moving your fragile items. Trust Chamomile Go to pack your paintings like pros. How to Pack Canvas Paintings for Moving Packing canvas art for moving requires special care due to the delicate surface and frame. Whether you’re relocating your home or gallery collection, it’s important

How to Pack Pictures for Moving – Easy DIY Guide
Moving and Packing Services

How To Pack Pictures For Moving

How to pack pictures for moving the right way can make all the difference between preserving your memories and facing heartbreak. Whether you’re relocating across Sherman Oaks or just a few blocks away, properly packing photo frames and artwork is a must to avoid scratches, cracks, or shattered glass. Pictures and framed art often hold deep emotional value, and many pieces may also carry financial worth—so protecting them should be a top priority. In this guide, you’ll learn how to safely pack pictures for moving using simple, proven steps. We’ll cover must-have supplies, the most common risks to watch for, and expert-approved methods to ensure your framed photos and wall art arrive in perfect condition. Items You’ll Need to Pack Your Photos for Relocation Packing picture frames safely requires the right materials. Whether you’re moving across Los Angeles or nearby areas like Pasadena or Irvine, using these essential supplies can help protect your artwork and photos during transit. 1. Sturdy Picture Boxes When relocating, use picture boxes that are specifically made to safeguard mirrors, framed artwork, and photographs. They’re adjustable and more durable than standard boxes, offering extra protection. 2. Bubble Wrap or Foam Sheets Wrap each frame with bubble wrap or foam sheets to cushion against shocks. Cover the entire surface, especially the corners and glass areas. 3. Packing Paper or Soft Cloth Before applying bubble wrap, cover the frame with packing paper or a fresh, gentle cloth. Avoid newspaper as it may leave stains. 4. Corner Protectors Use cardboard corners or plastic corner protectors to shield the frame edges from pressure and impact. 5. High-Quality Packing Tape Seal boxes securely with strong packing tape. Strengthen every seam, particularly the box’s bottom. 6. Labels and Orientation Arrows Use orientation arrows and flimsy labels to clearly identify each box. This notifies movers to handle boxes carefully and maintain their upright position. 7. Painter’s Tape Apply painter’s tape in an “X” on the glass to help hold it together if it breaks during the move. It leaves no residue and is simple to remove. Using these tools will make packing picture frames safer and more efficient. For professional help with packing and moving, contact Chamomile Go—your trusted moving service in Sherman Oaks and beyond. Five Typical Dangers of Moving Framed Pictures and Art When you pack pictures for moving, your goal is to protect them from damage in transit. Framed art and photos are delicate and can be easily ruined if not handled correctly. Below are five common risks—and simple ways to prevent them. 1. Glass Breakage During Transport Risk: The glass covering a photo or artwork can shatter due to vibration or pressure during the move. Prevention: Use painter’s tape in an “X” pattern on the glass to hold shards if it breaks. Place the frame inside a strong picture box after wrapping it in bubble wrap. Put “This Side Up” and “Fragile” labels on the box. 2. Frame Cracks or Corner Damage Risk: Frames, especially wood ones, can crack or their corners may chip during handling. Prevention: Use corner protectors or folded cardboard corners. Wrap the frame securely with foam sheets or packing paper, then reinforce the box with strong packing tape. 3. Moisture and Humidity Exposure Risk: Water damage can ruin photos, canvases, or frames, especially during long-distance moves or in damp weather. Prevention: Seal each item in a plastic cover or waterproof wrap before boxing. Avoid storing boxes in basements or areas prone to moisture. Use climate-controlled trucks if possible. 4. Scratches on Canvas or Photo Surface Risk: Surfaces can get scratched by friction with other materials or rough handling. Prevention: Wrap the artwork in acid-free packing paper or a clean, soft cloth before using bubble wrap. Avoid using newspaper or dirty fabrics. For canvas, avoid direct contact with bubble wrap. 5. Losing Original Artwork or Photo in Transit Risk: Items can get misplaced, especially small or thin frames. Prevention: Label each box clearly and create a checklist of packed artwork. When moving, choose picture boxes that are the proper size for the objects. Keep extremely valuable items with you during the move, if possible. You may read about How To Pack Toiletries For Moving. How to Pack Pictures for Moving: 6 Easy Steps Whether you’re relocating across Los Angeles or nearby areas like Sherman Oaks or Santa Clarita, properly packing photo frames can prevent damage to your framed memories. Follow these six easy steps using the right supplies to keep your artwork safe during the move. 1. Clean and Prepare Your Pictures Before you begin packing picture frames, use a microfiber cloth to remove dust and debris. Detach any loose items such as hanging wires or hooks to avoid scratches or pressure points during transport. 2. Apply Corner Protectors Use foam or cardboard corner protectors to shield the edges of your frames. This step reduces the risk of dents or cracks when placing items into picture boxes for moving. 3. Wrap Pictures Safely Start by wrapping each frame in packing paper to prevent surface damage. Then, layer it with bubble wrap for added cushioning. Make sure all corners and edges are covered properly. 4. Secure the Glass (If Any) If your frame has glass, apply painter’s tape in an “X” shape across the glass. This helps minimize shatter risk by keeping broken pieces together if the glass cracks. 5. Box Them Properly Place the wrapped frames upright in sturdy picture boxes. Fill gaps with packing paper or soft cloths to keep items from shifting. Avoid laying frames flat unless absolutely necessary, as upright positioning maintains box orientation and minimizes pressure damage. 6. Label & Seal the Box Use high-quality packing tape to seal the box tightly. Then, label it with “FRAGILE,” include orientation arrows, and write down the contents. Proper labeling makes unpacking easier and alerts movers to handle with care. Need help with packing photo frames or artwork? Chamomile Go offers expert packing services in Sherman Oaks. We use proper layering, taping, cushioning, securing,

How to Pack a Moving Truck for Maximum Space
Moving and Packing Services

How To Pack A Moving Truck

How to pack a moving truck the right way can save you time, protect your belongings, and make your move much smoother. Packing a moving truck isn’t just about putting boxes inside—it’s about loading smartly to prevent damage and maximize space. With the right techniques, you can avoid common mistakes that lead to broken items or wasted time. In this guide, you’ll learn how to load items in the right order, secure everything safely, and make the most of your truck’s space. Whether it’s a short or long-distance move, proper planning is key. We’ll also cover how long it typically takes and tips for packing different truck sizes. Let’s get started on packing your moving truck like a pro. What Do You Put in a Moving Truck First? When it comes to loading a moving truck, the order in which you pack items is more important than you might think. A well-packed truck ensures balance, protection of your belongings, and smoother unloading at your new location. Whether you’re doing a DIY move or hiring professionals, understanding the correct loading order can save time, money, and stress. Why the Loading Order Matters Proper loading of a moving truck ensures the safety of your possessions while in transportation. It also makes unloading easier and prevents shifting, which can cause damage. The goal is to distribute weight evenly, avoid crushed items, and keep fragile belongings protected. Start with the Heaviest Items First The golden rule of packing a truck is to begin with the heaviest and bulkiest items. Place these against the wall closest to the cab (front) of the truck: Appliances: Load your refrigerator, washer, dryer, and dishwasher first. These items are heavy and need a solid, stable base. Large Furniture: Couches, bed frames, dressers, and bookshelves should come next. If at all possible, disassemble furniture to conserve room and stop movement. Tip: To prevent scratches on your appliances and furniture, use padding and moving blankets. Next: Mattresses and Box Springs After loading the bulky items, place your mattress and box spring vertically along the side walls. This helps prevent other objects from moving and conserves floor space. Load Moving Boxes Strategically Now it’s time to stack your moving boxes. Use this order: Heavy boxes first: Books, tools, kitchen appliances. These create a solid base. Medium-weight boxes: Clothing, pantry items. Lightweight boxes: Linens, soft decor, pillows. To stop boxes from slipping while in transit, make sure they are packed tightly. Don’t leave open gaps—fill them with soft items or padding. Pro Tips for Packing a Truck Like a Pro Use Tie-Down Straps: Fasten every layer of objects to keep them from moving while you’re driving. Most trucks have built-in hooks to attach straps or ropes. Protect Fragile Items: Pack breakables in labeled boxes and place them on top of heavier items or in a designated fragile zone. Load Essentials Last: Items you’ll need first—like toiletries, cleaning supplies, and overnight bags—should go in last so they’re the first things off the truck. Create Pathways: Keep a narrow walkway for access in case you need to grab something mid-move. You may read about What Size Truck Do I Need For Moving. The Best Method for Packing a Moving Truck For a relocation to go smoothly and without damage, a moving truck must be packed correctly. With the right plan and technique, you can save space, protect your belongings, and make unloading easier. 1. Plan Your Layout First Before packing the truck, take a few minutes to plan where big and small items will go. Start by placing heavier items at the front (closest to the cab) for better weight balance. 2. Label and Sort by Room or Type Organize boxes by room or item type. Boxes with clear labels facilitate faster unloading and unpacking. 3. Use Furniture Pads and Blankets Use moving blankets or mats to protect appliances and furnishings. To prevent scratches during transportation, wrap fragile surfaces. 4. Disassemble Large Items Break down beds, tables, and shelving to save space and reduce the risk of damage. Keep all screws and hardware in labeled bags. 5. Stack Boxes by Weight and Fragility Lighter, more delicate boxes should be placed on top of heavier ones. This prevents crushing and keeps everything stable while loading the moving truck. 6. Fill Empty Spaces with Soft Items Use pillows, blankets, and towels to fill gaps between items. This provides an additional degree of security and helps stop moving. 7. Leave a Clear Path for Unloading Keep an aisle open if possible. It’ll help you access important items quickly and make packing and unpacking the truck more manageable. Packing a truck doesn’t have to be stressful. With a little planning and smart organization, packing a moving truck becomes quick, safe, and efficient. Need a Hand with Loading or Packing? Chamomile Go offers expert help with loading a moving truck, packing services, and full moving services in Sherman Oaks and nearby areas. How Much Time Does a Moving Truck Take to Pack? If you’re wondering how long packing a moving truck takes, the answer depends on a few key factors. From truck size to how many helping hands you have, every move is different. However, you may load your vehicle quickly and stress-free if you have the proper plan. Factors That Affect Packing Time Size of the Truck: A 10-ft truck is faster to pack than a 26-ft one. Number of Items: More time means more boxes and furnishings. Help Available: More helpers = faster packing. Average Time Estimates Here’s a general guide based on home size: Studio or 1-Bedroom: 1.5 – 3 hours 2–3 Bedroom Home: 3 – 5 hours 4+ Bedroom Home: 5 – 8 hours These times assume items are already packed and ready for loading a moving truck. Tips to Save Time While Packing a Truck Pack Before the Truck Arrives: Have boxes sealed, labeled, and organized. Assign Roles: One person loads, one stacks, others bring items. Use a Hand Truck or Dolly: This speeds

How Do You Pack Clothes When Moving | Best Methods
Moving and Packing Services

How Do You Pack Clothes When Moving

How do you pack clothes when moving without creating a mess or wasting time? It’s one of the most common questions people ask before relocating. Packing clothes when moving may seem simple, but doing it the wrong way can lead to wrinkles, wasted space, and a stressful unpacking process. From bulky jackets to delicate garments on hangers, each type of clothing needs special attention. In this blog, you’ll discover the best way to pack clothes for moving, smart packing hacks for moving, and how to use the right boxes and materials to protect your wardrobe. We’ll also explain how to pack hanging clothes without taking them off the hanger and when it’s best to call professional packing services for help. Whether you’re preparing for a local move in Los Angeles or relocating across town in Pasadena, this guide is packed with practical tips to keep your clothes safe, organized, and ready to wear when you arrive. Best Way to Pack Clothes for Moving Packing clothes may seem simple, but doing it the right way can save time, money, and space. Whether you’re moving across town in Los Angeles or relocating to another nearby area like Pasadena or Riverside, using smart packing hacks for clothes will make your move easier and more organized. Below are the best methods to pack clothes for moving while keeping everything neat and manageable. Sort and Declutter First – Donate or Toss Unused Clothes Before you even touch a box, go through all your closets and drawers. Ask yourself: Have I worn this in the last year? Does it still fit or suit my current style? Is it worth packing and moving? Give gently worn clothing to thrift shops in Santa Clarita or Culver City, or to local charity in Los Angeles County. Toss stained, torn, or worn-out items. The fewer items you pack, the easier the move. Packing hack for moving: Less clutter means fewer boxes and less time unpacking later. Group by Season, Type, or Person – Helps During Unpacking After decluttering, sort your clothes into logical groups. This helps you know exactly where things are when you unpack in your new home. By season: Separate winter clothes from summer wear. By type: Keep all pants, shirts, and jackets together. By person: Pack each family member’s clothes in separate containers or suitcases. This simple packing hack for clothes keeps things organized and stress-free when you arrive at your new place in Thousand Oaks or Sherman Oaks. Use What You Have – Suitcases, Drawers, Laundry Baskets Before you buy moving boxes, use items you already have at home: Suitcases: Ideal for heavy clothes like jeans or jackets. Dresser drawers: Take out drawers and wrap them in plastic wrap. Slide them right into the moving truck. Laundry baskets: Great for soft items like pajamas and t-shirts. Packing hacks for moving include using your own storage as mobile containers — it saves money and maximizes space. Rolling vs. Folding – Pros and Cons for Space Saving Both techniques work, but knowing when to use them is key: Rolling Clothes Pros: Saves space, reduces wrinkles, fits easily into tight spaces. Best for: T-shirts, leggings, gym wear. Folding Clothes Pros: Keeps garments flat, ideal for delicate or bulky items. Best for: Sweaters, dress shirts, structured clothing. Combine both methods based on the type of clothing for the ultimate packing hacks for clothes success. Protect Delicates and Expensive Items – Use Tissue Paper or Garment Bags High-end clothing needs a little extra care: Wrap silk, satin, or lace in acid-free tissue paper to avoid snagging. Use garment bags for suits, dresses, or anything that wrinkles easily. For jewelry or accessories, use padded pouches or small boxes. For movers handling luxury or delicate wardrobes in Beverly Hills or Century City, these tips are essential for damage-free transport. You may read about How to Pack with Packing Cubes. Moving Clothes Boxes & Other Packing Options Smart Ways to Pack Clothes for Moving Choosing the right containers makes packing clothes when moving faster, safer, and easier. Here are the top options and when to use each: Wardrobe Boxes Best for: Hanging clothes like suits or dresses. Pros: Keeps clothes wrinkle-free and ready to wear. Cons: Bulky and a bit pricey. Ideal when you want to move clothes straight from closet to closet. Suitcases & Duffel Bags Best for: Heavy or folded items like jeans and sweatshirts. Pros: Durable and easy to roll or carry. Cons: Limited space. A practical choice if you’re already using them for travel or storage. Vacuum-Seal Bags Best for: Bulky winter clothes and out-of-season items. Pros: Saves tons of space. Cons: Can wrinkle clothes. Great for long-distance packing clothes for moving. Clear Plastic Bins Best for: Delicates or everyday wear you’ll need quickly. Pros: See-through, reusable, moisture-resistant. Cons: Higher cost than boxes. Perfect for moves during wet weather or storage use. Cardboard Boxes Best for: T-shirts, kids’ clothes, and basic folded items. Pros: Affordable and stackable. Cons: Not water-resistant. Staple option for any move — just line them for extra protection. You can also read about How To Roll Clothes for Packing. How to Pack Hanging Clothes When it comes to packing clothes for moving, hanging items like suits, dresses, and coats need special care. The good news? You don’t have to take them off the hangers. Use these simple methods to save time and avoid wrinkles. 1. Wardrobe Boxes Best for: Dresses, coats, business wear. Pros: Clothes stay upright and wrinkle-free. How: Just transfer your hangers directly into the built-in metal bar. Ideal for long-distance moves or delicate fabrics. 2. Garbage Bag Method Best for: Quick, low-cost packing. Pros: Budget-friendly and easy. How: Group 5–10 hanging clothes, slip a garbage bag over them from the bottom, tie it at the top around the hangers. A go-to packing hack when moving locally. 3. Rolling Rack & Garment Bags Best for: Short moves and fragile items. Pros: Easy to roll, protects clothes. How: Hang clothes on a rolling rack

How to Pack a POD | Step-by-Step Moving Guide
Moving and Packing Services

How To Pack A Pod

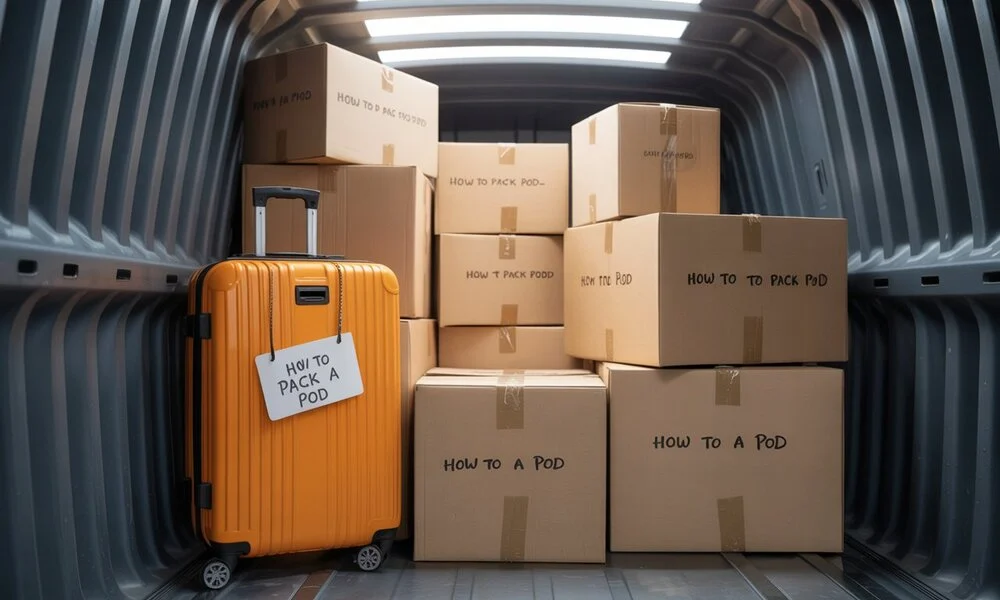
How to pack a pod starts with understanding what a POD (Portable On-Demand Storage) actually is. A POD is a weather-resistant, secure container that’s delivered right to your home or business for convenient loading. It works well for both local and long-distance moves, giving you flexibility and control over your schedule.  Packing a POD properly helps you maximize space, protect your belongings from damage, and makes unloading much simpler. Whether you’re preparing for a short-term storage solution or a cross-town move, packing smartly ensures your items stay safe and organized throughout the process. Essential Packing Materials for Your Storage Pod When preparing to load a pod or using PODS rentals, having the right packing supplies is key to keeping your belongings safe and organized. Here are the must-have packing essentials you should have on hand: 1. Durable Moving Boxes Use a mix of small, medium, and large boxes to fit different household items: Small: books, hand tools   Medium: kitchenware, small appliances, electronics   Large: bedding, pillows, and lightweight linens Always choose sturdy, high-quality boxes designed for storage and transport to avoid collapsing or tearing. 2. Bubble Wrap, Packing Paper & Stretch Wrap These materials are crucial for protecting fragile and irregular-shaped items. Bubble wrap: great for breakables and valuables   Packing paper: ideal for dishes, glassware, and ceramics   Stretch wrap: perfect for bundling items together and protecting furniture surfaces These supplies help prevent shifting inside the pod, keeping everything stable.   3. Furniture Pads & Moving Blankets Protect furniture from dents, scratches, and scuffs by layering pads or blankets between items. They also add extra cushioning for bulky pieces inside the storage pod. 4. Heavy-Duty Packing Tape & Dispenser Seal every box securely with strong packing tape. A handheld dispenser makes taping faster and more efficient while ensuring boxes stay tightly closed during storage or transport. 5. Labels, Markers & an Inventory List Clearly label each box with the room name or list of contents. Keep a written checklist or inventory to track your belongings and stay organized while using your PODS container. 6. Dollies, Straps & Rope A dolly makes moving heavy boxes and furniture much easier. Use straps and ropes to tie down bulky items, preventing them from tipping or shifting inside the pod during transit or storage. Tips for How to Pack a POD for Moving When it comes to packing pods for moving, a smart approach helps protect your belongings and maximize space. Whether you’re using PODS rentals or any other storage container, follow these key tips to make your pods packing experience smooth and efficient. For best packing services in Sherman Oaks contact no other than Chamomile Go. 1. Start with a Packing Plan Before loading anything, list your items and plan your layout. Take inventory of what goes into the pod Group items by size and fragility Sketch a rough layout if needed Planning ahead saves time and prevents last-minute stress. 2. Load Heaviest Items First Begin with heavy items like: Sofas, mattresses Dressers, washers, and refrigerators Place them at the bottom and along the back wall of the storage container to build a strong base. 3. Distribute Weight Evenly Balance is key in pods packing.Don’t put everything heavy on one side. Spread the weight from front to back and left to right. This prevents shifting during transport. 4. Stack Boxes from Heaviest to Lightest Take caution when stacking boxes and use high-quality moving supplies: Heavier boxes on the bottom Lighter boxes on top Fragile items cushioned in the middle This protects contents and stabilizes stacks inside the pod. 5. Use Vertical Space Wisely Maximize every inch by stacking items up to the ceiling of the pod. Place tall furniture upright. Fill gaps with small boxes or bags to keep everything tight and secure. 6. Create Aisles if You Need Access If you’ll need to reach items before the pod is unloaded, leave a small aisle or mark boxes for quick access. It helps, especially during longer storage periods. 7. Use Straps to Secure Layers As you load: Use straps or ropes to tie down layers Secure furniture to the walls of the container Tighten straps after every few rows This keeps items in place during movement or transport. You may read about Is Pods Moving Expensive. How to Pack Fragile Items and Valuables in a POD Packing pods for moving means protecting everything you care about—especially fragile and valuable items. Whether you’re using PODS rentals or another storage container, here’s how to pack breakables the right way. 1. Wrap Each Fragile Item Individually Use packing paper, bubble wrap, or foam to wrap items like: Glassware and dishes Ceramics and collectibles Electronics and small appliances Wrap each piece completely and tape the wrapping in place. 2. Use Dividers or Specialty Boxes For dishes, glasses, and stemware: Use divider kits or dish pack boxes Keep items upright and cushioned on all sides This adds extra structure and prevents shifting inside the storage container. 3. Add Cushioning Around and Between Items Line the top, bottom, and sides of every box with cushioning: Packing paper Bubble wrap Foam peanuts or soft towels This helps absorb shocks during pods packing and transportation. 4. Place Fragile Items on Top Always place fragile boxes: On top of heavier items Away from pressure points Where they’re easy to identify Label each box with “FRAGILE” and “TOP LOAD ONLY” for visibility. 5. Avoid Stacking Heavy Items on Fragile Boxes During pods packing, avoid stacking large or heavy boxes on top of delicate ones. Even short-term pressure can cause cracks or breakage. 6. Protect High-Value Items with Coverage For valuables like jewelry, electronics, or heirlooms: Check your insurance or opt for valuation coverage through the PODS rental provider Consider transporting high-value items personally, if possible This offers an additional degree of security and comfort. The Best Way to Load and Unload a Container Whether you’re using PODS rentals or other storage containers, knowing how to pack a pod properly—and unload

Is PODS Moving Expensive? Full Cost Breakdown Guide
Moving and Packing Services

Is Pods Moving Expensive

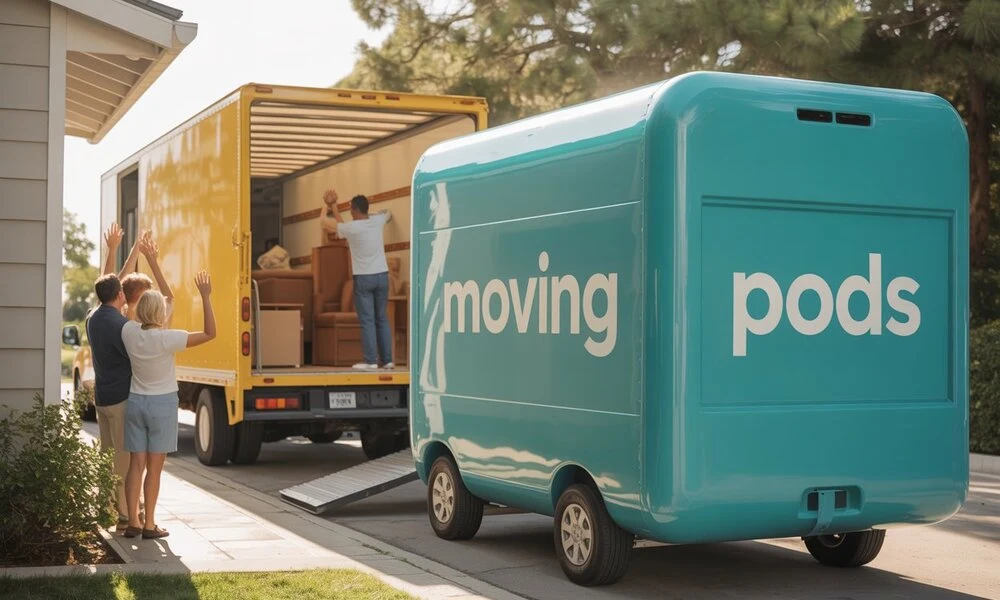
Is PODS Moving Expensive? Many people wonder, is PODS expensive compared to traditional movers. PODS offers a flexible, self-paced moving option where you can pack at your own speed, but pricing depends on factors like container size, distance, and rental time. For local moves, the cost of PODS moving can range from $300–$800, while long-distance moves may cost $1,000–$3,000 or more. When budgeting, remember to factor in delivery fees, storage time, and optional insurance. While PODS can sometimes be pricier than renting a truck, it often provides greater convenience, especially for those who need extra time or storage during the move. What Is PODS Moving and How Does It Work? PODS stands for Portable On Demand Storage. It’s a flexible moving and storage solution where a container is delivered to your location. You load it at your own pace, then PODS picks it up and delivers it to your new place or stores it until you’re ready. How PODS Moving Works Delivery – PODS drops off the container at your home. Loading – You load your items, or hire help. Storage (Optional) – Not ready yet? PODS stores it for you. Transport – When ready, they deliver it to your new location. When to Use PODS Local or long-distance moves (e.g., Los Angeles to Riverside or Santa Barbara) Home renovations or staging Senior moving or downsizing Temporary storage needs Is PODS Moving Expensive? Many people ask, “Is PODS expensive?” or “Is PODS moving expensive?” Local moves: $300–$800 Long-distance: $1,200–$5,000+ Storage: $110–$180/month It’s not the cheapest, but you’re paying for flexibility, storage, and convenience. Compared to full-service movers, PODS can be more affordable if you do your own loading. You may read about How Do Moving Pods Work? Is PODS Moving Expensive? It depends, but not always. Moving PODS costs vary depending on a few important factors. PODS can be more expensive than renting a moving truck, but it can occasionally be less expensive than hiring full-service movers. What Influences PODS Moving Costs?   The Move’s Distance You will pay more as you get farther. Long-distance moves are more expensive than local ones. Container Size: PODS provides a range of container sizes. Larger containers are more expensive than smaller ones. How Much Time You Spend Keeping It The fee increases with the length of time you rent the container. Storage costs mount up each month. Additional Services The cost increases if you use storage, get insurance, or require further assistance. Is PODS Pricey, Then? The answer to the questions “Is PODS expensive?” and “Is PODS moving expensive?” is: It depends on your demands. PODS can be reasonably priced for brief transfers and rental periods. However, it can get costly if you want long-distance transportation and storage. Average Cost of Using PODS to Move Wondering about the average cost of using PODS to move? Here’s a simple breakdown to help you understand what you might pay for a PODS move—whether it’s local or long-distance. Local Move with PODS: $300 – $800 A local move (within the same city or nearby areas like Los Angeles to Pasadena) is usually more affordable. Here’s how the cost adds up: Container delivery fee: $75 – $100 Monthly rental fee: $110 – $180 per container Pickup & final transport: $75 – $100 Total estimated cost: Around $300 to $800 depending on the container size and how long you keep it. Long-Distance Move with PODS: $1,200 – $4,000+ Moving from Los Angeles to another state—or even to Northern California—costs more due to fuel, distance, and time. Container delivery fee: $100 – $150 Transport to new city/state: $1,000 – $3,000 Monthly rental/storage fee: $110 – $180 Final pickup fee: $100 – $150 Total estimated cost: Between $1,200 and $4,000+ depending on distance and container size. What’s Included in the Cost of PODS Moving? Container drop-off and pickup Transportation to your new location Monthly storage (if needed) Fuel and travel fees for long-distance moves Is the cost of PODS moving worth it? For many, yes—especially if you want more time and less stress. But if you’re asking “is PODS expensive?”, it all depends on how far you’re moving, how much stuff you have, and how long you need storage. How Expensive Is PODS Moving for a 3-Bedroom Home? If you’re planning to move a 3-bedroom home, you’ll likely need 2 large PODS containers (16-foot each) or more—depending on how much furniture and boxes you have. Average Cost of PODS for a 3-Bedroom Move Local Move: $600 – $1,200 Long-Distance Move: $3,000 – $5,500+ The final price depends on: Distance of the move How many containers you need How long you keep them Extra services (like storage or insurance) Container Needs for a 3-Bedroom House Most 3-bedroom homes need: Two 16-foot PODS Or One 16-foot + One 12-foot POD Each 16-foot POD holds 3–4 rooms of furniture, but you’ll need to consider space, weight limits, and packing style. Key Cost Considerations Container delivery & pickup Transport to your new home (especially long-distance) Monthly rental if you store the container Weight limits (extra charges may apply if exceeded) So, how expensive is PODS moving for a 3-bedroom home? It’s not the cheapest option—but it’s flexible, and often more affordable than full-service movers if you load it yourself. What Can You Expect to Pay Using PODS? If you’re planning a move and considering portable storage containers, it’s important to know the cost of PODS moving before booking. PODS pricing can vary based on distance, container size, rental time, and additional services. For a local move, the cost usually ranges from $300 to $800, depending on how long you keep the container and the delivery fees. For long-distance moves, the cost can be anywhere from $1,000 to $3,000+, depending on mileage and container size. Additional costs could include packaging materials, insurance, and additional rental days. It’s essential to give PODS your moving information immediately for the most accurate price. Being aware of PODS moving costs in advance enables you to compare them to

How to Move a Mattress | Step-by-Step Guide
Moving and Packing Services

How To Move A Mattress

How to move a mattress the right way is important to avoid damage, dirt, and stress during a move. Mattresses are bulky and heavy, making them tricky to handle without proper planning. Many people face issues like torn fabric, bent springs, or dirt buildup when they try to move a mattress on their own. Additionally, improper mattress moving may result in property damage or back pain. Maintaining the cleanliness and protection of your mattress requires the use of the proper equipment and methods. Whether you’re moving locally or long-distance, learning how to move a mattress safely can save you time and money. What to Do Before Moving a Mattress Moving a mattress might seem simple, but if you skip a few key steps, it can become a real hassle. Whether you’re relocating across town or just switching rooms, preparing your mattress properly can save time, energy, and even prevent damage. In this guide, we’ll walk you through what to do before moving a mattress — the right way. 1. Clean and Vacuum the Mattress Before moving a mattress, cleaning it thoroughly is one of the most important steps. Mattresses gather allergies, perspiration, and dust over time. Use a handheld vacuum or upholstery attachment to vacuum both sides. This keeps dirt from transferring to your vehicle, floors, or clean linens during the move. Pro Tip: For deep cleaning, sprinkle baking soda on the mattress, let it sit for 30 minutes, then vacuum it up. 2. Check the Mattress Type (Memory Foam, Hybrid, Spring) Not all mattresses are created equal. Knowing your mattress type helps you find the easiest way to move a mattress safely and correctly. Memory Foam Mattresses: These are heavy and flexible. Avoid bending them too much. Hybrid Mattresses: A mix of foam and springs. To prevent damage, they must remain flat. Spring Mattresses: Lighter than memory foam but less flexible. Can be carried upright in some cases. Understanding your mattress type helps prevent damage and ensures your mattress stays in shape after the move. 3. Take Measurements of Doorways and Staircases Before you lift a single corner, grab a measuring tape. Measure your mattress and compare it with the width of doorways, staircases, hallways, and elevator entrances. Why it matters: You don’t want to get stuck halfway through the stairs or wedge it in a tight hallway. Planning your route in advance is one of the easiest ways to move a mattress smoothly and without stress. 4. Remove Bedding and Accessories It may sound obvious, but removing all bedding is essential. Strip off sheets, blankets, pillows, mattress toppers, and protectors. Not only does this reduce weight, but it also prevents items from falling off during the move. If you’re using a mattress bag or cover, now’s the time to put it on. This protects your mattress from dirt, moisture, and tearing. Choosing the Right Moving Supplies and Equipment When it’s time to move a mattress, having the proper moving supplies and equipment can make all the difference. Whether you’re relocating across Los Angeles or simply switching rooms, the right tools help protect your mattress, reduce stress, and prevent injuries. In this guide, we’ll cover everything you need to know about choosing moving supplies and equipment for a smooth, damage-free mattress move. 1. To protect against moisture and dirt, use mattress covers or bags. Keeping a mattress clean is one of the first things to do when transferring it. During storage or transportation, a mattress bag or plastic cover is necessary to shield it from water, dust, filth, and even bedbugs. These covers are especially useful if you’re navigating stairwells, outdoor paths, or loading into a truck — places where the mattress can get scuffed or soaked. Tip: Always choose a heavy-duty, tear-resistant mattress bag that fits your mattress size. 2. Secure the Mattress with Ratchet Straps or Ropes Once the mattress is loaded onto a moving truck or tied to a vehicle roof (only when absolutely necessary), you’ll need ratchet straps or strong ropes to hold it securely in place. This prevents shifting during the ride, which could lead to damage or even accidents. Whether you’re transporting it upright or laying it flat, securing the mattress tightly ensures it stays safe throughout the move. 3. Add Moving Blankets and Plastic Wrap if Needed Moving blankets around the mattress might provide additional protection, particularly for memory foam or hybrid mattresses. Wrapping them in plastic wrap helps keep the blankets in place and adds an extra barrier against tears or dirt. This is particularly useful if you’ll be storing the mattress for any period or if it’s being moved alongside heavy items that could rub against it. 4. Consider Dollies, Carts, or Hand Trucks for Easier Transport If your mattress is heavy or you’re dealing with narrow hallways and stairs, using a dolly, cart, or hand truck can save your back and make the process safer. Flat dollies can carry the mattress across long distances on flat ground. Hand trucks are great for smaller, lighter mattresses and short steps. Furniture carts offer better stability for bulkier mattresses. You may read about How To Prepare Furniture For Long Distance Moving. How to Move a Mattress: Step-by-Step Guide Whether you’re relocating to a new home or just rearranging rooms, knowing how to move a mattress the right way can save you from frustration—and injury. Mattresses are heavy, bulky, and can be tough to maneuver without the proper method. That’s why we’ve created this simple, effective step-by-step guide to help you through the process. Let’s dive into the easiest way to move a mattress without damage or stress. Step 1: Prepare and Protect the Mattress Before anything else, prepare your mattress for the move. Strip off all bedding, including sheets, protectors, and pillows. Then, cover the mattress with a mattress bag or heavy-duty plastic wrap to guard against dirt, moisture, and damage during transport. This step is crucial, especially if you’re going through outdoor spaces or loading into a moving truck. Clean

How to Clean Furniture Before Moving | 5 Easy Steps
Moving and Packing Services

How To Clean Furniture Before Moving

How to clean furniture before moving is an essential step for a smooth and healthy relocation. Clean furniture prevents dust, odors, and pests from coming along with you. It also protects your items during transit and helps you start fresh in your new space. Including this task in your move out cleaning tips ensures a thorough job. Don’t forget to add it to your move in move out cleaning checklist for better organization. A little cleaning now can save time, money, and stress later. This simple step leads to a cleaner, safer, and more stress-free moving experience. Why Should You Clean Your Old Home Before Moving Out? Moving out of a home is already a big task, but cleaning your old place before you leave is just as important. Whether you’re renting or selling, a clean space benefits everyone — from the next occupants to your moving process. Let’s look at the main reasons why you should clean your old home before moving out and how it helps in every part of your move. 1. Hygiene Reasons for Next Occupants Leaving your old home in a clean condition is a basic courtesy and part of good hygiene. The next tenants or new homeowners shouldn’t have to deal with dust, grime, or odors. A thorough clean ensures the space is fresh and livable. Move out cleaning tips recommend scrubbing bathrooms, wiping down kitchen appliances, mopping floors, and vacuuming carpets. Sanitizing the home reduces the spread of germs and allergens — making it healthier for the next family. 2. Avoiding Damage Fees or Penalties If you’re a renter, your lease likely requires you to return the property in good condition. Landlords often inspect every room, and if they find stains, marks, or trash left behind, you could face damage fees or lose your security deposit. Hiring clean up services to prepare for move helps you meet the landlord’s expectations. Professional cleaners know exactly what to target, such as baseboards, ovens, windows, and hard-to-reach corners — minimizing the risk of penalties. 3. Ensures You Pack Only Clean Items (Furniture Included) Cleaning before you move ensures that all your items — furniture, clothes, electronics, etc. — are packed in a clean environment. You don’t want to carry dust, pests, or musty smells into your new home. One of the best move out cleaning tips is to clean your furniture and belongings before packing. Wipe down surfaces, wash fabrics, and sanitize high-touch items. This way, you’re starting fresh in your new place. 4. Builds Good Relationship with Landlords or New Buyers Leaving a clean home behind shows responsibility and respect. It builds goodwill with landlords, real estate agents, or buyers. It also reflects positively on you if you ever need a rental reference or recommendation in the future. A tidy home can also help new buyers feel confident about their purchase. It’s one less thing for them to worry about as they move in. Good impressions matter — especially during property handovers. You may read about How To Prepare Furniture For Long Distance Moving. Best Cleaning Supplies for Your Move Getting ready to move? Having the right cleaning tools makes your house cleaning moving out faster and easier. Here are the best supplies to keep your old home spotless and your belongings safe. 1. Furniture-Friendly Cleaners Use surface-safe products for wood, leather, and fabric furniture. This keeps your items clean and avoids bringing dirt into your new home. 2. Microfiber Cloths & Vacuum Tools Microfiber cloths trap dust without leaving lint. Pair them with a vacuum that has a brush tool to clean corners, furniture, and carpets efficiently. 3. Disinfecting & Eco-Friendly Sprays Sanitize high-touch spots like counters and door handles. Go for eco-friendly options to avoid strong chemical smells for the next occupants. 4. Packing-Safe Cleaning Materials Use non-leaky, quick-drying sprays and wipes. They’re perfect for last-minute touch-ups and won’t damage packed items. Move out cleaning tips: Clean top to bottom Wipe furniture before packing Disinfect surfaces last Using the right supplies makes house cleaning moving out stress-free. Need help? Chamomile Go is here for packing, logistics, and clean-up coordination. Five Easy Steps to Clean Furniture Before Moving Before packing up your furniture, it’s important to give it a good clean. This helps protect your items during the move and keeps your new home fresh. Whether you’re doing it yourself or using clean up services to prepare for move, these five easy steps will guide you through the process. This guide is part of a complete move in move out cleaning checklist, especially useful during house cleaning moving out. Step 1: Dust and Vacuum All Surfaces Start by removing loose dust and dirt. Use a soft brush or vacuum with a brush attachment to gently clean surfaces, especially around edges and corners. This prevents dust from getting onto boxes or other pieces of furniture. Step 2: Wipe Down with the Right Cleaner Next, choose the right cleaner based on your furniture’s material: Wood: Use a mild wood polish or vinegar solution Leather: Use leather-safe wipes or cleaner Metal: Use a damp cloth with a gentle cleaner Avoid soaking the surface. Just a damp cloth is enough to freshen up your furniture. Step 3: Spot-Treat Any Stains Check for stains or marks. You can use: Homemade cleaners (like baking soda + water) Store-bought stain removers that match your material type Test any cleaner on a small area first to make sure it doesn’t damage the furniture. Step 4: Disinfect Handles, Drawers & Legs These parts are touched the most — especially if you’ve sold the furniture or it’s being reused. Use disinfectant wipes or a spray with a cloth to clean handles, knobs, legs, and inside drawers. This step is important for hygiene and is often included in professional clean up services to prepare for move. Step 5: Let Furniture Dry Fully Before Packing Always let your furniture dry completely before wrapping or boxing it. This prevents: Mold Bad smells Mildew during transport Use

Our Client's Reviews

Get In Touch With Us!

Find Us

Office Address

    Los Angeles, California

Office Phone

    +1 310-895-3517

Email Address

  Chamomilemoving@gmail.com

Let’s get you moving! Grab your FREE quote now.

Chamomile Go offers premier moving services throughout Los Angeles County, CA, ensuring a hassle-free relocation experience for all our clients.

+1 310-895-3517

24/7 Support

© 2025 Created by LocalPro1