Get a Free Quote

Edit Template

Author name: 2m54a

How to Pack a Suitcase for Moving | 10 Best Tips
Moving and Packing Services

How To Pack A Suitcase For Moving

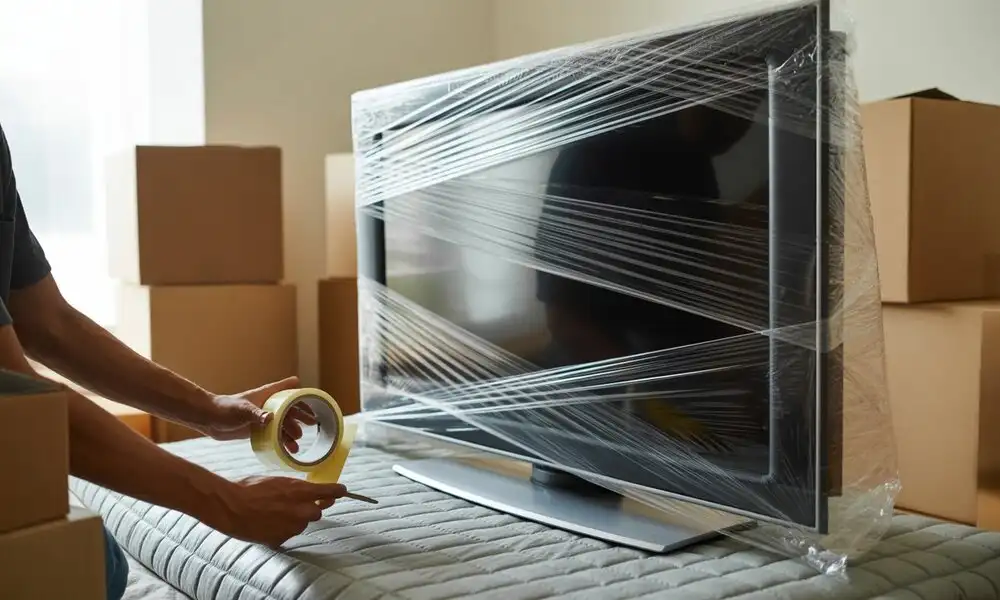
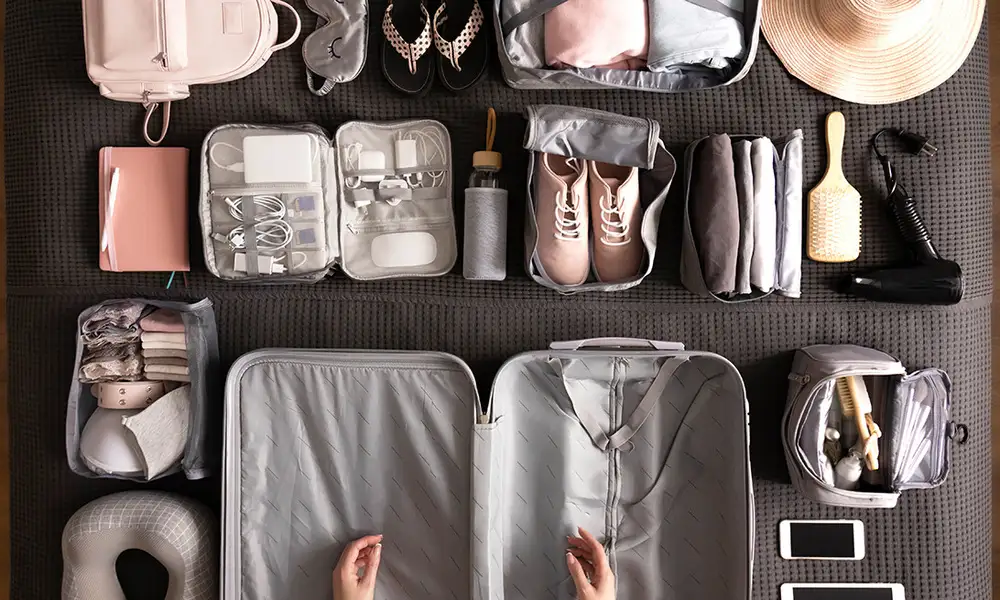
How to pack a suitcase is a skill that can make a big difference when you’re preparing for a trip or a move. Learning how to pack a suitcase properly can make your moving or travel experience stress-free by helping you stay organized and avoid last-minute hassles. Properly packing a suitcase ensures that your clothes stay wrinkle-free, your essentials remain easy to access, and fragile items stay protected.  It also saves space, allowing you to fit more without overstuffing your bag, and reduces the risk of damage during transport. Whether you’re packing luggage for a short getaway or a long-distance move, using the right methods can save time, prevent unnecessary stress, and make the entire process easier and more efficient. Why Properly Packing a Suitcase is Important When you pack a suitcase the right way, it can make a big difference whether you’re traveling or preparing for a move. Proper suitcase packing is not just about fitting clothes it’s about protecting your items, saving money, and reducing stress. 1. Prevents Wrinkles in Clothes One major benefit of smart suitcase packing is that it prevents wrinkles. Folding clothes correctly or rolling them can help maintain their shape. This is especially useful for business trips or events where you need to look polished. Moving Tip: When relocating, proper packing keeps your clothes fresh and ready to wear immediately after the move. 2. Maximizes Space Packing a suitcase efficiently helps you make the most of every inch of space. Rolling clothes, using packing cubes, and organizing by category will allow you to fit more items. Moving Scenario: If you’re moving temporarily or in stages, space-saving techniques mean fewer bags, which makes transportation easier. 3. Keeps Fragile Items Safe When you pack a suitcase properly, you can create layers and cushioning that protect fragile items like electronics, glassware, or souvenirs. Wrapping breakables in soft clothing or packing them in the center of the bag helps prevent damage. For Moving: This method works just like when movers protect valuables in boxes it’s all about reducing movement and shock during transit. 4. Avoids Extra Luggage Fees Efficient suitcase packing can save you money. Airlines often charge for overweight or extra luggage, so packing strategically helps keep your suitcase within limits. Moving Connection: If you’re relocating long-distance and sending extra bags, smart packing can reduce shipping costs and avoid unnecessary expenses. You may read How To Pack Hangers For Moving? 7 Tips for How to Pack a Suitcase for Moving When it comes to packing a suitcase for a move, doing it right can save you time, space, and stress. Whether you’re moving across town or across the country, these tips will help you stay organized and protect your belongings. 1. Choose the Right Suitcase Size matters! Select a suitcase that fits your needs large enough for your essentials but not so big that it becomes too heavy to handle. 2. Plan Before You Pack Make a checklist of what you’ll need. Planning helps avoid last-minute stress and ensures you don’t forget important items. 3. Roll or Fold? Combine both methods for maximum space. Roll casual clothes and fold formal ones. This strategy keeps everything neat and reduces wrinkles. 4. Use Packing Cubes Packing cubes are a game-changer. They keep items organized and make unpacking much easier when you arrive at your new home. 5. Protect Fragile Items Wrap fragile belongings in soft clothing for added protection. Place them in the center of the suitcase to minimize impact during the move. 6. Leave Essentials on Top Keep things like toiletries, chargers, and a change of clothes on top for quick access. No need to dig through everything when you arrive. 7. Check Weight Before zipping up, weigh your suitcase. Avoid overpacking to prevent strain during transport and possible fees if you’re traveling by air. Need Help? If you’re looking for professional packing services in Sherman Oaks, our team is here to make your move smooth and stress-free. We handle everything from fragile items to heavy belongings with care and expertise. Should I Roll or Fold Clothes When Packing a Suitcase? When packing luggage, one of the most common questions is whether to roll or fold your clothes. Both methods have their benefits, but the best option often depends on what you’re packing and how much space you have. Rolling Clothes: Pros and Cons Pros: Saves space: Rolling clothes tightly can free up more room in your suitcase. Reduces wrinkles: Especially for casual wear like t-shirts and jeans. Great for organization: Works well with packing cubes for a neat layout. Cons: Not ideal for heavy fabrics: Items like wool sweaters can become bulky when rolled. Time-consuming: Rolling each item takes longer than folding. Folding Clothes: Pros and Cons Pros: Perfect for structured clothes: Dresses, suits, and button-up shirts keep their shape better when folded. Quick and easy: Folding is usually faster than rolling. Cons: Less space-efficient: Folding takes up more room than rolling. Wrinkles more easily: Especially if items shift during travel or moving. The Hybrid Method: Best of Both Worlds For most situations, combining both techniques works best. Roll soft, casual clothes to maximize space and minimize wrinkles, while folding structured or delicate pieces to maintain their shape. This method is ideal for packing luggage whether you’re traveling or preparing for a move. Key Takeaway Rolling is great for saving space, folding is best for structured garments, and a hybrid approach offers maximum efficiency. What Should I Not Pack in My Suitcase? When packing for a trip, it’s important to know what items should never go into your checked luggage. Packing the wrong things can cause delays, damage, or even safety risks. Here’s a quick guide: 1. Flammable or Hazardous Items Avoid packing anything that can catch fire or cause harm. Examples include: Aerosol sprays Gasoline or lighter fluid Fireworks Nail polish remover These items are prohibited because they pose a danger during air travel. 2. Valuables Never pack valuables in your suitcase. Checked bags can

How to Make Moving Less Stressful With Simple Steps
Local Moving Services

How To Make Moving Less Stressful

How to make moving less stressful is one of the biggest concerns people face when planning a relocation. Moving is often overwhelming because it affects you emotionally, physically, and logistically all at once. Leaving behind familiar places and memories can feel heavy, while the packing and organizing take a toll on your body and time. On top of that, coordinating schedules, budgets, and deadlines can quickly add pressure.  The good news is that there are practical steps to make moving easier and reduce that burden. By planning ahead, staying organized, and using the right support, you’ll find that making your move easy is possible. With the right approach, moving doesn’t have to be stressful it can actually be a smooth start to your next chapter. Why Moving Feels Stressful and How to Make It Easier Moving to a new home is an exciting chapter, but for many people, it also brings a lot of stress. From emotional ties to financial worries, several factors contribute to the stress from moving. Understanding these reasons can help you prepare for a smoother and easier moving experience. Emotional Attachment to Home and Neighborhood One of the biggest reasons moving feels stressful is the emotional bond we create with our homes. A house isn’t just walls and furniture it’s where memories live. Leaving behind a familiar neighborhood, friendly neighbors, or even your favorite local spots can feel overwhelming. Recognizing this attachment can make the transition easier, as it allows you to honor your old space while looking forward to new beginnings. Fear of Change and New Environment Change can be uncomfortable, and moving means stepping into the unknown. A new city, new workplace commute, or even adjusting to different surroundings can cause anxiety. This fear of change is a natural reason why people experience stress from moving. Taking time to learn about your new area schools, shops, and community services can help reduce uncertainty and make settling in less stressful. Packing, Organizing, and Time Management Challenges Packing is often the most exhausting part of moving. Sorting through belongings, organizing boxes, and managing time before the moving day can quickly feel like too much to handle. Without proper planning, these tasks increase the stress from moving. Creating a packing checklist, labeling boxes clearly, and setting small daily goals are simple ways to achieve easier moving and stay in control of the process. Financial Concerns and Unexpected Costs Moving isn’t just physically tiring it can also impact your budget. Costs like hiring movers, buying packing supplies, and handling security deposits or utility setups can quickly add up. Many people underestimate these expenses, which leads to added financial stress. Planning ahead with a realistic moving budget and setting aside a little extra for unexpected costs can make the entire process easier and less stressful. You may read How To Pack Hangers For Moving? 10 Ways to Make Moving Less Stressful Moving can feel overwhelming, but with the right approach, you can reduce the stress and focus on the excitement of your new chapter. Here are ten proven tips to make moving easier and ensure a smoother transition. 1. Start Planning Early The earlier you start, the smoother things will go. Create a timeline and checklist that covers every step of the move. This way, you won’t feel rushed, and you’ll stay in control, truly making your move easy from day one. 2. Declutter Before Packing Don’t bring items you no longer use. Donate, sell, or discard things that don’t fit your lifestyle. Decluttering not only saves time but also makes moving easier since you’ll have fewer boxes to pack and carry. 3. Use a Labeling System Organized packing is key to stress-free moving. Use color-coded boxes or room-based labels to quickly identify where each box belongs. This small step goes a long way in making your move easy during unpacking. 4. Pack an Essentials Bag Keep a separate bag with toiletries, important documents, snacks, medications, and first-night essentials. Having these items handy helps you settle in quickly without searching through boxes. 5. Hire Professional Movers (If Needed) Sometimes, the best way to make moving easier is to leave it to the experts. Professional movers can save you time, effort, and even prevent injuries while ensuring your belongings are handled with care. 6. Involve Friends or Family Moving is easier when you have help. Friends and family can provide extra hands for packing and lifting, as well as much-needed emotional support throughout the process. 7. Take Breaks During the Process Don’t burn yourself out. Short breaks for rest, hydration, and snacks will keep your energy up. Moving is a marathon, not a sprint balance is key to making your move easy. 8. Stay Organized with a Moving Binder or App Keep everything in one place contracts, receipts, schedules, and checklists. A moving binder or digital app ensures you don’t misplace important details. Staying organized helps make moving easier at every stage. 9. Prepare Your New Home Before Arrival Set up utilities, clean your new home, and make sure you have the keys before moving day. Preparing in advance ensures you can settle in smoothly without unnecessary delays. 10. Keep a Positive Mindset Moving isn’t just about leaving a home it’s about starting a new chapter. Focus on the opportunities and fresh beginnings waiting for you. A positive attitude is one of the most powerful ways of making your move easy. When to Call for Professional Help With Your Move Not every move requires a moving company, but there are times when expert help can make all the difference. Knowing when to hire professionals can reduce the stress from moving and give you peace of mind. That’s where Chamomile Go comes in your trusted partner in making your move easy. Signs You Need Expert Movers 1. Limited Time or Tight Schedule If you’re on a strict deadline, handling everything alone can be overwhelming. Professional movers like Chamomile Go can save you valuable time and ensure your move stays on

How to Unpack After Moving | Easy Step-by-Step Guide
Moving and Packing Services

How To Unpack After Moving

How to unpack after moving can feel overwhelming when you’re surrounded by boxes and don’t know where to begin. Unpacking after a move is often as tiring as packing, but with the right plan, it becomes much easier. A clear strategy or a little unpacking help can save time, reduce stress, and help you settle in faster. Before opening boxes, it’s important to know which rooms to tackle first and how to stay organized. Breaking the process into small steps makes it more manageable and less stressful. With the right approach, you’ll be able to settle into your new home smoothly and enjoy the fresh start. What to Do Before You Start Unpacking Check Utilities and Internet Setup Before you begin unpacking after moving, make sure your basic utilities like electricity, water, and gas are working properly. Test the internet connection as well, since having Wi-Fi ready can make your move smoother and help with work or communication right away. Clean the New Home First It’s always a good idea to give your new space a deep clean before you start box unpacking. Dust, vacuum, and sanitize all surfaces, especially kitchens and bathrooms. A clean home ensures your belongings are set up in a fresh environment without needing to shift things around later. Organize Boxes by Room If you labeled your boxes during the move, place them directly in their assigned rooms. Organizing boxes by room before you begin unpacking after moving saves time and prevents clutter in common spaces. This step also makes box unpacking less overwhelming since you’ll know exactly where each item belongs. Create a Priority Unpacking Checklist Start with the essentials such as bedding, toiletries, and kitchen supplies. A priority checklist helps you handle box unpacking in order without stress. Unpack the items you need for daily comfort first, then move on to décor and less-used belongings. What Room Should I Unpack First? Start with the Kitchen The kitchen is the heart of any home, which is why it should be the first room you set up after moving. Begin your box unpacking with essentials like pots, pans, plates, cups, and silverware. Having your kitchen ready means you can prepare meals without relying on takeout. Don’t worry about organizing every drawer right away just focus on the basics so daily life feels normal while you continue unpacking after moving. Bedrooms for Rest and Comfort Moving is tiring, and having a comfortable place to sleep is essential. After the kitchen, unpack your bedrooms. Set up the bed frame, mattress, pillows, and linens. Then move on to clothes and personal items you’ll need for the next few days. A ready bedroom ensures that, no matter how busy your unpacking gets, you’ll always have a calm space to rest and recharge. Bathrooms for Daily Essentials Next, head to the bathroom. Toiletries, towels, shower curtains, and cleaning supplies should be unpacked right away. A functional bathroom makes life much easier while you’re still working through box unpacking in other areas. It’s also one of the most used rooms in the house, so keeping it organized early is a smart move. Living Room and Extra Spaces Last The living room, dining room, and any extra spaces should be unpacked after the essentials are done. These areas are more about comfort and entertainment rather than immediate needs. By saving them for last, you prevent clutter and can take your time decorating and arranging furniture the way you want. Pro Tip: Prioritize What Matters Most The best way to handle unpacking after moving is to think about which spaces you rely on daily. Essentials come first kitchen, bedroom, and bathroom while less important rooms can wait. This approach keeps your home functional and helps you feel settled faster without being overwhelmed by box unpacking all at once. You may read How Long Does It Take To Unpack After Moving? How to Unpack After Moving in Five Easy Steps Step 1: Unpack the Essentials Box The first step in unpacking after moving is to start with your essentials box. This should include toiletries, chargers, snacks, important documents, and basic cleaning supplies. Having these items easily accessible helps you settle in quickly without searching through multiple boxes. Step 2: Start with Priority Rooms Next, focus on priority rooms like the kitchen, bedrooms, and bathrooms. These are the spaces you rely on daily. Box unpacking in these areas first ensures you have a functioning home environment right away, with meals, rest, and hygiene taken care of. Step 3: Break Down Boxes as You Go One of the best ways to avoid clutter while unpacking after moving is to flatten and recycle empty boxes as soon as they’re unpacked. This keeps your space tidy and makes the process less overwhelming. Step 4: Organize Items Systematically Don’t just place items randomly set them up with purpose. Put clothes neatly into closets, arrange dishes in cabinets, and use shelves for everyday items. Systematic organization during box unpacking saves you time later and helps your new home stay clean and functional. Step 5: Personalize Your Home Once the basics are set, add décor, photos, and personal touches. This step makes your space feel like home and gives you a sense of comfort after the move. Need Help with Packing and Moving? At Chamomile Go, we make your moving experience stress-free with expert packing and moving services. If you’re looking for reliable packing services in Sherman Oaks, contact us today and let our team handle the hard work while you enjoy settling into your new home. When to Call Professionals for Unpacking Services Large Moves or Tight Schedules If you’ve just completed a big move or you’re on a tight schedule, hiring professionals can make the unpacking after moving process much faster. Instead of spending days going through box unpacking, expert movers can set up your home efficiently so you can focus on work, family, or daily routines. Businesses or Commercial Relocations For office or business moves, professional unpacking services

How to Pack Hangers for Moving | Step-by-Step Guide
Moving and Packing Services, Packing Services

How To Pack Hangers For Moving

How to pack hangers for moving is something many people don’t think about until it’s too late. Hangers are often overlooked during the moving process, but not packing them properly can lead to a tangled mess, broken hangers, or wasted space inside your boxes. While they may seem small compared to furniture or heavy items, packing hangers the right way can save time, space, and frustration on moving day. In this guide, we’ll share simple, step-by-step methods for packing hangers and packing clothes hangers so they stay organized, protected, and ready to use in your new home. The Significance of Packing Hangers Correctly Why packing hangers matters When planning a move, many people underestimate the importance of packing hangers the right way. A simple step like organizing hangers can save you time, protect your clothing, and make unpacking stress-free. Instead of throwing them randomly into a box of hangers, using the right method helps you avoid unnecessary mess. Saves time during unpacking If you pack hangers clothes hangers in an organized manner, you’ll instantly notice the difference when unpacking. Neatly stacked or tied hangers allow you to quickly hang clothes back in the closet. Without proper organization, you’ll waste time untangling hangers and sorting them from a cluttered pile. Prevents clothing damage Improperly packed hangers can damage your clothes during the move. Sharp edges or tangled wires might snag fabrics, leaving you with ruined garments. By placing your packing hangers carefully or bundling them together, you prevent damage and ensure your clothes are ready to wear once you unpack. Reduces clutter in moving boxes When hangers are tossed loosely, they create bulk and take up unnecessary space inside moving boxes. A designated box of hangers keeps them contained and prevents them from cluttering with other items. This makes your moving boxes more organized and easier to handle. The role of hanger organization in relocation A smoother relocation process often comes down to small details. Proper hanger organization is one of those details that ensures efficiency. When your hangers are neatly packed, you’ll have fewer surprises on moving day and a much quicker setup in your new home. Different Hanger Types and Their Packing Requirements Plastic hangers Plastic hangers are lightweight and common in most closets. However, they can snap if bent under pressure. When packing hangers, it’s best to group plastic ones together and place them inside a box of hangers to keep them from breaking during the move. Wooden hangers Wooden hangers are strong and long-lasting, but they are bulkier compared to other types. When packing hangers made of wood, stack them neatly to save space. A separate box of hangers for wooden ones prevents them from crushing lighter hangers or damaging clothes. Velvet and fabric hangers Velvet or fabric hangers are popular because they prevent clothes from slipping. However, their delicate surface needs extra care. Wrap them in paper or keep them in a clean box of hangers to avoid dust and fabric damage during the move. Metal hangers Metal hangers are slim and save closet space, but they tangle quickly if not bundled. When packing hangers made of metal, tie them in small groups with rubber bands before placing them in a box of hangers. This keeps them organized and easy to unpack. Keep, donate, or discard? Before packing hangers, decide which ones are worth keeping. If your closet has too many or damaged hangers, donate the extras to local charities or recycle them. Keeping only the sturdy and useful hangers helps you save space in your moving boxes and makes the relocation process easier. You may read Will movers pack for you? Getting the Required Packing Materials Essential supplies for moving hangers To move hangers clothes hangers safely, you’ll need the right packing supplies. The most common essentials include wardrobe boxes, large garbage bags, zip ties or rubber bands, moving blankets, and strong tape. These tools keep your closet items secure and make unpacking easier. A dedicated box of hangers is also helpful to keep them organized and separate from other belongings. Budget-friendly vs professional-grade materials When choosing supplies, think about your moving needs. Wardrobe boxes and heavy-duty tape are considered professional-grade and offer strong protection for valuable clothes and hangers clothes hangers. On the other hand, large garbage bags and basic zip ties are budget-friendly alternatives that still keep your items together, even if they’re less durable. Quick and low-cost alternatives If you don’t want to spend much, there are simple solutions. Group your hangers clothes hangers with rubber bands and cover them using garbage bags. Recycled moving boxes or a spare box of hangers can also work to keep things contained without extra costs. Getting Hangers Ready for Packaging Step 1: Sort and declutter Before you begin, go through all your hangers and separate them by type and condition. Broken or bent ones can be recycled, while extras can be donated. This step reduces clutter and ensures you only move the hangers you actually need. Step 2: Group by bundles Once sorted, place hangers into small, manageable bundles. Grouping them by material plastic, wooden, velvet, or metal makes them easier to organize during the move and quicker to set up later. Step 3: Secure with ties After grouping, wrap each bundle with rubber bands, string, or twist ties. Keeping them tightly held together prevents tangling and makes transportation easier. Why organization before packing helps Taking a few minutes to organize your hangers before boxing them saves a lot of stress later. When you arrive at your new home, you’ll be able to set up your closet faster without wasting time untangling piles of hangers. Pre-packing organization is a small step that creates big efficiency on moving day. How to Pack Hangers for Moving in Five Easy Steps Step 1: Bundle by type Start by grouping hangers according to their material plastic, wooden, velvet, or metal. Keeping similar types together prevents damage, makes them easier to count, and helps you stay organized when setting

How to Transport Fish When Moving in 5 Steps
Moving and Packing Services, Local Moving Services

How to Move a Fish Tank

How to transport fish when moving can feel challenging, but with the right approach, it’s completely manageable. Fish are delicate creatures that can easily become stressed by changes in water quality, temperature, or handling, so proper preparation is essential for their safety. Whether you’re planning a short trip across town or a long-distance relocation, knowing the best methods for fish transport can make the process smoother. In this guide, you’ll learn step-by-step how to transport fish for moving, the essential tools you’ll need, and when it might be worth hiring a professional moving service to handle the job with care. Understand the Challenges of Moving Fish Fish Are Sensitive to Change When it comes to fish transportation, even small changes in temperature, water quality, or handling can cause stress. Fish have delicate immune systems, and sudden shifts in their environment can lead to illness or even death. That’s why moving with fish requires planning ahead to minimize these risks. Short-Distance vs. Long-Distance Moves For short-distance moves, you can often keep your fish in sealed bags or small containers for a few hours without major issues. However, long-distance fish transportation involves greater challenges such as maintaining stable water temperature, ensuring enough oxygen, and preventing prolonged stress. Longer moves may require specialized equipment or professional help to keep your fish safe and healthy throughout the journey. Tools Required for Transporting Fish When Moving When planning fish transportation, having the right tools can make all the difference in keeping your pets safe and stress-free. Here’s a list of essential items and why they’re important for moving with fish: 1. Fish Bags (Oxygen-Filled for Longer Trips) Special fish bags allow you to safely hold your fish during travel. For long-distance moves, oxygen-filled bags help keep the water fresh and breathable. 2. Buckets with Secure Lids Sturdy buckets provide more space for fish to move and can be useful for larger species. Lids prevent spills and keep fish from jumping out. 3. Portable Air Pumps These pumps help maintain oxygen levels in the water, especially during long journeys where fish may be in containers for several hours. 4. Thermal Insulation Materials Insulating blankets, foam, or thermal wraps help maintain a stable water temperature, preventing your fish from getting too hot or too cold. 5. Water Conditioner Adding water conditioner neutralizes harmful chemicals in tap water and reduces stress on your fish during the move. 6. Fish Nets A soft fish net makes it easier to gently catch and transfer fish without injuring them. 7. Coolers or Insulated Containers Coolers keep the fish bags at a consistent temperature and shield them from sunlight or sudden temperature changes. By using these tools, you give your fish the best chance of staying healthy during fish transportation, whether you’re moving across town or across the country. Prepare Your Fish for Travel Before you transport fish for moving, proper preparation is essential to keep them healthy and stress-free during the journey. Follow these simple steps to get your fish ready: Step 1: Stop Feeding Fish 24–48 Hours Before the Move Fish produce waste quickly, and feeding them right before travel can cause water contamination. Stopping their food for a day or two ensures cleaner water and a safer trip. Step 2: Perform Partial Water Changes Replace about 25–30% of the tank water with fresh, conditioned water. This keeps water clean while maintaining familiar chemistry for your fish. Step 3: Check and Adjust the Temperature Ensure the tank water matches the expected travel environment. Sudden temperature changes can shock fish, so stability is key. Step 4: Inspect and Clean Transport Containers Thoroughly clean all fish bags, buckets, or containers before use. This prevents harmful bacteria from harming your fish during the move. By taking these steps, you create a stable and safe environment to transport fish for moving, whether it’s a quick relocation or a longer journey. You may read Tips for Moving With Dogs & Cats. How to Transport Fish When Moving in Five Easy Steps If you’re moving with fish, following a clear process will help reduce stress and keep them safe throughout the journey. Here’s how to do it: Step 1: Gently Catch and Bag the Fish Use a soft fish net to carefully catch your fish. Avoid chasing them too much, as this can cause stress. Place them in sturdy fish bags designed for transport. Step 2: Fill Transport Bags with Tank Water Use water from your current aquarium so the fish remain in familiar conditions. Fill the bags about one-third with water and two-thirds with air, then secure them tightly with rubber bands. Step 3: Place Bags Inside Insulated Containers Coolers or foam boxes help regulate temperature and protect the fish from light and sudden temperature changes during the move. Step 4: Stabilize Containers in Your Vehicle Secure containers so they won’t tip or shift while driving. Sudden movements can stress fish or damage the bags. Step 5: Set Up the Tank Quickly at the New Home Once you arrive, set up the aquarium right away. Acclimate fish slowly by letting the bag float in the tank for 15–20 minutes before releasing them. By following these steps, moving with fish becomes a much smoother and safer experience, ensuring your aquatic pets arrive happy and healthy. Hire a Professional Moving Service Sometimes, the safest choice for fish transportation is to let experts handle the job. If you own rare, delicate, or large fish, or if you’re moving long-distance, hiring professionals can save time, reduce stress, and ensure your fish arrive healthy. Why Choose Movers Experienced with Pets and Aquariums Professional movers who understand aquarium care know how to handle tanks, manage temperature control, and secure fish during transit. They also have the right equipment and packing methods to protect both your fish and their habitat. Chamomile Go – Your Trusted Moving Partner in Sherman Oaks At Chamomile Go, we specialize in safe and reliable moving services, including the careful handling of aquariums and live fish. Our

How to Pack Artwork for Moving – Step-by-Step Guide
Moving and Packing Services

How To Pack Artwork For Moving

How to pack artwork for moving is more than just putting it in a box it’s about protecting pieces that may hold both sentimental and monetary value. When you pack art incorrectly, you risk scratches, broken glass, dents, or even moisture damage that can ruin a cherished piece forever. Whether you’re packing art for moving across town or across the country, the right method keeps your pieces safe from bumps, shakes, and climate changes. From fine paintings to packing photo frames, every detail matters. For those who prefer expert handling, Chamomile Go offers professional packing services in Sherman Oaks, ensuring your artwork arrives in perfect condition without the stress. Why Proper Artwork Packing Matters When it comes to packing artwork, the right method makes all the difference. Artwork, whether it’s a family heirloom, a valuable painting, or a treasured print, carries both sentimental and financial value. Improper handling can lead to scratches, smudges, tears, or even irreversible damage. By taking time to pack art for moving the right way, you protect its beauty, value, and emotional meaning for years to come. Professional packing art for moving also ensures it survives the bumps, vibrations, and temperature changes during transit without harm Protecting Sentimental and Financial Value Art is more than decoration it’s often a reflection of personal history or a significant investment. Damaging a painting, sculpture, or print can mean losing irreplaceable memories or substantial monetary worth. That’s why packing artwork with the right materials, like acid-free paper, bubble wrap, and sturdy crates, is so important. A well-packed piece can handle long-distance travel, climate shifts, and the natural movement that happens during a move without losing its condition or value Common Mistakes People Make When Moving Artwork Many people underestimate how delicate art pieces are, leading to avoidable damage. Common mistakes include using newspaper (which can transfer ink), taping directly onto the art or glass, and skipping protective layers. Others use boxes that are too large, allowing the artwork to shift inside during transport. Overlooking the difference between packing artwork and general household items can be costly. Each artwork piece deserves specialized attention when packing art for moving to ensure it stays safe and secure Difference Between Framed and Unframed Artwork Packing Framed artwork needs extra care to protect both the frame and the art inside. Start by placing corner protectors on the frame, then wrap the piece in bubble wrap, securing it without tape touching the surface. For glass-front frames, apply painter’s tape in an “X” shape to reduce the risk of shattering during transit. On the other hand, unframed artwork should be covered with acid-free paper or glassine, then placed between sturdy cardboard sheets before wrapping. The approach to packing art for moving changes depending on whether it’s framed or unframed, but both require careful handling and high-quality materials You may read How To Pack Paintings For Moving? Essential Packing Supplies for Artwork When packing artwork or packing art for moving, having the right materials is key to preventing damage: Bubble wrap for cushioning Packing paper for initial wrapping Corner protectors to safeguard frame edges Glassine paper to cover art surfaces without sticking Packing tape for secure sealing Stretch wrap for extra protection Foam boards to prevent bending Sturdy boxes for safe transport Tools to Make the Process Easier Measuring tape – ensures correct box size Utility knife – for clean cutting of materials Labels – to organize items Fragile stickers – to alert movers of delicate contents How to Pack Artwork for Moving in Six Easy Steps Whether you’re packing photo frames for a local move or preparing to pack art for long-distance shipping, following a careful process helps protect your pieces from scratches, dents, and breakage. Here’s a simple six-step guide: Step 1: Clean and Prepare the Artwork Before you pack art, gently dust the frame, glass, or canvas with a soft cloth. Removing dirt and fingerprints prevents them from causing marks during transit. If the piece is especially valuable, wear cotton gloves to avoid transferring oils from your hands Step 2: Wrap Artwork with Acid-Free Paper or Glassine Acid-free paper or glassine creates a safe barrier against moisture, dust, and smudges. Make sure the entire surface is covered, especially the corners and edges. For packing photo frames, fold the paper neatly around the frame to avoid leaving gaps Step 3: Add Protective Layers like Bubble Wrap and Corner Guards Once wrapped, add a layer of bubble wrap for cushioning. Use corner protectors to prevent frame edges from denting or cracking if bumped. This extra layer is essential when you pack art with delicate glass or intricate wooden frames Step 4: Place in a Custom-Sized Box or Crate Select a box or crate that’s just slightly larger than the artwork. Too much space allows shifting, while a tight fit can cause pressure damage. For packing photo frames, slim but sturdy boxes are ideal to keep items upright and secure Step 5: Fill Empty Spaces with Cushioning Material Fill any gaps inside the box with packing peanuts, crumpled packing paper, or foam inserts. This stops movement during transport and absorbs impact if the box is accidentally dropped or stacked Step 6: Label the Box “FRAGILE” and Indicate “This Side Up” Once sealed, clearly label each box. Adding “FRAGILE” ensures movers treat it with care, and “This Side Up” helps maintain the correct orientation, especially for framed glass pieces that should never be stored flat How to Pack Framed Artwork for Moving When packing framed artwork or preparing to pack art with glass fronts, extra care is essential to avoid cracks, scratches, and breakage. Special Attention for Glass Frames Before wrapping, apply masking tape in an “X” pattern across the glass. This helps hold the pieces together if the glass breaks, reducing the risk of damage to the artwork inside. Adding Cardboard Cutouts for Extra Glass Protection Cut a piece of sturdy cardboard slightly larger than the glass surface and place it over the taped area. This adds

Packing Services

How To Pack Mugs For Moving

How to pack mugs for moving is one of the most important skills to learn before a relocation, especially if you want to avoid chips, cracks, or total breakage. Mugs often hold more than just coffee or tea they carry memories, gifts from loved ones, and unique designs that can’t be replaced. Because of their delicate handles and ceramic or glass material, they require the same careful approach you’d use for packing glasses when moving. The right techniques, such as wrapping coffee mugs with protective layers and securing them in sturdy boxes, can make the difference between unpacking your favorite mug in perfect condition or finding it broken at the bottom of the box. Why Properly Packing Mugs is Important When you’re getting ready for a move, small items like mugs can often get overlooked. But mugs are more fragile than they seem, and without the right mug packaging, they can easily break during transport. Let’s look at why packing mugs for moving the right way matters. Avoid Breakage Poor packing is the number one reason mugs end up chipped, cracked, or completely broken. Without proper padding or sturdy boxes, mugs can knock against each other during the move. Using bubble wrap, packing paper, or dividers ensures each mug stays secure and protected from sudden jolts. Protect Sentimental Items Some mugs aren’t just kitchenware they hold memories. Maybe it’s the one you got as a gift from a friend, or the one from your favorite vacation spot. Proper mug packaging keeps these sentimental items safe so you don’t lose something that means more than money can replace. Save Money Replacing broken mugs adds unnecessary costs to your move. By investing time in packing mugs for moving carefully, you avoid having to spend money buying replacements later. A little preparation now can save you from post-move shopping trips. Reduce Stress Moving is already stressful enough. When you know your mugs are packed securely, you can feel confident they’ll arrive in one piece. This peace of mind lets you focus on other parts of your move without worrying about unwrapping a box full of broken pieces. Materials Needed for Packing Mugs for Moving Before you start, gather the right supplies. Using the correct materials ensures your mug packaging is strong and secure. Here’s what you’ll need: Sturdy cardboard boxes – Choose small to medium-sized boxes to prevent them from getting too heavy and reduce the risk of mugs shifting inside. Packing paper or bubble wrap – Wrap each mug individually to protect it from chips and cracks during the move. Packing tape – Seal the boxes tightly so nothing comes loose in transit. Cardboard dividers (optional but recommended) – Keep mugs separated to avoid them bumping into each other. Labels and markers – Mark boxes as “Fragile” and note their contents for easy unpacking. You may read How To Pack Dishes For Moving Without Paper? Step-by-Step | How to Pack Mugs for Moving If you want your mugs to arrive in one piece, follow these proven steps. This method works not just for packing mugs for moving, but also for packing glasses when moving. 1. Clean and Dry Make sure every mug is completely clean and dry before packing. This prevents odors, stains, or mold from forming during the move. Even a little moisture can cause problems when items are wrapped for days. 2. Wrap the Handle First The handle is the most fragile part of the mug. Start by wrapping coffee mugs around the handle with a layer of bubble wrap or packing paper. This extra attention helps prevent chips and cracks where mugs break most easily. 3. Wrap the Entire Mug After protecting the handle, wrap the entire mug securely. For delicate or expensive mugs, use a double layer of bubble wrap or packing paper. This ensures that both the body and rim are safe from impacts. 4. Use Dividers or Cushioning If possible, place cardboard dividers in the box. These keep mugs from touching each other during transport. If you don’t have dividers, use crumpled packing paper between each mug to create a soft buffer. 5. Pack Snugly in the Box Choose a small to medium-sized box. Place wrapped mugs upright and fill all empty spaces with packing paper or soft cloths. A snug fit prevents mugs from shifting, which is one of the main causes of breakage. 6. Seal and Label the Box Close the box securely with packing tape. Label it clearly as “FRAGILE – MUGS” so movers know to handle it with care. Adding “This Side Up” can also help prevent mugs from being packed upside down. When it comes to packing services in Sherman Oaks, Chamomile Go is your trusted local expert. Our team uses professional techniques and quality materials to ensure your mugs, glasses, and other fragile items are safe during the move. From careful wrapping to secure boxing, we handle every detail so you can enjoy a stress-free moving experience. Choose Chamomile Go for reliable, efficient, and friendly service that puts your belongings first. How to Pack Coffee Mugs vs. How to Pack Coffee Cups While they may seem similar, packing coffee mugs for moving and packing coffee cups requires slightly different techniques to keep them safe. Coffee Mugs Coffee mugs are usually made of thicker ceramic and have larger, heavier handles. This makes the handle the most vulnerable part. When wrapping coffee mugs, start by protecting the handle with bubble wrap or packing paper. Then, wrap the entire mug with an extra layer to prevent chips or cracks during transport. Place mugs upright in the box and fill all gaps with packing material to keep them snug. Coffee Cups Coffee cups are typically lighter, smaller, and often come with matching saucers. The rim is more delicate, so it needs special protection. Wrap the cup first, focusing on the rim, and then wrap the saucer separately. Layer them with cardboard or packing paper between each piece so they don’t touch. For added

What Is the Average Cost of PODS Moving – 2025 Rates
Moving and Packing Services

What Is The Average Cost Of Pods Moving

What is the average cost of PODS moving? This is one of the most common questions people ask when planning a flexible, do-it-yourself move. PODS, short for Portable On-Demand Storage, are large, weather-resistant containers delivered right to your doorstep. After loading them at your own speed, they are either delivered to your new residence or stored safely until you’re ready.  Many residents in Los Angeles and surrounding areas like Pasadena, Irvine, and Santa Clarita choose PODS because they combine moving and storage in one service. The cost of a pod move can vary based on factors like distance, container size, and storage duration, and understanding typical PODS rates for moving can help you compare options before making a decision. What is the Average Cost of PODS Moving? If you are planning a move, you may be wondering about the average PODS moving cost. PODS provides portable storage containers that can be used for long-distance and local moves, as well as temporary storage. It is important to note that PODS moving costs vary depending on factors such as your location, the container size, and the time of year. It is common for local relocations to cost between $200 and $800, while long-distance relocations often cost between $450 and $7,600. Local Moving Costs with PODS Because transportation distances are shorter for local moves, the average PODS moving cost is generally lower because fewer services are required. Based on container size, how many days you need the container, and whether you require extra pickups or deliveries, you can expect to pay anywhere from $200 to $800 for a local move. A PODS move will cost more if you use larger containers or keep the unit for a longer period of time. Long-Distance Moving Costs with PODS There is an increase in the cost of PODS moving for cross-country or interstate relocations due to transportation, fuel, and logistics fees. PODS moving costs typically range between $450 and $7,600 for long-distance moves. Your exact cost will depend on the distance, container size, number of containers, and the season of the move. The high demand during the summer usually results in higher costs for moves. Short-Term Storage Rates with PODS Depending on the container size and location, PODS offers short-term storage services. On average, storage rates vary from $149 to $349 per month, depending on container size. If you use PODS moving, your total moving cost will include both delivery and storage, since this storage fee is separate from the transportation cost. When Would Someone Use PODS for Moving? People who prefer to pack at their own pace without being rushed by traditional moving services prefer PODS. It is ideal for DIY movers who prefer to move at their own pace. When the portable container is delivered to your site, you load it whenever it is convenient for you, and PODS will pick it up when you are ready. Situations Where PODS Moving Works Best Temporary Relocation If you’re moving for a short-term job assignment, military duty, or seasonal living, PODS can be a practical choice. You can keep the container for as long as you need, making it easy to move back or to a new location without the hassle of multiple moves. Combining Moving and Short-Term Storage Many people use PODS when they need both transportation and storage in one solution. For example, if your new home is not yet ready, PODS can store your container in a secure facility until you are ready for delivery. This is especially convenient during closing times, construction delays, and while waiting for a lease to begin. Downsizing or Remodeling PODS is also useful if you’re decluttering, staging a home for sale, or renovating. You can store extra furniture and belongings outside your home, keeping your space safe and organized during the process. Limitations to Keep in Mind While PODS offers convenience, there are a few limitations: Weight limits – Each container has a maximum weight capacity, which can affect what you pack. Access restrictions – Once the container is stored at a PODS facility, you may need to schedule access ahead of time. Space requirements – You’ll need enough driveway or street space to place the container at your location. You may read How Does Pods Moving Cost Per Mile Work? What Can You Store in a PODS Container? A PODS container can be used to store and move a wide variety of household items, making them an excellent choice for moving and storing. You can reduce the cost of POD moving by packing smartly by knowing what you can and cannot store, regardless of whether you are moving across town or across the country. Household Goods Most people use PODS containers to store common household belongings such as: Furniture (beds, sofas, tables, chairs) Appliances (washers, dryers, refrigerators) Packed boxes of clothing, books, or kitchenware Because PODS containers are weather-resistant, they can keep these items safe during transport or storage, helping you get the most value for the cost of a pod move. Seasonal Items PODS is also great for seasonal storage, especially if you’re remodeling, downsizing, or creating extra space at home. Examples include: Sports gear (bicycles, surfboards, ski equipment) Holiday decorations Patio furniture or gardening tools Items You Cannot Store For safety reasons, PODS has restrictions on certain materials. You cannot store: Flammable items (gasoline, propane tanks, fireworks) Perishable goods (fresh food, plants) Hazardous materials (pesticides, chemicals, explosives) The Importance of Proper Packing Although PODS containers are sturdy, proper packing is critical to protect your belongings during a move or during storage. Use sturdy boxes, bubble wrap, moving blankets, and tie-down straps to secure your belongings. In addition to protecting your valuables, you can also maximize space, potentially lowering the overall cost of POD moving by fitting everything into fewer containers. What Factors Can Affect the Cost of Short-Term Storage? When renting a PODS container for temporary use, several factors can influence the total price. Understanding these will help you better plan your budget

How to Pack TV for Moving Without Box | Easy Guide
Moving and Packing Services

How To Pack Tv For Moving Without Box

How to pack TV for moving without box can seem challenging, especially when you no longer have the original packaging designed to protect your screen. Flat-screen TVs are delicate and expensive, making them one of the most vulnerable items during a move. Without the manufacturer’s box, the risk of scratches, cracks, or internal damage increases. That’s why using proper alternatives like bubble wrap for packing TV is essential. It acts as a cushion to absorb shocks and bumps during transport. Many people successfully manage packing a TV for a move using everyday moving supplies. With the right materials and careful steps, you can safely relocate your television without worry. What If You Don’t Have the Original Box for Your Flat-Screen TV? No box? No problem. Moving your flat-screen TV without the original packaging is common and safe when done right. Why Original Boxes Matter TV boxes are designed to fit perfectly, with custom foam inserts and protection for corners and screens. They help prevent damage during a move. But most people don’t keep them because they’re bulky and hard to store. TV Packing Without Boxes – Is It Safe? Yes, it’s safe! TV packing without boxes can be done with the right materials: Don’t forget to remove and pack cords, remotes, and stands separately. Why Use a TV Packing Service? Hiring a TV packing service means: It’s a stress-free way to protect your electronics especially for long-distance or commercial moves. You may read How Do You Move Your Computer And Stuff? Essential Packing Materials to Replace the Original Box If you don’t have your TV’s original box, don’t worry the right packing materials can still protect your screen during a move. Here’s what you’ll need for TV packing without boxes: Bubble Wrap Bubble wrap cushions your TV and absorbs shocks during transport. Wrap multiple layers around the screen and edges to prevent cracks and scratches. Moving Blankets Thick moving blankets add an extra protective layer, especially against bumps or rough handling. They’re ideal for wrapping the entire TV after bubble wrap. Cardboard Sheets or Corner Protectors Flat cardboard sheets or foam corner protectors shield the edges the most fragile part of a flat-screen. These help prevent chips and screen pressure. Packing Tape Use strong packing tape to secure the wrap and blankets in place. Don’t apply tape directly on the TV surface. Shrink Wrap or Stretch Film Wrap everything tightly with stretch film to hold all layers together. This also helps keep dust and moisture away. Soft Cloth or Microfiber Before wrapping, cover the screen with a microfiber cloth or soft, lint-free fabric to prevent surface scratches and static buildup. Using these materials ensures your TV packing without boxes is just as safe. Or, let a TV packing service like Chamomile Go handle it all with professional care no original box needed. Step-by-Step Guide | How to Pack a TV for Moving Without the Original Box Packing your TV without the original box may sound risky, but with the right approach, you can move it safely. Whether you’re doing it yourself or hiring a TV packing service, follow these steps to protect your screen during the move. 1. Clean and Prepare the TV Make sure all cords and accessories are unplugged before you start packing. Coil and label them to make setup easier after the move. Use a soft microfiber cloth to gently clean the screen, removing dust and fingerprints that could cause smudges or scratches when wrapped. 2. Protect the Screen First Start by placing a microfiber cloth directly on the screen. For extra protection, add a flat cardboard sheet over the cloth to shield against pressure. You can also use a screen protector film if you have one on hand. 3. Can a TV Be Protected by Bubble Wrap? Absolutely. Bubble wrap provides excellent shock absorption during transit. If available, use anti-static bubble wrap, especially for LED, OLED, or Smart TVs, to prevent static damage. 4. How Many Bubble Wrap Layers Are Appropriate for a TV? Wrap the TV with at least two to three layers of bubble wrap to create a soft cushion. Pay extra attention to the corners these are the most impact-prone areas by adding additional padding there. Secure the bubble wrap in place with packing tape, avoiding contact with the TV surface. 5. Wrap with Moving Blankets or Towels After bubble wrapping, use moving blankets or thick towels to add an outer layer of protection. This helps shield the TV from bumps, scratches, and pressure during loading and unloading. Wrap tightly and finish with stretch film to hold everything together. 6. Secure the TV Upright Always keep the TV standing upright when loading it into your car or moving truck. Never lay it flat, as that increases the risk of screen damage. Use foam padding, pillows, or soft furniture to wedge the TV securely in place so it doesn’t shift during transit. How Can a 65-Inch TV Be Packed Without a Box? Packing a 65-inch TV without the original box requires special care due to its size and weight. These larger screens are more fragile and harder to handle alone, so here are a few essential tips: If you’re unsure or want to avoid the risk, our TV packing service in Sherman Oaks offers professional handling for large TVs. At Chamomile Go, we bring the right materials and experience to safely pack and transport your 65-inch TV no original box neede. Final Thoughts It’s absolutely possible to pack and move a TV without the original box. With the right materials like bubble wrap, moving blankets, and custom-cut cardboard and careful handling, your TV can arrive safely at your new place. But if you’d rather skip the stress and ensure it’s done right, let the professionals handle it. At Chamomile Go, we offer expert TV packing services in Sherman Oaks and nearby areas. Whether it’s a 65-inch screen or a smaller unit, we make sure your electronics are moved with care. Ready for a

moving pods cost per mile
Moving and Packing Services

How Does Pods Moving Cost Per Mile Work?

How does PODS moving cost per mile work? PODS offers a flexible moving and storage solution where you can pack at your own pace, and they handle the transportation of your container. Many people want to know the PODS cost per mile or the PODS per mile cost so they can plan their moving budget more effectively. Whether you’re relocating locally or across the country, understanding how this cost works helps you compare prices with traditional moving companies and make an informed decision. The final price you pay can vary depending on several factors such as the total distance of your move, your location, the size of the container, and whether you choose local or long-distance service. By knowing the per-mile cost structure, you can better estimate your total moving expenses before booking. PODS Moving Cost Per Mile | Understanding the Rates When planning a move, many people ask, “What is PODS moving cost per mile?” This is an important question, especially if you’re comparing moving options. PODS per mile cost is the distance-based charge that PODS adds to your total moving price. This cost helps determine how much you will pay based on how far your container travels from your starting point to your destination What Does Cost Per Mile Mean for PODS Moving Services? In PODS pricing, cost per mile refers to the charge applied for each mile your container is transported. This is separate from other costs like container rental, delivery, and pick-up fees. The moving pods cost per mile is more noticeable in long-distance moves, but even local moves may have a small mileage-related fee depending on the location and route How PODS Calculates Distance Charges for Local and Long-Distance Moves PODS uses different methods to calculate mileage costs depending on whether it’s a local move or a long-distance move Local Moves – Often charged as a flat rate that may include a set mileage limit. If you exceed that limit, PODS may charge an additional per-mile fee Long-Distance Moves – Mileage is factored directly into your overall moving quote. The further the distance, the higher the PODS per mile cost. This is because fuel, driver time, and transportation logistics all increase with distance Factors That Impact the Per-Mile Rate Several elements can affect your moving pods cost per mile Distance – Longer routes generally have a higher total mileage charge Fuel Prices – When fuel costs rise, transportation expenses increase, which can influence per-mile rates Location – Moving between high-demand cities or remote areas can change the PODS per mile cost due to availability and routing challenges Time of Year – Summer is peak moving season, which may affect overall rates including mileage charges You may read How Much Does It Cost To Rent A Pods Moving? Average Cost of PODS Moving The average cost of PODS moving can vary based on the size of your move, distance traveled, and time of year. Understanding these averages can help you budget more accurately when planning your relocation. PODS offers different container sizes to fit small, medium, and large moves, and the price changes depending on how far you’re going Typical Cost Range by Move Size Small Moves (Studio or 1-Bedroom Apartment) – Usually require a smaller container. Average local move costs range from $300–$800, while long-distance moves can be $1,000–$3,000 Medium Moves (2–3 Bedroom Home) – May require one medium or large container. Local costs range from $500–$1,500, and long-distance from $2,000–$4,500 Large Moves (4+ Bedroom Home) – Often need multiple containers. Local costs can be $800–$2,000, and long-distance may range from $3,000–$7,000 Example Scenarios 50-Mile Local Move (Medium Home) – About $600–$1,200, including container rental and transportation 1,000-Mile Long-Distance Move (Large Home) – Around $4,000–$6,000 depending on the season and fuel costs Average Cost by Distance Distance Small Move Medium Move Large Move Local (Under 50 mi) $300–$800 $500–$1,500 $800–$2,000 250 Miles $800–$2,000 $1,500–$3,000 $2,500–$4,000 1,000 Miles $1,000–$3,000 $2,000–$4,500 $3,000–$7,000 PODS Long-Distance Moving Cost The PODS long-distance moving cost depends mainly on the distance traveled, container size, and how many containers you need. Unlike short local moves, long-distance moves factor mileage directly into the total cost. This includes transportation, fuel, driver labor, and logistics for delivering your container from one state to another How Long-Distance Costs Are Calculated For long-distance and cross-country moves, PODS provides a quote that bundles several pricing components: Container Size & Quantity – Larger homes often require multiple containers, increasing the total cost Distance & Mileage – Longer moves, such as interstate or coast-to-coast relocations, will have higher transportation fees Fuel & Logistics – Cross-country transport involves higher fuel costs, tolls, and coordination for container transfers between PODS facilities Season & Demand – Summer is the busiest moving season, often leading to higher rates for long-distance relocations Mileage Pricing for Cross-Country or Interstate Moves PODS typically includes mileage charges as part of your quote for interstate moves. The per-mile cost isn’t usually billed separately but is built into the total. The further you move, the more mileage contributes to the total PODS long-distance moving cost. For example, a 500-mile move will cost less than a 2,000-mile move due to lower transportation expenses and fuel usage Example Long-Distance Cost Breakdown Distance Small Move (Studio/1-Bedroom) Medium Move (2–3 Bedrooms) Large Move (4+ Bedrooms) 500 Miles $1,500–$3,000 $2,500–$4,500 $3,500–$6,000 1,000 Miles $1,800–$3,500 $3,000–$5,000 $4,000–$6,500 2,000 Miles $2,000–$4,000 $3,500–$5,500 $4,500–$7,000 If you’d like, I can now merge this PODS Long-Distance Moving Cost section with your PODS Moving Cost Per Mile and Average Cost of PODS Moving into a single, fully SEO-optimized, entity-based guide that ranks for all your target keywords. PODS Local Moving Cost The PODS local moving cost is generally more affordable than long-distance moves, but pricing still depends on container size, rental period, and distance. Local moves are usually charged as a combination of a daily or monthly container rental rate plus any per-mile charges if you exceed a set mileage limit. How Local Moves Are Priced Container Rental Rate – For

Our Client's Reviews

Get In Touch With Us!

Find Us

Office Address

    Los Angeles, California

Office Phone

    +1 310-895-3517

Email Address

  Chamomilemoving@gmail.com

Let’s get you moving! Grab your FREE quote now.

Chamomile Go offers premier moving services throughout Los Angeles County, CA, ensuring a hassle-free relocation experience for all our clients.

+1 310-895-3517

24/7 Support

© 2025 Created by LocalPro1