Get a Free Quote

Edit Template

Author name: 2m54a

How to Pack Pillows for Moving | Quick Guide
Moving and Packing Services

How To Pack Pillows For Moving

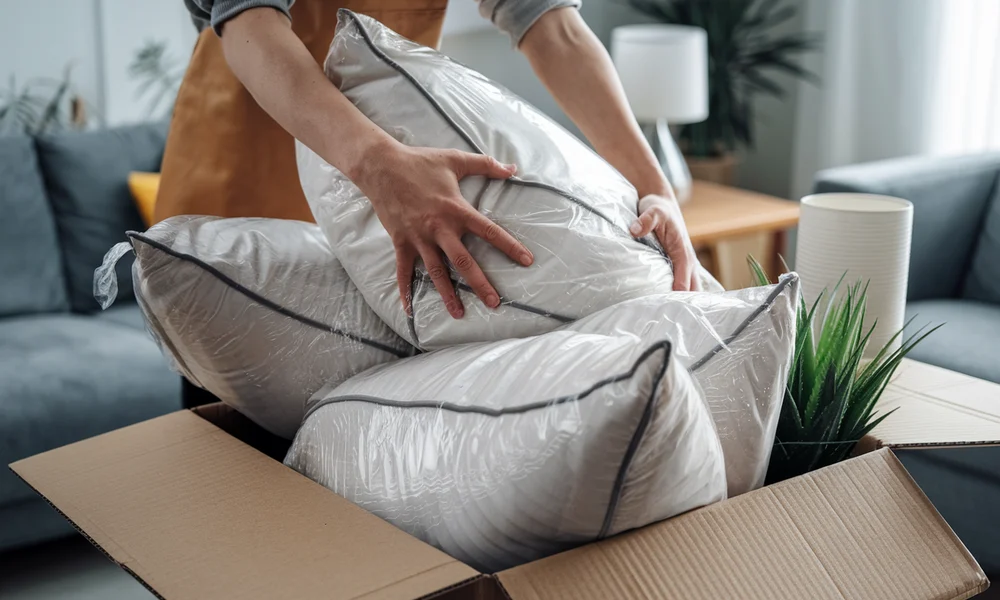
How to pack pillows for moving is an important consideration that can often be overlooked during the hustle of relocation. Proper packing not only saves valuable space but also protects your pillows and bedding from dirt, moisture, and potential damage. Improper techniques can result in unnecessary bulk, stained fabrics, or even flattened and misshapen pillows by the time you arrive at your new home. In this article, we’ll cover efficient methods for packing pillows and bedding, including the best materials to use, space-saving strategies, and tips to keep everything clean and fresh throughout the move. Why It’s Important to Pack Pillows Correctly When it comes to moving, many people overlook the importance of proper pillow packing. However, taking the time to pack pillows the right way can make a big difference in keeping them fresh, clean, and undamaged throughout the move. Preventing Damage and ContaminationPillows may seem soft and harmless, but they can easily collect dust, dirt, and even pests if not packed properly. Using proper pillow packing for moving helps prevent exposure to dirt or damage from heavier items being placed on top of them. Clean plastic bags or vacuum-sealed storage bags can shield your pillows from moisture and contamination. Saving Space in Moving Boxes/TrucksIt can be astonishing how much space pillows can occupy. Smart pillow packing can help you save valuable space in boxes or the moving truck. Compressing pillows in vacuum-sealed bags reduces their size significantly, allowing you to fit more into each box while keeping things organized. Keeping Pillows Fresh and CleanNothing’s worse than unpacking musty or dusty pillows in your new home. Correct pillow packing for moving ensures your pillows stay fresh and clean, ready for immediate use. Always make sure your pillows are completely dry before packing, and consider adding dryer sheets or sachets for a fresh scent upon arrival. Best Way to Pack Pillows for Moving When it comes to packing pillows for a move, doing it the right way ensures they stay clean, protected, and ready to use when you unpack. Whether you’re moving across town or across the country, follow this simple guide to get the job done efficiently. Step-by-Step Instructions: Sort and Clean Pillows BeforehandBefore any pillow packing begins, sort through your collection. Decide which pillows to keep, donate, or toss. Wash and dry the ones you plan to bring this helps avoid transferring dirt, dust, or odors to your new space. Choose a Storage Method: Box, Plastic Bag, or Vacuum BagEach pillow storage bag option has its own advantages, depending on the type of pillows you’re packing and how much space you have: Cardboard Box: Great for keeping shape intact. Stack clean pillows loosely inside and seal with tape. Plastic Bag: A budget-friendly option that offers basic protection. Be sure to use clean, durable bags and tie or seal them shut. Vacuum Bag: Best for space-saving, especially during long-distance moves. These bags are perfect for confined locations because they drastically reduce the size of large cushions.  Avoid Over-Compressing Down or Feather PillowsWhile vacuum bags are great for synthetic or foam pillows, be cautious with feather or down-filled ones. Over-compressing can damage the fill and reduce their fluffiness over time. When using a pillow storage bag, lightly press the air out without applying too much pressure. Label for Easy UnpackingClearly label each container or pillow storage bag with its contents and the room it belongs to (e.g., “Guest Room – Pillows”). This will make unpacking faster and more organized at your new home. If you want moving services in Los Angeles contact no other than Chamomile Go. Pros and Cons of Each Pillow Packing Method: Method Pros Cons Box Maintains pillow shape, easy to stack Takes up more space in truck or storage Plastic Bag Affordable, provides basic protection Limited compression, risk of tearing Vacuum Bag Major space-saver, protects against moisture Can damage delicate fills, not ideal for all pillows How to Pack Pillows for Moving Using Plastic or Vacuum Bags When you’re packing pillows for a move, using the right type of bag can save space and keep your pillows clean. Vacuum and plastic bags are two of the most popular choices. Here’s how to use each one properly. Benefits of Vacuum Bags for Pillow Packing Vacuum bags are a great choice for pillow packing during a move. Here’s why: Space-saving – They squeeze the air out, making your pillows much smaller and easier to pack. Moisture protection – Vacuum bags help keep your pillows dry and safe from spills or damp air. How to Use Vacuum Bags Properly Not all pillows are the same, so it’s important to know how to use vacuum bags the right way. Good Pillow Types for Vacuum Bags: Synthetic fiber pillows Polyester or foam pillows Tips to Avoid Damage to Delicate Pillows: Don’t put down, feather, or memory foam pillows in vacuum bags. If you must pack them this way, don’t remove all the air—leave a little room so they’re not squished flat. Try not to store them compressed for too long. Fluff them up as soon as you unpack. Plastic Bags as an Alternative for Pillow Packing If you don’t have vacuum bags, large plastic bags can work too for packing pillows. Tips for Using Plastic Bags: Use clean, thick plastic bags so they don’t rip during the move. Add small air holes if the pillows will be packed for a long time. This helps prevent moisture build-up. Tie or tape the bags securely, but don’t compress the pillows too much. How to Pack Comforters for Moving Comforters are big and fluffy, which makes them tricky to pack. But with the right steps, you can keep them clean, protected, and easy to move. Here’s how to do it: Step 1: Prep Your Comforters Before you pack anything, it’s important to prep your comforters the right way. Clean Them First: Wash and fully dry your comforters before packing. This keeps them fresh and helps avoid mold or smells later. Fold Neatly: Fold

What Is a Moving Pod? Everything You Need to Know
Moving and Packing Services

What Is a Moving Pod? Everything You Need to Know

What is a moving pod? A moving pod, also called a portable storage container, is a convenient solution for people preparing to relocate or needing extra storage space. The process is simple: the company delivers the pod directly to your home, allowing you to pack and load your belongings at your own pace. Once you’re finished, the company picks it up and either transports it to your new address or stores it securely until you’re ready for delivery. Moving pods provide flexibility and control in the moving process in a way that traditional moving services cannot. Rather than sticking to someone else’s schedule, you have a schedule to follow, and you choose when to pack, when to move, and how everything is organized. They are incredibly popular among anyone looking for a more simplified, cost-effective way to move. Being able to plan everything on your own schedule is why so many families and businesses are proactively adopting moving pods as an alternative to traditional moving services. What Is a Moving Pod? A Simple Explanation If you’ve ever asked yourself what are pods in moving? You are not the only one. A moving pod is a portable storage unit made to simplify relocating or storing your goods. The moving pods are sent directly to you, allowing you to pack and load your belongings at your leisure(Pods provide convenience). When you (finish moving) complete your moving process, the moving company/ pod company takes the pod to your new residence or stores it until you prefer to move into your new residence.  The flexibility of being able to pack and load your pod has become a widely chosen alternative to traditional truck movers or full-service movers not only because of the ease but because it typically offers savings and even more control. Physical Characteristics of Pods.  When somebody asks, what are pods? Usually, they are asking about the way they look or their construction. Fundamental elements of a pod. Size Options: Pods are available in many sizes, generally between 7 and 16 feet long. 7-foot pods: Wonderful for a small apartment, dorm, or limited storage. 12-foot pods: Perfect for a 2-3 room apartment. 16-foot pods: Great for larger moves like a 3-4 bedroom home. Weather-Resistant Materials: Most moving pods are constructed with weather-resistant materials such as steel frames, aluminum siding, or sturdy composite panels. This protects your things against rain, wind, and prolonged exposure to the sun.  Easily Transported: Moving pods are picked up and delivered using specialized hydraulic systems which retain the container level. This reduces the chances of items shifting, tipping, or breaking while being moved. They can be used for local and long-distance transportation. Who Uses Moving Pods? Because of their versatility, moving pods are useful for many types of people and situations: Families: Perfect for household moves, especially for long-distance relocations, since they allow for flexible packing and unpacking. College Students: Great for students moving into or out of dorms or small apartments, thanks to the smaller pod sizes. Military Personnel: Ideal for frequent relocations, offering both short-term and long-term moving or storage solutions. Long-Distance Movers: A practical and often more affordable option than hiring traditional movers when moving across state lines or cross-country. How Does PODS Work for Moving? If you’re preparing for a move and want an alternative to traditional movers, PODS might be a good option for you. Before we get too far, let’s address a question we’re often asked: What are PODS? PODS stand for Portable On Demand Storage. These are durable, waterproof containers that are brought directly to your home. Once the container drops off at your location, you have the flexibility to get your POD ready on your own timeline. Below is a breakdown of the entire process: 1. Container Delivery One of the first homes you will have as part of the PODS process is receiving the POD container that is dropped off at your home, driveway, or curb. You do not have to travel somewhere to access a storage unit  the PODS come to you. The container comes in several sizes, and you can choose what size POD will work best for you based on how much you have to move or store. 2. Pack At Your Own Pace One of the exciting features of PODS is their flexibility. Your packing can happen whenever you want — whether you want to set a day aside to get it done, or if that packing occurs over several weeks. Being able to fit your packing into your own schedule adds more control to the process and reduces what is already a stressful schedule when moving to a new home. 3. Pickup, Delivery, or Storage When you’re finished packing, PODS will return to pick up the container. From there, you can decide what happens next: Have it delivered to your new home for unloading. Send it to a secure storage facility if you’re not ready to move in yet. This flexibility makes PODS a popular alternative to traditional moving services, especially for people who want convenience, time, and cost savings. Have it delivered to your new home (across town or across the country). Store it at a secure PODS storage center until you’re ready. Comparison: PODS vs Traditional Movers PODS Traditional Movers You pack at your own speed Professional movers do all the heavy lifting More flexibility in timing Fast and efficient packing/loading Cost-effective for many people Less physical work for you Great for temporary storage Experienced in handling fragile or bulky items You control how things are packed Set moving date — no waiting around Ideal for short or long-term storage needs Usually quicker from start to finish Benefits of Using Moving Pods Ease of Scheduling and Packing Flexible scheduling is one of the greatest benefits of using a moving pod. You control when the pod arrives, how long you take to pack, and when the pod is picked up or delivered. No need to worry if packing takes two days or

How to Transport Plants When Moving Long Distance Safely
Moving and Packing Services

How To Transport Plants When Moving Long Distance

How to transport plants when moving long distance can be a challenging task for many plant owners. Ensuring the safe arrival of plants over long distances involves considering various factors such as temperature, humidity, light, and handling. Improper transport can lead to stress, damage, or even the death of the plants. This makes it crucial to understand the best practices and strategies to maintain their health during the journey. Proper plant transport is essential for their survival, as plants are sensitive to changes in their environment and require special care to adjust to new conditions. Why Moving Plants Requires Special Care Fragility During Transit Due to their fragility, plants are readily harmed in transit. Roots, stems, and leaves need protection from jolts, tipping, or temperature changes. Local vs. Long-Distance Moves Local moves are shorter and less stressful, but long-distance moves expose plants to more risks like temperature fluctuations and dehydration. Impact of Temperature and Humidity Extreme temperatures and low humidity can harm plants, causing dehydration, shock, or fungal growth. Keeping plants at a stable temperature is essential. Reducing Stress Stress from the move can lead to leaf drop or illness. Proper packing, hydration, and protection from harsh conditions are key to moving plants without killing them. For moving services in Los Angeles trust only Chamomile Go. How to Care for Plants While Moving Watering Before the Move:Water your plants a day or two before moving with plants. This helps ensure they are well-hydrated without being waterlogged. Avoid watering them right before the move, as excess water can cause the soil to shift and make a mess. During Transit:While moving with plants, it’s important to avoid overwatering. Don’t let the soil get soggy, but keep it damp enough. If you’re traveling long distances, you can place a damp cloth or paper towel around the roots to maintain moisture without dripping. Light and Temperature Proper Lighting:Before moving with plants, ensure they are not in direct sunlight for long periods as this can stress them out. Try to keep them in indirect light or a shaded area. During the move, avoid exposing them to bright lights for extended times to reduce stress. Temperature Protection:To maintain a safe temperature during the journey, avoid leaving plants in hot or cold environments. If you’re traveling by car, keep the plants in the passenger compartment, as the trunk can get too hot or cold. For long-distance moves, consider insulating the plants using bubble wrap or blankets to maintain a consistent temperature. Packaging Packing Plants Safely:When learning how to move with plants, packaging is crucial. Start by gently removing the plant from its pot to prevent damage. Wrap the root ball in damp newspaper or a plastic bag to hold moisture and protect it from drying out. Using Boxes and Cushions:Place the wrapped plants inside sturdy boxes that are slightly bigger than the plant to allow for some movement. Use crumpled newspaper or packing peanuts to cushion the plant and prevent it from shifting or breaking during transit. Make sure the box is ventilated to avoid heat buildup. How to Move with Plants: Planning Ahead Restrictions on Transporting Plants:Before moving with plants, check local regulations regarding plant transport. Some states or countries have restrictions on moving plants across state lines or internationally to prevent the spread of pests and diseases. Research and make sure your plants meet all necessary requirements, including documentation and inspections. Pest Inspections:Many regions require pest inspections before transporting plants. Make sure your plants are pest-free and obtain any required certifications to avoid delays or fines during transit. This is particularly important for long-distance or international moves. Transport Options Personal Car:Transporting plants in your personal car is a good option for local moves. You have control over temperature and light conditions, which can help keep the plants comfortable. However, this method can be limited by the number of plants and the space in your car. Professional Movers:Professional moving companies may offer plant transport services, especially for long-distance moves. They can provide the expertise needed to pack and protect plants during the journey. However, this option can be expensive, and not all movers may handle plants with the same level of care. Shipping Plants:Shipping plants via a courier is a practical option for long-distance moves. However, this method can expose plants to longer transit times and potential temperature extremes. It’s important to use a reliable courier and consider express shipping to minimize risks. Pros of Each Method Personal Car:Pros: Cost-effective for minor adjustments and control over circumstances. Professional Movers:Pros: Expertise in handling plants, convenient for large moves. Shipping Plants:Pros: Convenient for long-distance moves, good for a large number of plants. Planning ahead by considering these transport options and regulations will ensure that you move with plants safely and smoothly. How to Transport Tall Plants in Car Securing Tall Plants:When figuring out how to move with plants, especially tall ones, securing them properly in the car is key to preventing damage. To lessen weight and stop soil moving, try to take the plant out of its pot. Wrap the root ball in a plastic bag or damp newspaper to keep it secure and moist. Tips for Preventing Damage:To prevent damage to the plant and pot, place the plant in a sturdy container or box. If the plant can’t be removed from the pot, secure the pot in a box or crate to avoid tipping over. You can also use packing materials like bubble wrap or towels to cushion the plant. Ensure the plant isn’t leaning against any sharp edges or other objects. Creative Solutions Fitting Tall Plants in Your Vehicle:If you’re moving with plants in your car, and the plant is too tall to sit upright, try laying down the back seats to create more vertical space. You can also tilt the plant slightly or place it in the footwell to prevent it from being crushed by the ceiling. For larger vehicles, such as SUVs or minivans, you might be able to stand the plant up

What To Do When Moving To A New State | A Step-by-Step Guide
Moving and Packing Services

What To Do When Moving To A New State

What to do when moving to a new state involves more than just packing boxes and hiring movers—it’s a life-changing decision often driven by factors like job opportunities, lifestyle changes, familial requirements or the wish for a new beginning. Whether you’re chasing a dream job, seeking a lower cost of living, or moving closer to loved ones, relocating to a new state is a significant transition that requires careful consideration. Planning ahead is essential to make the move smoother and less stressful, helping you avoid unexpected costs and last-minute headaches. In this guide, we’ll walk you through not only what steps to take when preparing for an interstate move but also common pitfalls to avoid so you can settle into your new home with confidence and peace of mind. How I Prepared to Move Out of State Talk To Moving Company Expert Moving out of state was a big decision for me. To make sure I didn’t miss anything important, I created a moving out of state checklist. There were many things to consider when moving out of state, and here’s how I handled each step. Researching the New Location The first thing I did was research the new city. I checked the cost of living to see if I could afford it comfortably. I also looked at crime rates to find safe neighborhoods. Even though I don’t have kids, I read about the local schools because good schools often mean a nice community. This research helped me feel more prepared and confident about moving. Visiting in Advance If possible, I recommend visiting the place before you move. I took a quick trip to my new city to explore. I walked around different neighborhoods, checked out grocery stores, and got a feel for the area. Visiting helped me imagine what life would be like there and made the move less scary. Downsizing and Decluttering Before packing, I went through all my belongings and started downsizing and decluttering. I sold things I didn’t need, gave away clothes I never wore, and threw out old stuff. This made packing easier and saved money because I had less to move. Budget Planning Moving can be expensive, so I made a clear budget plan. I wrote down all expected costs, like moving truck rental, gas, packing supplies, and deposits for my new place. Having a budget helped me avoid surprises and stay within my limits. Following my moving out of state checklist and paying attention to all the things to consider when moving out of state made my move easier and less stressful. If you’re planning a move, taking time to prepare like this really helps. You can also read about How To Move From State To State. What to Do When Moving to a New State Moving to a new state can be exciting but also a little overwhelming. To help you stay organized, here are the top 10 things to do when moving to a new state. Using a moving out of state checklist can make the process easier by keeping track of all the important tasks. Plus, there are many things to consider when moving out of state to ensure a smooth transition. 1. Create a Moving Checklist Start by making a detailed moving out of state checklist. This will help you keep track of all the steps and deadlines. Include packing, notifying important contacts, and setting up services at your new home. 2. Research the New Area Thoroughly Before moving, spend time learning about your new city or town. Examine living expenses, crime statistics, educational institutions, and employment prospects. Knowing these details is one of the most important things to consider when moving out of state. 3. Set a Moving Budget Moving can get expensive, so plan your budget carefully. Include costs like moving supplies, hiring movers or renting a truck, travel expenses, and deposits for utilities or housing. 4. Hire a Reputable Moving Company or Rent a Truck Decide whether to hire professional movers or rent a truck and move yourself. Research companies, read reviews, and get quotes to choose the best option for your budget and needs. 5. Update Your Address Everywhere Make sure to update your address with the post office, banks, credit cards, insurance companies, and any subscriptions. 6. Transfer Utilities and Services Arrange for utilities like electricity, water, gas, internet, and cable to be turned off at your old home and set up at your new one. Don’t forget to transfer your phone service if needed. 7. Register Your Vehicle and Update License The majority of states have deadlines for getting a new driver’s license and registering your vehicle. This is an important thing to consider when moving out of state to avoid fines. 8. Change Insurance Policies (Auto, Health, Renters/Home) Contact your insurance providers to update your policies with your new address. Some rates and coverage options might change depending on your new location. 9. Establish Residency (Voter Registration, etc.) If you want to vote or qualify for in-state tuition, register to vote and complete any residency paperwork required by your new state. 10. Find Local Services (Doctors, Schools, Internet, etc.) Look for new schools, physicians, and internet providers in the area before you relocate. This helps you settle in quickly and avoid disruptions in important services. Following these top 10 steps and using a thorough moving out of state checklist will help you handle all the things to do when moving to a new state smoothly. Taking time to plan means less stress and a fresh start in your new home. What Not to Do When Moving to a New State Don’t procrastinate planning. Waiting too long to organize your move can cause unnecessary stress and last-minute problems. Start early to stay on track. Don’t forget to cancel or transfer subscriptions and gym memberships. Overlooking these can lead to unwanted charges after you’ve moved. Don’t assume living costs will be the same. Different states have different prices for housing, groceries, and services.

What Size Moving Truck Do I Need? Guide for All Moves
Moving and Packing Services

What Size Moving Truck Do I Need

What size moving truck do I need? Choosing the right truck size depends on the size of your home and the number of belongings you’re moving. A 10-12 foot truck is good for a studio or 1-bedroom apartment, while a 20-26 foot truck works for larger homes. Consider the type of furniture, fragile items, and any special needs for your move. It’s also important to think about truck features like fuel efficiency and ease of driving, especially if you’re new to handling large vehicles. Properly estimating your items and checking with the rental company for recommendations can help ensure you pick the right size. How to Calculate the Right Size of Truck for Moving When planning a move, choosing the right moving truck size is crucial to ensure you can fit all your belongings while avoiding unnecessary trips or extra costs. Here’s a breakdown of common moving truck sizes, their typical load capacities, and their benefits and drawbacks. 10-Foot Truck Capacity: This is the smallest truck available for rental. It can hold around 1-2 rooms of furniture, making it ideal for a small apartment, dorm room, or studio. Average Weight Capacity: Typically, a 10-foot moving truck can handle up to 2,000-3,000 pounds. Benefits: Perfect for small moves; it’s easy to maneuver in tight spaces and requires less fuel. Drawbacks: Limited space means it might not be suitable for larger homes or moves with more items. You may need to make multiple trips. 15-Foot Truck Capacity: This truck is better for a small house or a 1-2 bedroom apartment. It can hold about 2-3 rooms worth of furniture and belongings. Average Weight Capacity: Usually, it can support up to 4,000 pounds. Benefits: Offers more space than the 10-foot truck while still being relatively easy to drive. Drawbacks: It might still feel a bit cramped for larger moves, and depending on your load, you might need to optimize packing. 20-Foot Truck Capacity: This size is great for larger apartments, 2-3 bedroom homes, or if you have a lot of items like furniture, appliances, and boxes. Average Weight Capacity: Typically supports between 6,000-7,000 pounds. Benefits: Ideal for larger moves; offers good capacity without requiring a large moving team. It’s spacious but not too large to handle. Drawbacks: Slightly more challenging to maneuver than smaller trucks, and fuel consumption can be higher. You might need to pack carefully to avoid wasting space. 26-Foot Truck Capacity: The largest truck size available for moving, this truck can carry the contents of a 3-4 bedroom home or even more, depending on the layout of your space. It’s perfect for large families or those with lots of heavy items like couches, large appliances, and more. Average Weight Capacity: A 26-foot truck can typically hold up to 10,000 pounds. Benefits: Maximum capacity means fewer trips and fewer moving expenses if you’re trying to save on mileage. It’s best for large-scale moves. Drawbacks: Difficult to drive, especially in urban areas or tight spaces. It can also be more expensive to rent due to its size, and its large footprint means it requires more parking space. How to Choose the Right Moving Truck Size When choosing from these moving truck sizes, it’s important to consider: The amount of stuff you have: A good rule of thumb is to estimate how many rooms your belongings fill. A 10-foot truck works well for 1-2 rooms, while a 26-foot truck is necessary for larger homes. The weight of your items: Be mindful of the weight capacity. Exceeding the weight limit can cause issues, including damage to the truck. Distance of your move: If you’re moving a long distance, renting a larger truck might help you save on multiple trips, even though it comes with higher fuel costs. Your comfort with driving a larger truck: If you’re not accustomed to driving larger vehicles, consider renting a smaller truck to make the process smoother. You can also read about Packing services in Los Angeles. How to Calculate the Right Size of Truck for Moving Choosing the right moving company truck sizes is crucial to ensure your move goes smoothly. Selecting the proper truck helps avoid making extra trips or overloading the vehicle. Here’s a step-by-step guide to determine the right size truck for your move. 1. Consider the Number of Rooms in Your Home Start by estimating how many rooms your home has. A general rule of thumb is: Studio/1-Bedroom Apartment: A 10-foot truck should be sufficient. 2-Bedroom Apartment/House: A 15-foot truck is ideal for moves with 2 bedrooms. 3-Bedroom House: A 20-foot truck is typically needed. 4+ Bedroom House: A 26-foot truck will likely be required for larger homes. 2. Evaluate the Size and Weight of Large Furniture Items Larger furniture like sofas, refrigerators, and beds take up significant space, so it’s essential to account for them when choosing the truck size. Here’s a quick estimate of their space requirements: Sofas/Sectionals: Around 20-60 cubic feet, depending on size. Refrigerators: Typically 40-60 cubic feet. Beds: A queen or king-size bed can take up about 50-60 cubic feet. Dining Tables: Around 40-50 cubic feet. Sum up the cubic feet of your large furniture to help determine how much space they’ll need in the truck. 3. Assess the Volume of Boxes and Other Belongings Consider the volume of smaller items such as boxes, clothing, and kitchenware. Each box can take up around 1-5 cubic feet, depending on its size. Estimate the number of boxes and their sizes to get a better idea of how much space you’ll need. For example: Small boxes: 1-2 cubic feet. Medium boxes: 3-4 cubic feet. Large boxes: 4-6 cubic feet. Volume Estimation: Understanding Cubic Feet Cubic feet measures the total space available in a truck. Here’s how it typically breaks down: 10-foot truck: 400-500 cubic feet. 15-foot truck: 700-800 cubic feet. 20-foot truck: 1,000-1,200 cubic feet. 26-foot truck: 1,600-1,800 cubic feet. To estimate how much space you need, sum up the cubic footage of your items and compare it to the truck’s

What to Pack First When Moving | Step-by-Step Guide
Moving and Packing Services

What To Pack First When Moving

What To Pack First When Moving can be challenging to figure out, particularly if you’re unsure about what to bring first. With so much to do, moving to a new house can be both exhilarating and stressful. Being organized and packing wisely are the greatest ways to stay on course. Creating a packing list for moving is an easy way to stay organized and ensure that your most valuable belongings are available when you need them. You can save yourself a great deal of anxiety and uncertainty by starting early and following a packing schedule for moving. To keep things going smoothly, concentrate on packing the necessities first and adhere to your moving checklist. This will make it easier and quicker for you to get settled in your new house. What Should You Do Before You Start Packing? What to Move First When Moving is a key question to answer before you begin packing. It’s crucial to know what to pack first before you start the moving process. Making a plan in advance will keep everything organized and make your relocation go more smoothly. Clear Out Your Area Decluttering is one of the best things you can do before packing. You’ll save time and effort when packing if you get rid of items you don’t need. Your relocation will go more quickly and be less stressful if you have fewer things. Why Decluttering Is Important: You’ll need to move and pack fewer things. Unwanted items won’t be brought into your new house. It will be easier and faster to unpack. How to Decide What to Keep, Donate, or Throw Away: Keep things that are essential in your new home, functional, and in good condition. Give away well-maintained items that you no longer need, such as furniture, clothing, or books. Anything that is broken, expired, or useless should be thrown out. Gather Packing Supplies After decluttering, start collecting the packing supplies you’ll need to protect your stuff during the move. Packing Supplies You’ll Need: Boxes (various sizes) Packing tape Bubble wrap Packing peanuts Markers for labeling Soft items like towels or newspaper for padding Where to Find Free Packing Supplies: Ask local grocery or liquor stores for free boxes. Look on websites like Facebook Marketplace or Freecycle. See if friends or family have extra packing items. Create a Moving Checklist A moving checklist will help you stay organized and make sure you don’t forget anything important. It’s a great way to manage your time and reduce last-minute stress. Things to Include in Your Checklist: Confirm your moving date and book movers if needed. Start packing early, beginning with items you don’t use every day. Clean and prepare your current home for the move. Let utility companies, the post office, and others know your new address. How to Plan Your Packing Schedule for Moving: Set a timeline and break tasks into smaller steps. Pack non-essentials first, like out-of-season clothes or extra decor. Save daily-use items like toiletries and kitchen tools for last. By staying organized and knowing what to move first when moving, you’ll make the process more manageable and less stressful. Following a clear packing schedule for moving will ensure nothing is overlooked and that your new home is set up smoothly. What to Pack First When Moving | A Smart Packing Schedule for Moving A well-defined packing strategy can simplify and reduce the stress of moving preparations. Knowing what to move first when moving is one of the most beneficial things. Starting with essentials guarantees that you have what you need immediately and keeps you comfortable and organized during the journey. Start by Packing a Box of Necessities A necessities box needs to be the first item on your moving checklist. This little box contains the essentials you’ll need as soon as you move into your new house. You won’t have to go through dozens of boxes to find necessities like your toothbrush or phone charger if you pack it first. What to Include in Your Essentials Box: Toiletries (toothbrush, toothpaste, soap, toilet paper) Important papers (ID, passport, lease, insurance) Medications (prescription and over-the-counter) A few sets of clothes Phone and device chargers Snacks, water, and basic kitchen items (a mug, plate, utensils) Why This Box is Important: Having your essentials close at hand helps you settle in faster and avoid stress during the first few days in your new place. Pack Valuables and Personal Keepsakes As part of your packing schedule for moving, it’s smart to pack valuables and sentimental items early. These can include jewelry, family keepsakes, legal papers, or anything that’s hard to replace. How to Safely Pack Valuable Items: Jewelry: Use padded boxes or small bags to keep pieces safe and untangled. Keepsakes: Wrap fragile items carefully and place them in strong, labeled boxes. High-value items: Use secure bags or special boxes with extra padding to protect them. Keeping these items in a separate, clearly marked box ensures they stay safe and easy to find. Pack Seasonal Items Early Seasonal things like holiday decorations, winter jackets, or beach gear should be packed early because you won’t need them right away. This step clears up space and helps you focus on daily-use items later. Tips for Packing Seasonal Items: Winter clothes (if moving in summer): Store in labeled bins or vacuum-sealed bags. Sports and outdoor gear: Use tough bags or boxes; pack large items like bikes or skis in special carriers. Holiday decorations: Wrap delicate items in bubble wrap and clearly label each box. Packing seasonal items first keeps your move more organized and makes unpacking easier later on. Following a solid packing schedule for moving ensures everything is packed efficiently and nothing important is left behind. How to Pack for a Move in a Month | Your Week-by-Week Packing Plan The best strategy to reduce stress if you have a month to prepare for your relocation is to spread out the work and keep organized. You can stay organized and prevent missing anything crucial by

How to Tape Moving Boxes | Step-by-Step Packing Tips
Moving and Packing Services

How To Tape Moving Boxes

How to tape moving boxes is an essential step in packing for a move. Properly taping your boxes ensures they stay secure and prevents items from falling out during transport. The best way to tape moving boxes is by using the right tape and applying it correctly. It’s important to choose a tape that is strong enough to hold the weight of your items, such as packing tape or moving tape. The easiest way to tape moving boxes is to use a method that covers both the top and bottom securely, creating a seal that keeps everything in place. Knowing what kind of tape to use can make all the difference in ensuring your belongings are safe and secure during the move. Why Taping Moving Boxes is Essential Taping moving boxes is an important part of packing for a move. Here’s why it matters: Preventing Boxes from Opening During Transport Taping moving boxes properly helps keep them closed. Without strong tape, boxes can easily open during the move. This can cause your belongings to fall out or get mixed up, leading to a mess or loss of items. Ensuring the Safety of Your Belongings When you tape moving boxes securely, you protect your items inside. The tape keeps the box intact, preventing it from collapsing or getting damaged while in transit. This is especially important for fragile or valuable items that need extra care. How Improper Taping Can Lead to Damage If you don’t tape moving boxes properly, the boxes might not hold up well during the move. Weak tape or not taping the boxes enough can cause them to open or break. This can lead to items being damaged or lost, which is something you want to avoid when packing. In short, taping moving boxes the right way is essential for keeping your things safe and making your move easier. Always use good-quality tape and make sure to seal all openings securely. How to Tape Moving Boxes (The Best, Easiest Way) Taping moving boxes correctly is key to keeping your items safe during a move. Here’s a simple step-by-step guide on the best way to tape moving boxes. Step 1: Prepare the Box Before you start taping, make sure your box is ready: Fold the Bottom Flaps: Start by folding the bottom flaps of the box. The shorter flaps should go in first, then the longer ones over the top. This creates a secure base. Organize the Contents: Pack your items tightly inside the box. Avoid overfilling it, as this can make the box unstable. Make sure nothing is poking out of the top. Step 2: Secure the Bottom Now that the box is packed and ready: Use Strong Packing Tape: Use a heavy-duty packing tape (preferably 2-3 inches wide). Start by taping across the middle seam of the box where the flaps meet. Press the tape firmly onto the surface to avoid air bubbles or gaps. Tape the Sides: Run a strip of tape along each side of the box for extra security. You want to make sure the box stays closed during the move. Step 3: Taping the Top Once the bottom is secure, it’s time to seal the top of the box: Fold the Top Flaps: Fold the top flaps the same way as the bottom flaps. Again, start with the shorter ones and finish with the longer ones. Apply Tape Across the Top: Use the same technique as you did for the bottom. Place a strip of tape down the middle seam of the top and make sure it sticks properly. Reinforce the Edges: For extra strength, add a strip of tape to each side of the box, ensuring all flaps are tightly sealed. Step 4: Tips for a Neat and Secure Seal Don’t Over-Tape: Using too much tape can make the box messy and harder to handle. Stick to a few well-placed strips. Press Firmly: Make sure each strip of tape is pressed down firmly. This ensures a tight seal and prevents the box from opening during transport. Use Quality Tape: For the best way to tape moving boxes, always use high-quality packing tape. Cheap tape may not hold as well and could break during the move. Advantages of the Best and Easiest Way to Tape Moving Boxes Secure Protection: This method ensures your boxes stay tightly sealed, reducing the risk of items shifting or falling out. Simple Process: It’s easy to do and doesn’t require special tools or techniques, making it quick and efficient. Neat and Organized: The tape will hold your boxes together without looking messy, giving you a professional-looking finish. Using the best way to tape moving boxes not only saves you time but also protects your belongings. Follow these simple steps, and your items will be ready to travel safely to your new home! You can also read about packing services in Los Angeles. How to Fold a Moving Box Folding a moving box correctly is key to ensuring your items stay safe during the move. A well-folded box is more stable, providing better protection for your belongings. Here’s a simplified guide: Step 1: Choose the Right Box Size Select the right box based on what you’re packing. Smaller boxes work for heavy items like books, while larger boxes are best for lighter items like clothes. The box size will affect how you fold it. Step 2: Fold the Bottom Flaps Flatten the Box: If it’s not pre-folded, flatten the box and fold it into shape. Fold the Shorter Flaps First: Fold the shorter flaps in first to create a stable base. Fold the Longer Flaps Over: Fold the longer flaps on top to distribute the weight evenly. Step 3: Secure the Bottom Use strong packing tape to secure the bottom. Tape the center seam, and add extra strips along the edges for reinforcement to prevent the box from opening. Step 4: Fold the Top Flaps Fold the Top Flaps: Once packed, fold the shorter top flaps in, then

Do Moving Companies Pack for You? Find Out Here!
Moving and Packing Services

Do Moving Companies Pack For You

Do moving companies pack for you? Yes, many do. Most professional movers offer complete packing services for moving to make the process easier and safer. These services include packing, loading, transporting, and even unpacking your items. Some companies provide only basic moving help, while others handle everything from start to finish.  Choosing full moving and packing services can save you time, reduce stress, and protect your belongings. It’s important to ask what’s included before hiring a mover. Knowing their service options helps you plan better. Let professionals take care of the packing so you can focus on settling into your new space. What Do Moving Companies Do? The Whole Service Overview Whether you’re moving to a faraway city or only a few blocks away, moving can be intimidating. Movers who pack for you can help with that. At Chamomile Go, we specialize in making your move smooth and stress-free with our expert moving company packing services, including our trusted packing services in Sherman Oaks. Standard Moving Company Services PackingPacking takes time and energy and doing it wrong can lead to damage. That’s why many people turn to moving company packing services for help. At Chamomile Go, our professional team uses top-quality materials like sturdy boxes and bubble wrap to pack everything from fragile glassware to bulky furniture. If you’re wondering whether movers who pack for you exist the answer is yes, and we’re here to help. Loading After packing, our movers carefully load your items into the truck using safe techniques that prevent injury and damage. We also optimize space so nothing shifts during transport. Transportation Once loaded, your items are safely transported to your new location. Our drivers handle the logistics, route planning, and safe delivery of your belongings, so you don’t have to worry. Unloading When we arrive, we don’t just drop boxes at the door. Our team unloads your belongings and places them in the rooms you choose carefully and efficiently. Unpacking Want to skip the stress of opening and organizing boxes? We offer unpacking too. Our packing services in Sherman Oaks include complete unpacking, helping you settle in faster. How Movers Streamline Your Relocation Hiring a professional moving team like Chamomile Go ensures every step is planned and executed with care. From packing and loading to transport and setup, we simplify the process so you can focus on your new home not the heavy lifting. Why Choose Moving Professionals Over DIY? Professional Handling: Our movers have received training on how to carefully handle big and delicate things. Time Savings: We pack and move your entire home faster than doing it solo. Injury Prevention: Avoid straining your back our team handles the hard work. All-in-One Service: We offer full packing, moving, and unpacking packages. Protection: Our services often include basic insurance to safeguard your belongings. Chamomile Go takes pride in offering reliable, efficient, and affordable moving company packing services. If you’re looking for dependable packing services in Sherman Oaks, we’re just a call away ready to make your move easier from start to finish. Do Movers Pack for You? Here’s What to Expect Yes, movers do pack for you. Many professional companies offer reliable packing services for moving to make the entire relocation process easier and more efficient. Whether you’re planning a local move or relocating long distance, movers who pack for you can handle everything from wrapping fragile items to boxing up your entire home. Here’s a clear breakdown of the moving and packing services available and what you can expect: 1. Full vs. Partial Packing Services Full Packing Services With full-service packing, movers take care of packing every item in your home—furniture, clothes, electronics, kitchenware, and more. They bring all necessary materials like boxes, packing tape, bubble wrap, and paper to keep your belongings safe. This option is perfect for people with tight schedules or large households who prefer a hands-off move. Partial Packing Services Partial packing allows you to handle some items yourself while letting the movers take care of delicate or large belongings. For instance, you might pack books or clothes, while leaving fragile items like glassware or electronics to the professionals. It’s a great balance of cost-efficiency and expert help. 2. How Movers Handle Special, Fragile, or Bulky Items Fragile Items Worried about breakables? Trained movers use special materials like bubble wrap, packing paper, and custom boxes to ensure your fragile items such as dishes, glassware, or artwork are packed with care. Bulky Items Heavy or large items like sofas, wardrobes, or appliances require extra care. Movers may disassemble furniture, wrap items in moving blankets or pads, and use the right tools to prevent damage during loading and transport. Specialty Items For high-value or sensitive items such as antiques, collectibles, or fine art many companies offer custom crating or climate-controlled options to ensure safe delivery. 3. Is Packing Optional or Mandatory? Optional Packing In most standard moves, packing is optional. You can choose to do it yourself and hire movers only for transportation and unloading. This option is common for budget-conscious moves or for people who prefer to pack their own belongings. Mandatory Packing In some cases, especially for long-distance or international moves, companies may require that they handle the packing. This ensures everything is packed to their safety standards, especially for fragile or valuable items that need professional protection. Hiring movers who pack for you not only saves time but also ensures your belongings are packed with care and expertise. Whether you choose full or partial packing services for moving, a trusted team can make the process smoother, safer, and more organized. If you’re looking for comprehensive moving and packing services, be sure to choose professionals who offer both flexibility and reliability. How Much Does Hiring Movers to Pack Your Stuff Cost? The cost of having movers pack for you can vary significantly depending on a variety of factors. While hiring professionals to pack your belongings can save you time and effort, it also comes with an added cost. Below

How to Pack Necklaces for Moving | Quick & Easy Steps
Moving and Packing Services

How To Pack Necklaces For Moving

How to pack necklaces for moving is an important step to protect your valuable and delicate jewelry during relocation. Necklaces are prone to tangling, knotting, and breaking if not packed properly. To pack necklaces for moving the right way, always separate each piece before packing. Use a straw or cardboard to thread each necklace through and fasten the clasp. You can also place each necklace in a small zip-lock bag or wrap them individually in soft tissue or plastic wrap.  The best way to pack necklaces is by layering them with bubble wrap and storing them in a sturdy jewelry box or hard container. Label each item if necessary, especially if you have several valuable pieces. Avoid tossing all your jewelry into one container, as this increases the risk of damage. Always keep the packed necklaces with you instead of loading them into the moving truck. Why Properly Packing Necklaces is Important It is essential to make sure jewellery, particularly necklaces, is safe when being stored or transported. Knowing how to pack necklaces for moving or storage properly can make a big difference whether you’re relocating, gifting, travelling, or simply storing them for future use. That’s why learning the best way to pack necklaces is so important. Preserving the Necklace’s Integrity Necklaces are often made of delicate materials like gold, silver, or gemstones and can be easily scratched, bent, or broken. The best way to pack necklaces is by using soft, cushioned materials such as bubble wrap, cotton pads, or tissue paper to keep them safe and secure. Proper protection ensures your valuable pieces stay in perfect condition. Preventing Damage While Being Transported When you pack necklaces for moving, there’s always a risk of tangling, knotting, or damage due to shifting. A tangled chain can strain or even break the necklace. To prevent this, always keep necklaces separated using straws, zip-lock bags, or jewelry rolls. Securing them tightly reduces movement and protects their structure during the move. Providing Organisation and Simplicity in Unpacking Packing your necklaces in an organized manner makes unpacking much easier. Keeping each piece in a labeled pouch or box not only prevents tangling but also saves time when setting up in your new space. Whether you’re relocating or storing them, learning the best way to pack necklaces offers convenience, safety, and peace of mind. 11 Ways How To Pack Necklaces For Moving Making sure your necklaces are securely packed before moving is crucial to preventing tangling and damage. To ensure that your jewellery gets to your new home in the same condition as when it left, here are 11 tips for packing necklaces for moving, each with unique benefits. Method 1: Make Use of a Compartment Jewellery Box Benefits of utilising a jewellery box with distinct sections: Keeping your necklaces organised and safe can be achieved with a jewellery box that has built-in sections. By preventing necklaces from colliding, each part reduces the possibility of tangling or breaking. How it avoids damage and tangling: The distinct pieces keep necklaces from moving and joining together, maintaining their shape and avoiding undue strain on fragile chains. Method 2: Keep in Separate Pouches Putting each necklace in a Ziploc bag or tiny fabric pouch: You can store each necklace separately in pouches or bags. Because it reduces tangling, this technique is particularly useful when moving. How this technique maintains necklace organisation and safety: Because each necklace is stored separately, it is shielded from tangles, scratches, and other possible harm, which makes unpacking easy. Method 3: Make Your Own Necklace Roll Rolling necklaces in fabric or soft cloth: Rolling necklaces are best made from a soft fabric, such as cotton or velvet. All you have to do is lay your necklace out on a piece of cloth and gently roll it up. Detailed instructions for safely rolling necklaces: Place the necklace on the cloth, fold the cloth over it gently, and then wrap it up securely without applying too much pressure. Use a rubber band or ribbon to fasten the roll. Method 4: Jewellery organisers made of cardboard or plastic Making use of jewelry-specific inserts or compartments: Necklaces can be safely stored when moving with pre-made jewellery organisers, such as cardboard inserts or plastic trays. Advantages and disadvantages of using pre-made organisers: These organisers are quick fixes and easy, but they might not always hold necklaces of different thicknesses or lengths, using up more room than expected. Technique 5: Using Bubble Wrap How bubble wrap can offer additional security: Fragile goods are best wrapped in bubble wrap. Using bubble wrap to package necklaces gives a layer of padding that reduces breakage and absorbs vibrations. Detailed instructions for packing with bubble wrap: To conceal the necklace, cut a piece of bubble wrap big enough. To keep the necklace from unwinding during the move, gently wrap it, making sure it is completely protected, and bind it with tape. Method 6: Avoid Tangling by Using Straws How to avoid knots when threading necklaces through straws: To prevent tangling, thread each necklace through a paper or plastic straw. During transportation, the straw keeps the necklace from kinking and twisting. Advice for arranging several necklaces: You can use different straws for each necklace and arrange them according to length or type. This avoids confusion when unpacking and keeps your jewellery neatly organised. Method 7: Making Use of a Travel Case or Jewellery Roll Advantages of a special travel roll or case: Travel bags and jewellery rollers are made especially to safely store necklaces. To provide quick access and avoid tangling, these goods feature pockets and compartments. How to use these things when moving: To move with the highest level of security, just put your necklaces flat in the designated pockets or compartments, close the travel box, or fold up the case. Method 8: Using Labelled Ziplock Bags How classifying bags according to their nature (such as gold or silver) facilitates unpacking: Necklaces are best kept neat and protected in ziploc bags. It will be simpler to unload and locate what you need without searching through unmarked bags if you

How To Organize A Furniture Inventory Before Moving | Guide
Moving and Packing Services

How To Organize A Furniture Inventory Before Moving

How to organize a furniture inventory before moving is an essential step in ensuring a smooth and efficient relocation. By taking the time to create a detailed list of your furniture, you can save valuable time, reduce stress, and make the moving process much easier. A well-structured moving inventory helps you stay organized, keeping track of what you own, where it is, and whether any items need special care or packing. This process not only allows you to prioritize what should be moved first but also enables you to identify any pieces that may no longer be needed, minimizing clutter and unnecessary work. Overall, organizing a furniture inventory before moving will make the entire experience more manageable, ensuring nothing is overlooked and that everything is accounted for. Why Create a Moving Inventory List? Creating a moving inventory list is an essential step when preparing for a move, whether you’re moving to a new home, office, or any other location. A well-organized moving inventory list provides numerous benefits, helping streamline the entire moving process. Here’s why you should consider making one: 1. Keeps Track of All Furniture and Items A moving inventory list helps you keep track of all your possessions. From furniture to small kitchen appliances, everything can be documented and accounted for. This list serves as a comprehensive record of everything being moved, ensuring you don’t forget anything during the packing and moving process. 2. Helps with Moving Logistics and Organization With so many things to pack and transport, staying organized can be difficult. A moving inventory list helps you break down your items into categories, making it easier to pack, load, and unload. You can assign specific boxes or areas for particular items and ensure everything is packed systematically. This not only helps you stay organized but also makes the entire moving process more efficient. 3. Ensures Nothing Is Left Behind or Forgotten The last thing you want on moving day is to leave behind important belongings. A moving inventory list is your safety net. As you pack, you can check items off your list to ensure nothing is left behind in your old space. This prevents unnecessary back-and-forth trips to your old home to retrieve forgotten items. 4. Simplifies Insurance Claims if Damage Occurs During Transit Unfortunately, accidents can happen, and items can get damaged during transit. Having a detailed moving inventory list makes it much easier to file insurance claims. You’ll have an itemized record of what was being moved and its condition prior to the move, simplifying the claims process and ensuring that you are adequately compensated for any losses. 5. Stress Reduction Moving can be stressful, but a moving inventory list significantly reduces that stress. By keeping track of everything, you can avoid last-minute panics. You’ll know exactly where each item is, what’s been packed, and what’s left to do. This level of organization helps you maintain control, preventing chaotic moments on moving day. 6. Helps in Deciding What to Keep, Donate, or Sell A moving inventory list also provides a great opportunity to assess what you truly need. By listing out all your items, you can easily identify items that are no longer useful, damaged, or unnecessary. This gives you a chance to decide what to donate or sell, making your move lighter and more efficient. You can also read about moving services in Los Angeles. Step-by-Step Guide on How to Organize a Furniture Inventory Before Moving Preparing your furniture inventory before moving is a critical step to ensure everything is accounted for, properly packed, and safely transported. Using a moving inventory template can make the process much easier and more organized. Here’s a step-by-step guide to help you organize your furniture inventory: Step 1: Make an Inventory List Start by listing all the furniture pieces you plan to move. Go room by room, categorizing each item based on its location (e.g., living room, bedroom, kitchen). Using a moving inventory template can help you easily organize and track each piece, ensuring that you don’t miss anything. This will give you a comprehensive overview of what you’re moving, making the entire process more manageable. Step 2: Document Furniture Details For each item on your list, note important details like the condition of the furniture (e.g., new, gently used, or damaged). If any piece needs special handling or preparation, like disassembly, make a note of it. You can also include any important instructions like “fragile” or “handle with care.” This documentation helps movers and ensures that each item is treated appropriately. Step 3: Take Photos Take clear, detailed photos of each item for reference. Photos are especially useful for noting existing damage before the move, which can be essential for insurance purposes. If your furniture has unique features, such as intricate designs or marks that could be overlooked, be sure to capture these as well. A well-documented photo record will be invaluable when checking items after the move or if any claims need to be made. Step 4: Assign Value to Items Estimate the value of each piece of furniture, especially if you plan to use insurance during the move. For high-value items, like antiques or designer pieces, create a separate list with their detailed descriptions and estimated values. This helps ensure that these items are properly insured and receive the right level of attention during transport. The moving inventory template can assist in organizing this step by adding value columns for each item. Step 5: Decide What to Keep, Donate, or Sell Once you’ve compiled your list, take a moment to assess whether each piece of furniture is worth moving. You may find that some items are no longer necessary or may not be worth the effort of transporting. Use your moving inventory template to streamline this process by marking which items you plan to keep, donate, or sell. This not only reduces clutter but also ensures that only essential pieces make the move. You can also read about packing services in Los

Our Client's Reviews

Get In Touch With Us!

Find Us

Office Address

    Los Angeles, California

Office Phone

    +1 310-895-3517

Email Address

  Chamomilemoving@gmail.com

Let’s get you moving! Grab your FREE quote now.

Chamomile Go offers premier moving services throughout Los Angeles County, CA, ensuring a hassle-free relocation experience for all our clients.

+1 310-895-3517

24/7 Support

© 2025 Created by LocalPro1