Get a Free Quote

Edit Template

Author name: 2m54a

How to Make Moving Easier – 70 Proven Tips
Moving and Packing Services

How To Make Moving Easier

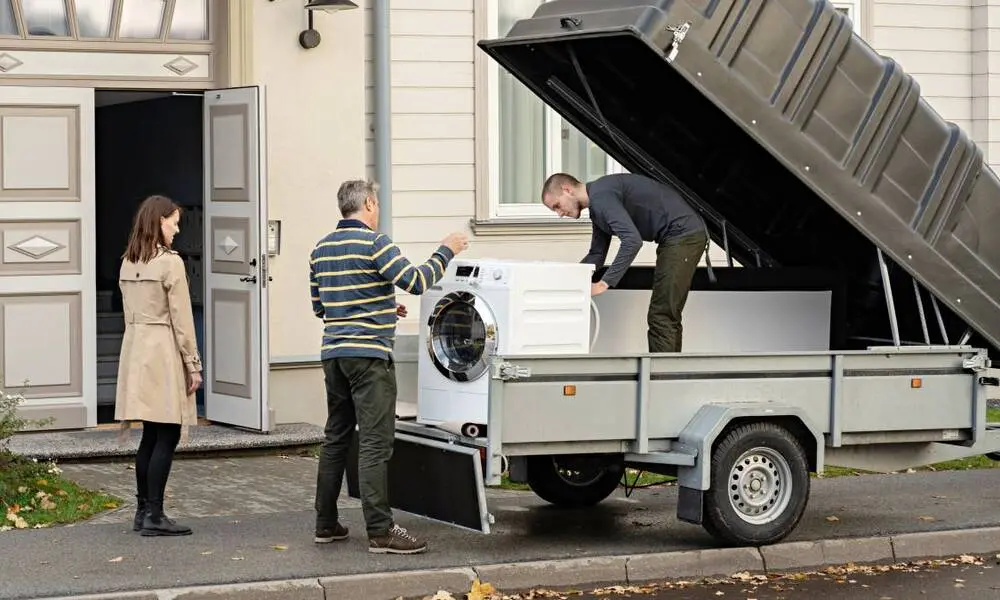
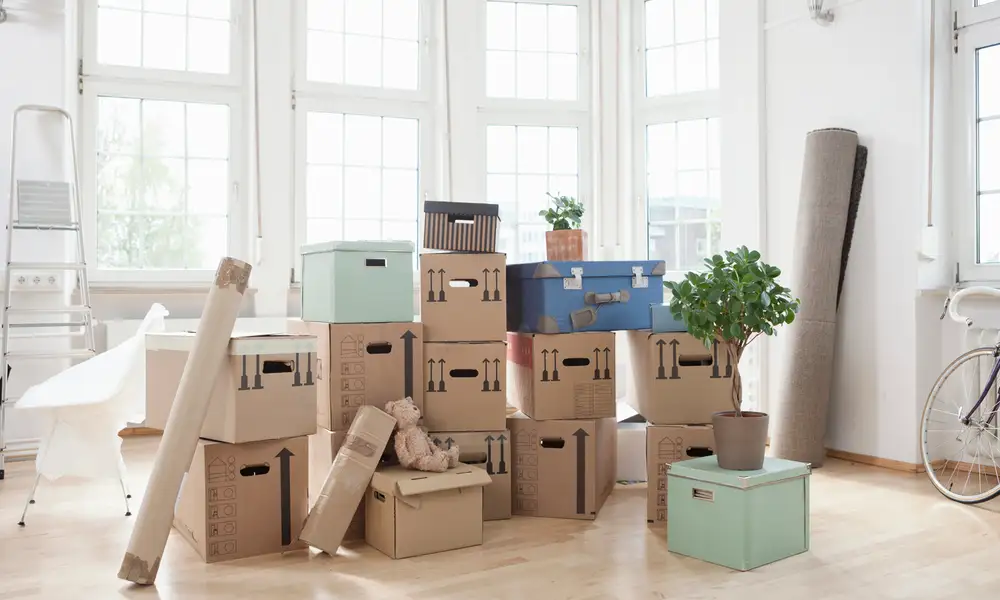
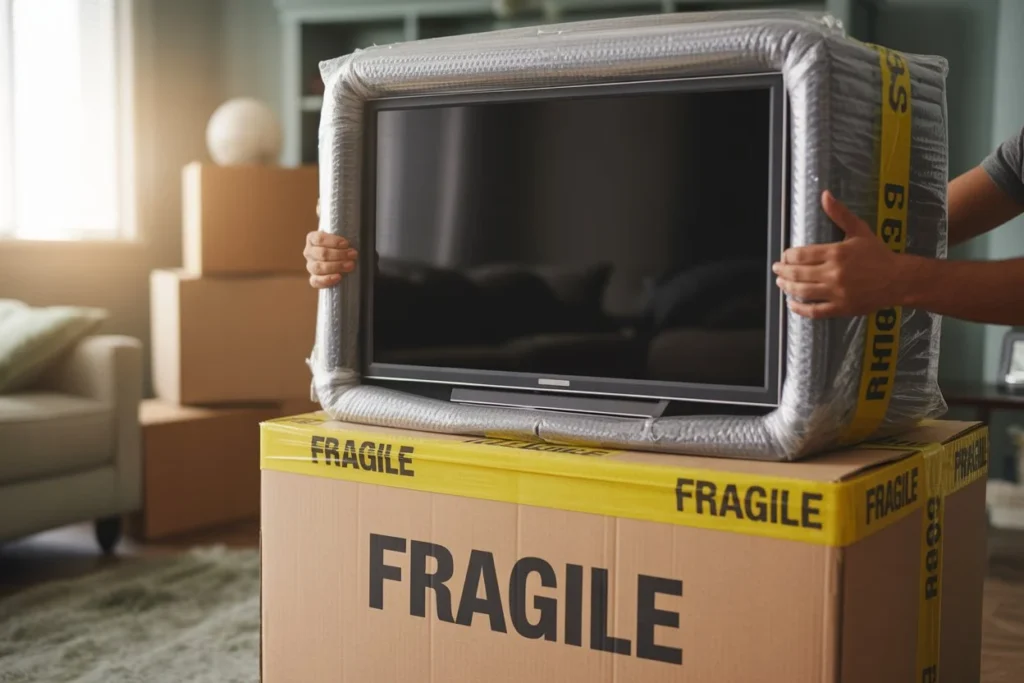
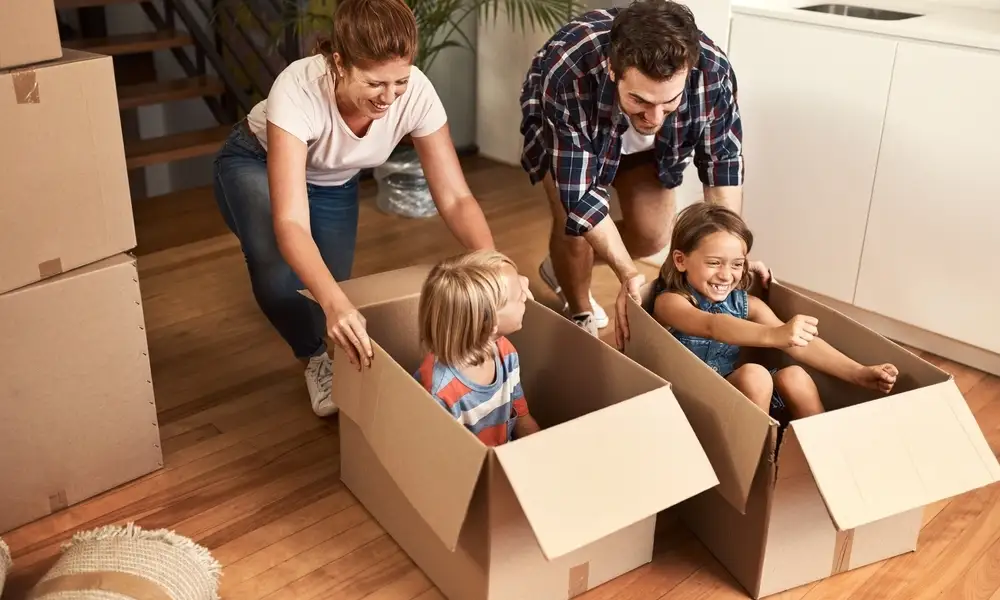
How to Make Moving Easier starts with knowing that moving doesn’t have to be overwhelming or exhausting. Many people think of relocation as a stressful, time-consuming task, but with the right planning and strategies, you can turn it into a less miserable moving experience. Whether you’re moving across town or across the state, the key is focusing on smart, simple steps that save time, reduce stress, and keep things organized. In this guide, we’ll share practical, proven tips for making moving easier so you can enjoy a smoother transition into your new home without feeling drained. Why Moving Feels Overwhelming Emotional and Physical Challenges Moving is more than just packing boxes and loading a truck  it’s a life change that often triggers moving stress and relocation anxiety. Emotionally, it can be hard to leave behind familiar surroundings and adjust to a new environment. Physically, moving is exhausting, with heavy lifting, packing fragile items, and trying to meet tight deadlines all adding to the pressure. The Impact of Poor Planning The stress gets worse when there’s poor planning. Waiting until the last minute, failing to organize belongings, or forgetting important steps can make moving day feel chaotic. This can lead to broken items, lost belongings, and delays that make the process even more stressful. Turning Stress Into a Smooth Move The good news is that the right strategies can turn a stressful move into a smooth process. Breaking tasks into smaller steps, staying organized, and using proven packing and moving tips will keep stress levels low. This allows you to focus on the excitement of settling into your new home instead of feeling drained. You may read How Far In Advance To Book Movers? 70 Easy Moving Tips for a Less Miserable Move Moving can be stressful, but with the right approach, it becomes manageable and even smooth.Here’s a complete list of easy moving tips to make your next move more organized, faster, and less stressful. 1. Start Planning Early Begin planning at least 4–6 weeks before your move. An early plan is the easy way moving without last-minute chaos. 2. Create a Moving Checklist Using a checklist helps you stay organized and makes sure you don’t overlook anything crucial. It’s key to making moving easier. 3. Declutter Before Packing Donate, sell, or throw away items you don’t need. This makes for a less miserable moving experience. 4. Pack Room-by-Room Concentrating on a single room at a time expedites the unpacking process and prevents item mixing. 5. Use Quality Packing Supplies Packing tape, bubble wrap, and sturdy boxes guard against damage while in transit. 6. Label Every Box Put a brief description of the contents and the room name on the boxes. This is one of the easy moving tips for fast unpacking. 7. Pack Essentials Separately For convenience, keep daily necessities like clothing, chargers, and toiletries in a different bag. 8. Take Photos of Electronics Snap a picture of cable setups before unplugging so you can easily reconnect them later. 9. Protect Fragile Items For protection, wrap breakables, glasses, and plates in packing paper or bubble wrap. 10. Use Small Boxes for Heavy Items Books, tools, and other heavy things are easier to carry in small boxes. 11. Pack Clothes in Suitcases Suitcases have wheels, making it the easy way moving your wardrobe. 12. Use Trash Bags for Hanging Clothes Tie trash bags around groups of hanging clothes for quick packing and unpacking. 13. Color-Code Boxes Assign each room a color and mark boxes with that color for fast sorting. 14. Keep Hardware in Labeled Bags Store screws, bolts, and small parts in ziplock bags labeled with the furniture name. 15. Use Towels & Blankets for Padding Soft items can protect furniture and save money on bubble wrap. 16. Wrap Drawers with Plastic Wrap Leave lightweight items in drawers and secure them with plastic wrap. 17. Defrost and Clean the Fridge Do this 24 hours before moving to avoid leaks and odors. 18. Keep Important Documents Handy Passports, contracts, and IDs should be packed separately in a safe spot. 19. Arrange Childcare for Moving Day Kids are safer and happier away from the moving chaos. 20. Take Measurements Before Moving Ensure large furniture fits through doorways and hallways before moving day. 21. Protect Floors and Walls Use floor runners or cardboard to avoid scratches and damage. 22. Disassemble Large Furniture Take apart beds, desks, and shelving for easier transport. 23. Use Original Boxes for Electronics If you kept the original packaging, it’s the safest way to move electronics. 24. Keep Cleaning Supplies Out You’ll need them for last-minute cleaning at both old and new homes. 25. Schedule Utilities in Advance Arrange electricity, water, and internet connections before moving in. 26. Don’t Overpack Boxes Heavy boxes are harder to lift and more likely to break. 27. Move Valuables Yourself Jewelry, heirlooms, and fragile keepsakes should travel with you. 28. Use a Moving Binder Keep all contracts, receipts, and checklists in one place. 29. Ask for Help Early Moving can be made less unpleasant by friends, family, or movers. 30. Use Plastic Bins for Storage Items Clear bins let you see what’s inside without opening them. 31. Pack Seasonal Items First Pack things you won’t need until after the move to save time. 32. Store Liquids in Sealed Bags Prevent spills by sealing cleaning products and toiletries in plastic bags. 33. Keep Snacks & Drinks Handy Moving takes energy—snacks keep you going without breaks. 34. Use Rolling Carts Perfect for moving heavy boxes short distances. 35. Keep Pets Safe Arrange for pets to stay with a friend or in a pet daycare on moving day. 36. Photograph Your Old Home Helps with rental deposits or proving pre-move condition. 37. Set Aside a “First Day” Box Fill it with essentials like bedding, plates, and toiletries for the first night. 38. Protect Corners with Cardboard Cardboard corner guards prevent dents during moving. 39. Keep Tools Handy You’ll need screwdrivers, hammers, and other tools

Tips for Moving With Dogs & Cats – Stress-Free Guide
Moving and Packing Services

Tips for Moving With Dogs & Cats

Tips for Moving With Dogs & Cats often start with understanding that relocation is not just a change for you it’s a big adjustment for your pets too. Both dogs and moving challenges and cats and moving challenges can cause stress because pets thrive on routine and familiar surroundings. A new home means new smells, sights, and sounds, which can make your dog anxious or your cat unsettled. That’s why planning for your dog or cat’s emotional and physical comfort is just as important as packing your boxes. Unlike moving without pets, relocating with animals requires extra steps such as maintaining routines, preparing carriers, and creating safe spaces so your furry companions can transition smoothly into their new environment. Why It Can Be Difficult to Move With a Dog or Cat Stress and Anxiety in Pets When moving with pets, it’s important to understand that dogs and cats experience stress in different ways. A change in environment can make a dog anxious because they rely heavily on routine, familiar scents, and their owner’s presence. Cats, on the other hand, are territorial and tend to feel more stressed when their safe space changes suddenly. The sight of boxes, the sound of movers working, and the absence of their familiar environment can lead to restlessness, excessive vocalization, or hiding. This stress can start days before the move and continue until they feel secure in the new home. Behavioral Issues During the process of moving with a dog or cat, you might notice sudden changes in behavior. Unfamiliar sounds like moving trucks, furniture being shifted, and footsteps from strangers can make dogs bark excessively or show signs of fear. Cats may hide, refuse to eat, or become more defensive. The combination of strange sights, smells, and noises can lead to unpredictable reactions. Dogs might pull on their leash more during walks in a new neighborhood, while cats may hiss or avoid interaction until they feel safe again. Safety Concerns Safety is a major concern when moving with pets. During loading and unloading, doors are often left open, and movers are constantly coming in and out. This increases the risk of a dog slipping out the door or a cat darting away to hide. Long car rides during the move can also be stressful and risky if pets aren’t secured in a carrier or pet seatbelt. Even in the new home, unpacked boxes, sharp objects, or unstable furniture can be dangerous for curious pets. Planning ahead, securing pets during the move, and giving them a designated safe space can help reduce these risks. Getting Your Cat Ready to Move Create a Safe Space When it comes to cats and moving, creating a safe space is one of the most important steps. Cats are sensitive to change, and the chaos of packing and movers coming in and out can overwhelm them. A quiet room with their bed, toys, food, and litter box can help them feel secure. If you don’t have a spare room, a large crate with familiar blankets can serve as a temporary safe haven until moving day arrives. Acclimate to the Carrier Many cats dislike carriers, so it’s best to introduce them gradually before moving with pets. Place the carrier in your home several weeks before the move, leaving the door open with treats or toys inside. This helps your cat see it as a safe, comfortable space rather than a trap. By moving day, they’ll be less likely to resist when it’s time to travel. Maintain Familiar Routines Keeping routines consistent is key when preparing cats and moving to a new home. Maintain regular feeding times and keep their litter box in its usual place until the last possible moment. Familiar scents and routines help reduce anxiety and make the transition easier. Even in the new home, try to set up their essentials in a quiet corner before introducing them to the rest of the space. Vet Check-Up Before moving with pets, schedule a vet appointment to ensure your cat is healthy and ready for the journey. Ask about any vaccinations that may be due, and consider microchipping in case your cat gets lost during the move. A health check will also help identify any issues that could make the transition more stressful for your cat. You may read about How do you move cats across country? Getting Your Dog Ready to Move Exercise and Play One of the best ways to reduce anxiety when it comes to dogs and moving is through exercise and play. A long walk, a game of fetch, or a fun training session before moving day can help burn off extra energy and keep your dog calm. Physical activity not only tires them out but also helps release stress, making them more relaxed during the chaos of packing and loading. Familiarization Dogs can feel uneasy about new experiences, so gradual familiarization is key. Introduce them to their travel crate, pet seatbelt, or harness several weeks before the move. Let them explore it at their own pace, rewarding them with treats or praise. This way, when dogs and moving day arrives, they’ll already be comfortable with the equipment needed for safe travel. Training Cues Basic commands such as “stay,” “wait,” or “come” are incredibly useful during a move. They can prevent accidents when movers are going in and out of the house or when doors are open. Practice these cues daily leading up to the move so your dog responds reliably even in stressful situations. Training becomes a valuable safety tool in the busy environment of dogs and moving preparations. Vet Visit Before moving, schedule a vet appointment for a health check. Ensure your dog’s vaccinations are up to date and discuss any travel-related concerns with your vet. Update their ID tags and consider microchipping if you haven’t already. These precautions are essential for keeping your dog safe during the transition to a new home, especially in the unpredictable environment of dogs and moving. Tips for

How to Move a Hot Tub Safely in 7 Simple Steps
Moving and Packing Services

How To Move A Hot Tub

How to move a hot tub safely and efficiently requires more than just muscle it needs planning, the right tools, and sometimes professional help. Hot tubs are large, heavy, and delicate, making them tricky to relocate without damage or injury. Whether you’re moving it across your yard or to a new home, the process can be complex. This guide covers everything you need to know about moving a hot tub, step by step. We’ll explain the DIY method and when it’s smart to hire a hot tub moving service. If you’re thinking about moving a hot tub, read on to do it the right way. Is It Hard to Move a Hot Tub? Yes, moving a hot tub is hard without the right tools, people, and planning. These units are large, heavy, and tricky to maneuver especially through tight spaces or uneven terrain. How Heavy Is a Hot Tub? A typical hot tub weighs 500–1,000 pounds empty, and over 3,000 pounds when filled. The bulky shape adds to the difficulty, making it tough to fit through gates, doorways, or stairs. Common Challenges When you move a hot tub, expect obstacles like: Narrow walkways or gates Stairs or steps Sloped or muddy ground Indoor-outdoor transitions Each adds time, risk, and effort. Can One Person Do It? No. You’ll need a team of 3–5 people to lift, guide, and stabilize the hot tub. Attempting it solo can lead to serious injury or damage. What You’ll Need To safely handle relocating a hot tub, use: Heavy-duty dollies or sliders Lifting straps and tie-downs Moving blankets for protection Tool kit for disconnecting water and power A ramped truck is a must if transporting. Safety First Always prioritize safety: Wear proper gear Use spotters Lift carefully Avoid slippery areas If unsure, hire professionals they’re trained to handle hot tubs without damage or danger.  You may read about What To Bring First When Moving To A New House? Preparing to Move a Hot Tub Safely Moving a hot tub takes more than muscle it requires proper preparation, safety awareness, and the right equipment. Whether you’re doing it yourself or hiring a hot tub moving service, these key steps will help protect both your spa and your property during the move. 1. Drain and Disconnect All Power Lines Start by turning off the power at the breaker and unplugging the tub. Drain the tub of all water and carefully unplug any electrical connections. Use a pump or garden hose for faster drainage. 2. Clean and Dry the Tub Thoroughly Once drained, wipe down the entire surface of the hot tub inside and out. A clean, dry unit is easier to handle and less likely to slip during the move. 3. Gather the Right Equipment Prepare the following necessary equipment before relocating a hot tub: Heavy-duty dollies or hot tub carts Moving straps for safe lifting Furniture sliders for navigating tight spaces Plywood boards if the ground is uneven The tub is considerably safer and easy to lift and roll using these equipment. 4. Protect the Tub with Blankets or Wrap Cover all sides of the hot tub with moving blankets or plastic wrap. This helps prevent scratches, dents, or damage to the control panel during the move. 5. Clear the Path to the Transport Vehicle From the tub to the moving truck, walk the entire distance. Remove obstacles, measure gate and door openings, and secure ramps if needed. A clear path avoids delays and accidents. How to Move a Hot Tub in 7 Easy Steps Relocating a hot tub might seem like a big task, but with a bit of planning and the right tools, you can handle it yourself. Here’s a clear, step-by-step process to help you move a hot tub without damage or injury. Step 1: Empty the hot tub and turn it off First, unplug the gadget and turn off the power at the breaker. Use a pump or hose to drain all of the water. To avoid leaks while being transported, make sure all plumbing lines are empty. Step 2: Gather Moving Tools and Helpers You’ll need: Furniture dollies or hot tub carts Moving straps Blankets or padding Cardboard or plywood sheets At least 3–4 strong helpers Moving a hot tub will be much easier and safer with these equipment. Step 3: Plan the Route – Measure Doors and Paths Before moving, measure doorways, gates, and walkways. Clear any obstacles like garden tools, patio furniture, or loose stones. Planning ahead helps avoid delays and damage. Step 4: Tilt and Secure the Tub on Its Side Most hot tubs need to be tilted upright to fit through tight areas. Here’s how to do it safely: Place cardboard padding or blankets on the ground Use moving straps to tilt the tub slowly with your team Always tilt on the stronger frame side not the control panel or pump side Never tilt alone. Always have someone supporting the opposite end. Step 5: Use Dollies or Sliders to Transport It Slide furniture dollies under the tub and roll it along the planned route. Use sliders or plywood if the ground is soft or uneven. Move slowly and watch for dips or steps. Step 6: Load onto the Moving Vehicle with Care Use a ramp to roll the tub onto a truck or trailer. Keep the tub upright and centered. Have helpers support both ends to keep it steady during the lift. Step 7: Secure During Transport and Reinstall at the New Location Strap the hot tub tightly inside the vehicle to prevent shifting. At the new location, unload carefully, reconnect power, and refill with water. Run a test cycle before using it. For moving services in Sherman Oaks contact no other than Chamomile Go. How to Move a Hot Tub on Its Side When space is limited like narrow gates or tight hallways moving a hot tub on its side can make the process much easier. But it must be done correctly to avoid injury or

How to Move a Washing Machine | Step by Step Guide
Moving and Packing Services

How To Move A Washing Machine

How to move a washing machine starts with careful planning and attention to safety. Moving a washing machine is more complex than it seems due to its weight, hoses, and internal drum. If done improperly, it can lead to injuries, water damage, or a broken appliance. That’s why preparation is key to avoiding costly mistakes. Both your home and your machine can be protected by using the right tools and methods. Hiring professional washing machine movers is often the safest choice for a smooth move. Whether you’re doing it yourself or calling the pros, safety and planning should come first. Proper handling ensures your appliance stays in good working condition. How to Get a Washing Machine Ready to Move A washing machine must be moved carefully to prevent damage and mess. Here’s a little how-to to complete it safely: 1. Turn Off Power and Water Unplug the machine and turn off the water supply. This prevents leaks and electrical hazards. 2. Drain All Water Disconnect hoses and drain any remaining water from both the drum and the hoses. Use a shallow pan or bucket. 3. Clean and Dry the Drum Wipe the inside of the washer and leave the door open to air dry. This stops mold from forming during the move. 4. Secure the Drum Use transit bolts (if available) to lock the drum in place. This prevents internal damage while moving. 5. Tape Cords, Hoses, and Doors Attach hoses and power cords securely to the washer’s body. To keep the door closed while being transported, use tape. Bonus Tip: Know Your Washing Machine Weight Most machines weigh between 150–200 lbs. To avoid getting hurt, always lift with assistance or use a dolly. If you’re looking for reliable moving services in Sherman Oaks, we’re here to help. Contact us today for safe and professional assistance with your move! Essential Items Needed to Move a Washing Machine Moving a washing machine safely requires the right tools and equipment. The following are essentials to keep both you and your appliance safe during moving: 1. Moving Straps and Gloves These help you lift and carry the washer with better grip and less strain. 2. Appliance Dolly or Trolley A sturdy dolly is essential for moving a heavy washer across floors or down stairs. Most washing machine movers use one to prevent injuries. 3. Blankets or Padding To protect your machine from dents and scratches while being transported, wrap it in moving blankets. 4. Wrench and Pliers These are needed to disconnect water hoses and remove or attach transit bolts. 5. Transit Bolts (If Applicable) Use transit bolts to lock the drum and protect internal parts during the move. 6. Waterproof Containers for Hoses Keep disconnected hoses in waterproof bags or containers to prevent leaks and messes. How to Move a Washing Machine in Seven Easy Steps Whether you’re relocating across town or just changing apartments, knowing how to move a washing machine the right way can save you from damage, mess, or injury. Washing machines are bulky and heavy, but with the right steps, the process becomes safe and manageable. Step 1: Disconnect the water supply and turn it off. To get started, unplug the washing machine from the power source. Next, close the water supply valves, which are often found behind the washer. This stops water from flowing during the disconnection process. Step 2: Drain All Water from the Machine Before moving, it’s imperative to remove any leftover water: Disconnect the hot and cold water hoses. Let any remaining water drain into a bucket or shallow pan. Lower the drain hose to let out water from the machine’s pump system. This prevents water from spilling during transport. Step 3: Secure All Loose Parts and Wires Use tape to secure the power cord to the washer’s rear. Coil the water hoses and place them in a waterproof bag. If your washer has a door, tape it shut using painter’s tape. Also, insert transit bolts to lock the drum in place (if your machine requires them). These bolts prevent internal damage during the move. Step 4: Use moving blankets to shield the washing machine. Wrap the washer in thick moving blankets or padding. This protects it from dents, scratches, and bumps during loading and transport. Straps or packing tape can be used to fasten the padding. Step 5: Lift Carefully Using a Trolley or Dolly Washing machines are heavy often 150 to 200 pounds. Use an appliance dolly or trolley for safe lifting. Slide the dolly under the washer. Secure it with moving straps. Always keep the washer upright to avoid damaging the internal drum and suspension. Step 6: Load into the Truck, Upright and Strapped Use a ramp if possible and load the machine into the truck while keeping it upright. Position it against the truck wall. Strap it tightly to avoid movement during the drive. Never lay a washing machine on its side or back, as it may damage internal components. Step 7: Reinstall Carefully in the New Location Once you arrive: Remove the transit bolts. Reconnect the water supply and power cord. Level the washer using the adjustable feet. Run a test cycle to ensure everything works as it should. You may read about How To Move Bulky Kitchen Appliances? How to Move a Washing Machine with a Trolley Moving a washing machine can be tough because of its washing machine weight, which often ranges between 150 to 200 pounds. Using a trolley makes the process safer, easier, and more efficient. Benefits of Using a Trolley to Move Washing Machine Stability: A trolley provides a steady base to keep the washer balanced while moving. Safety: It reduces the risk of back injuries and strain by handling most of the weight. Ease: Rolling the machine on wheels is much easier than carrying it, especially over longer distances or stairs. Correct Technique to Lift and Load with a Trolley Prepare the Washing Machine: Secure cords and hoses, tape the door shut,

What to Bring First When Moving to a New House Guide
Moving and Packing Services

What To Bring First When Moving To A New House

What to bring first when moving to a new house is one of the most common questions people face during the relocation process. The first few hours in a new place can feel overwhelming emotionally, it’s a mix of excitement and anxiety; practically, it’s about making the space livable from the moment you step in. That’s why having a well-thought-out new house essentials checklist can make a big difference.  By packing the right first-day items ahead of time, you can avoid unnecessary stress and focus on settling in comfortably. Whether it’s your toiletries, important documents, or basic kitchen tools, bringing the right items first helps you function smoothly from day one. A reliable moving into new house checklist ensures you’re not left searching through boxes just to find your toothbrush or a roll of toilet paper. This guide will help you understand exactly what to bring first and why it matters so your move-in day feels more like home and less like chaos. Why It’s Important to Pack the Right Items First Moving can be exciting but also stressful. When you move into a new house, the last thing you want is to dig through dozens of boxes just to find your toothbrush or a clean shirt. That’s why packing the right items first makes all the difference. It not only reduces chaos on move-in day but also ensures your comfort during the critical first 24–48 hours in your new home. 1. Reduce Chaos on Move-In Day Imagine you’ve just arrived at your new home after hours of hauling boxes and navigating traffic. You’re tired, hungry, and your phone is about to die but where’s the charger? Where are the plates for dinner or the toilet paper for the bathroom? Packing an essentials box or “first night box” ahead of time helps you avoid this common moving stress. When the right items are packed first and kept accessible, you’ll know exactly where to reach when you need your daily basics. 2. Save Time Looking for Essentials During the first few days in a new house, you’re not just settling in you’re also unpacking, cleaning, and figuring out your new surroundings. You don’t want to waste time opening every box just to find your phone charger, medication, or clean clothes. New home necessities should be packed in a separate, clearly labeled box and transported with you, not in the moving truck. This increases efficiency and saves you valuable time and energy when it matters most. 3. Ensure Comfort for the First 24–48 Hours The first couple of days after you move into a new house are often the most uncomfortable especially if you’re missing basic daily needs like: Bedding and pillows Toiletries (toothbrush, soap, toilet paper) Medications and first aid kit Snacks, water, or basic kitchenware Phone/laptop chargers A change of clothes Kids’ or pets’ supplies By prioritizing these comfort-focused items, you’ll make your first night feel less like camping and more like coming home. Pro Tip: Make a “First Night Survival Kit” Think of this as your new home necessities survival kit. Pack it in a clear plastic bin or a suitcase and label it: “Open First”. Include must-haves based on your lifestyle anything that supports your comfort, daily needs, and peace of mind. What to Bring First When Moving to a New House (Essentials Box List) When you move into a new house, the first 24 to 48 hours are all about comfort, survival, and getting settled quickly. That’s where your essentials box also known as a “first night box” or “open-first kit” comes in. This box should contain the new home necessities you’ll need immediately upon arrival, saving you time, reducing stress, and ensuring you’re not digging through sealed boxes when you’re tired from the move. Let’s break down exactly what to include in your essentials box so you’re well-prepared for move-in day. 3.1. Personal Essentials These items cover your daily comfort and hygiene needs. Having them within reach makes your transition smoother and less chaotic. Medications Pack all daily prescriptions and over-the-counter medications you or your family members may need. Keep them in their original containers to avoid confusion. Toiletries Bring basics like toothbrushes, toothpaste, soap, shampoo, deodorant, toilet paper, and hand towels. You’ll want to freshen up after a long moving day. Chargers & Electronics Include phone chargers, power banks, and any small electronics like a laptop or tablet. Staying connected helps with everything from setting up Wi-Fi to ordering food. A Few Changes of Clothes Pack enough outfits for at least 2–3 days, including undergarments, pajamas, and weather-appropriate layers. It may take a while before your full wardrobe is unpacked. 3.2. Kitchen Basics You may not be ready to cook full meals right away, but you’ll still need access to daily needs like snacks and simple kitchenware. Paper Plates, Cups, and Utensils Disposable tableware saves time and keeps cleanup easy when your dishes are still boxed up. One Pan or Pot If you plan to prepare a simple meal, one versatile cooking pan can go a long way. Dish Soap and Sponge Even if you’re not doing heavy dishwashing, you’ll need these to clean any items you use right away. Snacks and Bottled Water Keep granola bars, crackers, nuts, and water bottles handy to stay energized and hydrated throughout the day. 3.3. Sleeping Setup After a long moving day, a good night’s sleep is essential for your comfort and well-being. If your bed isn’t set up yet, having basic sleeping gear will help you rest. Pillows and Blankets These provide warmth and comfort, especially if you’re sleeping on the floor or an air mattress the first night. Bedsheets Clean sheets can make any surface feel a little more like home. Air Mattress or Temporary Bedding If your mattress hasn’t arrived or isn’t assembled yet, an air mattress or sleeping bag can be a lifesaver. 3.4. Cleaning Supplies Before you fully settle in, you might want to wipe down surfaces and clean high-touch areas. Efficiency in

How Much Does It Cost to Rent a PODS Moving Container
Moving and Packing Services

How Much Does It Cost To Rent A Pods Moving​

How much does it cost to rent a PODS moving container? The cost depends on several factors like distance, duration, container size, and added services. PODS offers a convenient moving and storage solution for both local and long-distance moves. For local moves, container rental rates typically range from $300 to $600. For long-distance moves, the PODS rental price can go from $1,000 to $5,000 or more. Prices may also rise if you need the container for storage or additional days. The size of the container usually 8-ft, 12-ft, or 16-ft also impacts the final cost. Longer moves or extended rentals naturally cost more. Always compare quotes to find the best fit for your moving needs What is a PODS Container and Why People Choose It for Moving A PODS container which stands for Portable On-Demand Storage is a popular choice for people looking for a flexible and cost-effective moving or storage solution. Whether you’re relocating your home or business, PODS containers are designed to make the moving process simpler and more manageable. What Makes PODS Containers So Popular? Flexibility and Convenience: One of the main reasons people choose PODS containers is the flexibility they offer. Unlike traditional moving companies, PODS gives you the option to pack and load at your own pace. There’s no need to rush you can keep the container for as long as you need. Self-Packing Advantage: With PODS, you control how your items are packed. This is especially helpful if you prefer to organize things yourself or want to reduce labor costs. For those who like to manage their own time and resources, self-packing with a PODS container is a smart solution. Door-to-Door Delivery: PODS containers are delivered right to your doorstep. You pack it up, and when you’re ready, the company picks it up and delivers it to your new location or to a secure storage center. This door-to-door delivery model reduces the stress of coordinating transportation. Ideal for Both Residential and Commercial Moves Whether you’re moving a small apartment or relocating a business, PODS containers come in multiple sizes to fit your needs. Homeowners appreciate the ease and control, while business owners value the reliability and space management during an office move or renovation. Cost of POD Rental: What to Expect When considering PODS for your move, it’s essential to understand the cost of pod rental. The pricing can vary depending on factors such as: The size of the container The duration of rental The distance of your move Delivery and pickup services On average, container rental rates can range from a few hundred to over a thousand dollars per month, depending on your location and needs. Always request a detailed quote to compare options and ensure it fits your moving budget. For more detail you can read what is a moving pod? PODS Pricing for Local Move: What You Need to Know A local move typically covers a relocation within 50 to 100 miles from your current residence or business location. Whether you’re moving within Los Angeles, relocating to Pasadena, or downsizing in Irvine, a PODS container can simplify the process by allowing you to move at your own pace without the pressure of coordinating with a traditional moving crew. How Much Does a PODS Rental Cost for a Local Move? The average PODS rental price for local moves ranges from $350 to $800 or more, depending on multiple factors. This price typically includes delivery, container drop-off, pickup, and basic rental time (usually 30 days). However, depending on your circumstances, the total cost can go up or down. Key Factors That Influence Storage Pod Rental Rates To make an informed decision, it’s important to understand what drives the storage pod rental rates in your area: Size of the Container PODS offers three standard sizes: 8-ft. PODS container – Good for studio apartments or a single room. 12-ft. PODS container – Perfect for 2–3 rooms or a small office. 16-ft. PODS container – Ideal for larger homes or full-house moves. Larger containers naturally come with higher rental prices due to space and transport handling. Duration of the Rental PODS gives you the freedom to rent by the day, week, or month. The longer you keep the unit, the more you’ll pay. While the first 30 days may be included, any extra time will add to the PODS rental price. For example: A 30-day rental may cost around $450 A 45-day rental may rise to $600+ City-Specific Pricing Differences Where you live plays a big role in pricing. High-demand metro areas like Los Angeles, Beverly Hills, and Century City tend to have higher storage pod rental rates due to fuel costs, labor fees, and urban logistics. In contrast, cities like Lancaster, Palmdale, or Victorville may offer more affordable rates. Optional Services That Add Value (and Cost) While PODS is primarily a self-pack and self-move service, you can upgrade your move by including: Professional loading/unloading crews Packing material kits Temporary or long-term storage at a secure PODS facility These services make your move easier but will increase your final PODS rental price. Tips to Get the Best Value on PODS for a Local Move Compare quotes from PODS and similar container services Book early to lock in the best rates, especially during peak moving seasons (May–September) Choose the right container size too big and you’ll overpay, too small and you’ll need multiple trips Bundle services wisely to save on labor or packing supplies What is the Cost of PODS for a Move that Involves Long-Distance? A long-distance move typically refers to any relocation that spans over 100 miles or crosses state lines. Whether you’re moving from Los Angeles to Austin or from Ventura to Seattle, a long-distance move requires more planning, and naturally, a higher budget especially when using a PODS container. Average Cost of PODS for Long-Distance Moves The average cost of PODS for a long-distance move can range from $1,000 to $4,000 or more, depending on several key factors: Key Cost Factors: Transportation

Moving and Packing Services

How To Move Long Distance

How to move long distance can feel overwhelming at first, but with the right steps, it becomes much easier. Planning beforehand is essential whether you’re moving for a new start, family, or career. Use simple moving long distance tips like making a checklist, booking trusted long distance movers, and packing in stages to stay organized. Selecting a certified moving company can also help you avoid stress at the last minute. Don’t forget to create a moving budget to avoid hidden costs. With careful planning, your long-distance move can be smooth and stress-free. Let’s break it down step by step to help you move with confidence. Understanding Long Distance Moving Long-distance moving involves relocating to a new place that is typically over 100 miles from your current location and often across state lines. It’s a major life event that needs detailed planning, professional help, and clear understanding of what’s involved. What Is Considered a Long-Distance Move? A long-distance move is any move that crosses a significant distance usually over 100 miles or to a different state. It can range from moving across California to relocating from Los Angeles to another state like Arizona or Texas. Long-distance relocations entail federal requirements, more intricate logistics, and distinct pricing systems in contrast to local migrations. Whether you’re moving long distance for a new job, better lifestyle, or to be closer to family, knowing what defines this type of move helps you plan better and avoid surprises. Key Differences Between Local and Long-Distance Moves There are several key differences between a local move and a long-distance move: Distance and Duration: Local moves happen within the same city or nearby areas, while long-distance moving spans hundreds or even thousands of miles. Pricing and Regulations: Long-distance movers charge by weight and distance, while local movers usually charge by the hour. Long-distance moving also involves compliance with federal transportation laws. Packing and Timing: Long-distance moves need sturdier packing, extra labeling, and a well-planned timeline due to the longer travel. Getting the right long distance moving advice from professional movers can help reduce risks and delays. Common Reasons for Long-Distance Relocation People move long distance for many personal or professional reasons: Career Opportunities: New jobs or promotions often require relocation to another city or state. Lifestyle Changes: Some families move for better weather, cost of living, or safer neighborhoods. Education: College students or parents looking for better school districts may choose long-distance relocation. Family Needs: Being closer to elderly parents or having a fresh start after a life event also motivates long-distance moves. Understanding these reasons can help you emotionally and practically prepare for the change. Challenges and Benefits of Long-Distance Moving Challenges: Higher Costs: Long-distance moves are more expensive due to fuel, tolls, and logistics. Stress and Planning: It requires careful planning, early packing, and time management. Emotional Impact: Leaving your familiar surroundings can be emotionally taxing. Benefits: New Opportunities: A new location can offer better career, social, or educational prospects. Fresh Start: Moving long distance allows you to declutter and begin a new chapter. Personal Growth: Adjusting to a new place can build independence and resilience. By getting professional long distance moving advice, you can turn the challenges into opportunities and make your relocation smoother and stress-free. You may read about How To Prepare Furniture For Long Distance Moving? How to Move Long Distance in 7 Easy Steps Relocating across states or hundreds of miles can be overwhelming but with a structured plan, it becomes manageable. Below are 7 easy steps that offer practical long distance moving advice to keep your relocation stress-free and on budget. Step 1: Make an Early Moving Plan Planning ahead is one of the most important moving long distance tips. Start by: Setting a Moving Date: Pick a specific move-out and move-in day. Try to avoid peak seasons if possible (summer is the busiest). Creating a Task Timeline: List weekly tasks from 8 weeks out booking movers, packing, notifying schools, etc. Being organized early gives you more control and fewer last-minute surprises. Step 2 – Make a Move Budget Making a move budget is critical to avoid unexpected costs when moving long distance. Include: Estimated Costs: Factor in movers, packing supplies, gas, lodging, meals, and temporary housing if needed. Cost-Saving Tips: Book movers in advance for better rates. Use free boxes from local stores. Pack non-fragile items yourself. Moving Cost Calculators: Use online tools to estimate your full move based on distance, home size, and services. This step ensures you stay financially prepared from start to finish. Step 3 – Declutter and Downsize Before you pack, declutter your home. This is one of the easiest long distance moving tips to save time, space, and money. Sort Your Belongings: Decide what to keep, sell, donate, or toss. Sell or Donate Items: Use Facebook Marketplace, garage sales, or local charities. Dispose Responsibly: Recycle old electronics or chemicals per city regulations. The less you take, the lighter (and cheaper) your move will be. Step 4: Select a Trustworthy Moving Company A seamless long-distance move requires knowing how to pick a moving company. Research Movers Thoroughly: Check reviews, compare quotes, and ask for recommendations. Check Licensing and Insurance: Look for a USDOT number for interstate movers. This proves they’re registered with the Federal Motor Carrier Safety Administration (FMCSA). Avoid Red Flags: Beware of movers with no physical address, vague pricing, or requests for large upfront payments. Reliable movers offer peace of mind and professional support vital parts of any long distance moving advice list. Step 5 – Pack Efficiently and Smartly Good packing protects your items and speeds up unpacking. Label Clearly: Mark every box by room and contents. Use “Fragile” labels where needed. Essential Boxes: Pack must-haves like clothes, medications, chargers, and toiletries separately. Consider Pro Packers: If you’re short on time or moving valuable items, professional packing services are worth the investment. Efficient packing helps reduce damage and saves you time on the other end. Step 6 – Organize Important Documents and Utilities

How Far in Advance to Book Movers | Full Guide
Moving and Packing Services

How Far In Advance To Book Movers

How far in advance to book movers depends on several important factors, such as the time of year, the distance of your move, and how busy your chosen moving company is. As a general rule, it’s best to schedule movers at least 4 to 8 weeks ahead of your desired moving date. For local moves, 2 to 4 weeks may be enough during slower seasons, while long-distance or peak-season moves like those in summer often require advance booking of movers up to 12 weeks out. Early booking not only secures your preferred date and time but also helps you avoid high rates, rushed decisions, and limited availability. An easier, less stressful moving experience is guaranteed when preparation is done in advance. Why Should I Book Movers Early? Booking movers in advance comes with major advantages, especially when you’re planning a smooth and stress-free relocation. Whether you’re moving locally or long-distance, early planning helps you avoid common pitfalls that many people face during last minute moving services. Avoid Last-Minute Price Hikes Avoiding price increases is one of the main reasons to schedule your movers in advance. For urgent demands, moving companies frequently charge more. If you wait until the last week or even the last few days, chances are you’ll face last minute moving services fees, which are usually higher due to limited availability. You can obtain better rates and possibly even discounts if you lock down your moving date in advance. Get Your Preferred Moving Date and Time The ideal moving dates and hours are yours to choose when you make your reservation in advance. This is especially important if you’re moving during peak seasons like summer or weekends. Early booking gives you the flexibility to schedule your move when it’s most convenient for you, rather than settling for what’s left. More Time to Prepare and Organize Planning an advance moving strategy gives you time to organize everything without rushing. You’ll be able to sort, donate, or sell items you no longer need. You can properly label boxes, prepare your new home, and make other arrangements like school transfers or utility set-ups. This saves time and helps avoid confusion during the move. Reduce Stress and Unexpected Surprises Moving is one of life’s most stressful events. Booking movers early helps reduce that stress significantly. You’ll know your move is in capable hands, which means fewer chances of unexpected surprises like unavailable trucks, delayed movers, or missing packing supplies. With proper planning, your moving day becomes a lot more predictable and manageable. How Far in Advance to Book Movers: Recommended Timeframes When planning a move, timing is everything. Knowing how far in advance to book movers can save you stress, money, and frustration especially if you’re relocating during busy periods or long distances. Here’s a breakdown of recommended timelines depending on your move type and season. Local Moves: 2–4 Weeks in Advance It’s best to hire movers at least two to four weeks prior to the date you want to move if you’re moving locally. Local moving companies may have more flexible calendars, but waiting too long can still limit your options especially if you need specific dates or weekend slots. You may secure your desired time and crew by making your mover reservations well in advance. Long-Distance Moves: 6–8 Weeks in Advance For moves that cross states or cover long distances, it’s crucial to book 6 to 8 weeks ahead. More coordination, permissions, and preparation are needed for these kinds of transfers. Delaying your advance booking of movers could leave you with fewer choices and higher prices, especially if you’re relocating to or from a high-demand area. Peak Season (Summer): Up to 12 Weeks in Advance  Summer is the busiest time for moving, and schedules fill up fast. If you’re moving between May and September, try to schedule movers up to 12 weeks in advance. Movers get booked quickly during this period, especially around weekends, holidays, and the start or end of the month. Booking early gives you the best chance at securing top-rated movers and avoiding last-minute issues. Off-Season (Winter/Fall): 2–4 Weeks May Be Enough Moving during the fall or winter usually gives you more flexibility. With fewer people relocating during colder months, you can often schedule movers 2 to 4 weeks in advance without much trouble. You may even find better rates and more personalized service from moving companies. Still, it’s a good idea to plan early, especially if your schedule is tight. Same-Day or Emergency Moves: What to Expect  Sometimes life happens, and you might need to move on short notice. While not ideal, same-day or emergency moves are possible with some moving companies. Availability can be limited, and you may face higher prices due to last-minute coordination. If you didn’t make an advance booking of movers, be prepared for flexibility in timing and possibly a smaller crew. Best Time of Year to Easily Book a Move When planning your relocation, knowing the best time of year to easily book a move can make a huge difference in cost, convenience, and availability. By understanding the different moving seasons and timing your move strategically, you can save money and avoid unnecessary stress. To assist you maximize your relocation timetable, below is a comprehensive guide. Overview of Moving Seasons Peak Season (May–September): High Demand, High Cost This is the busiest time for moving companies. Families prefer summer moves due to school breaks and better weather. However, this high demand means you’ll face higher rates and tighter schedules. If you need to move during this season, make sure to secure advance booking of movers ideally 8–12 weeks in advance. Delaying may leave you with fewer choices and inflated prices. Off-Peak Season (October–April): More Availability, Lower Rates The best time of year to easily book a move is typically during the off-peak months. From late fall to early spring, moving companies have more open slots, and pricing is often more budget-friendly. You’ll have better chances of getting your preferred date and

How to Pack a TV for Movers | Step-by-Step Guide
Moving and Packing Services

How To Pack A Tv For Movers

How to pack a TV for movers is something every homeowner should know before moving day arrives. TVs, especially flat screen models, are delicate and often expensive making them one of the most important items to pack correctly. A single bump or scratch can damage the screen or internal components. Whether you’re moving across town or to a new city, proper packing TV for moving helps protect your investment. Using the right materials and techniques for flat screen TV packing ensures that your device stays safe during the entire moving process. Necessary Materials and Tools for Packing a TV When you pack a TV for moving, using the right tools protects your screen from cracks and scratches. Here’s what you’ll need: TV Box (Original or Moving-Grade) The best option is the original TV box. If not available, use strong moving boxes for TV, available at Home Depot, or online. Foam Corners Foam corners protect the edges of your TV and prevent damage during bumps. Most TV boxes include these, or you can buy them separately. Bubble Wrap Wrap the TV completely in bubble wrap for added shock protection. Use large bubbles for better cushioning. Packing Tape To keep everything in place and close the box, use sturdy packing tape. Tape all sides and corners securely. Moving Blanket or Padding Wrap the TV in a thick towel or moving blanket if you aren’t boxing it. Use tape or stretch wrap to secure it. Screen Protector Film (Optional) This adds extra protection against scratches but isn’t required. Helpful for large or expensive TVs. You may read about How Do You Move Your Computer And Stuff? Step-by-Step Guide | How to Move a TV Safely Moving a TV needs special care, especially when it comes to flat screen TV packing. Here’s a quick checklist to help you properly pack a TV when moving: Step 1: Clean and Disconnect Turn off your TV, unplug it, and remove all cables and connected devices. Before packing, make sure everything is cool and dust-free. Step 2: Organize Accessories Place the remote, power cord, HDMI cables, and base stand into small, labeled bags. To ensure that nothing is lost during the move, keep them all together. Step 3: Protect the Screen Use a gentle, dry towel to gently wipe the screen. Use a screen protector or soft sheet to prevent scratches during flat screen TV packing. Step 4: Wrap the TV Wrap the TV in bubble wrap and cover the corners with foam protectors. This step helps absorb shocks and avoids damage from bumps. Step 5: Secure in a TV Box Place the wrapped TV into a TV moving box that fits snugly. Add extra padding if there’s any open space to keep it steady. Step 6: Label the Box Clearly mark the box with “Fragile” and “This Side Up” to make sure it’s handled with care during loading and transport. Need help with packing services in Sherman Oaks or nearby areas? Contact Chamomile Go your trusted local moving experts. Packing a Small or Very Large TV When it comes to packing TV for moving, the size and shape of your television make a big difference. Whether you’re handling a compact screen or an oversized smart TV, proper care and packing materials are essential. Small TVs Small TVs are much easier to manage. They’re lightweight, usually under 32 inches, and can often be packed by one person. These screens fit well into standard-sized TV boxes or even moving boxes with proper padding. Even though they’re less bulky, you still need to protect the screen with soft cloth, wrap it in bubble wrap, and secure it with packing tape. Just because it’s small doesn’t mean it can’t break always take time to pack a TV for moving the right way. Large TVs Large TVs, especially 55 inches and up, are heavier, more fragile, and require more care. They often need custom-fit moving boxes or adjustable TV kits. Two people are usually needed to safely lift and carry the screen without bending or dropping it. Make use of lots of padding inside the box, foam corners, and a thick layer of bubble wrap. The TV should be kept upright during the transport; placing it flat increases the chance of screen damage. Special Tips for Curved or Ultra-Slim TVs Curved and ultra-slim models are more sensitive to pressure and shock. When packing TV for moving, place a rigid piece of cardboard or a flat board behind the screen before wrapping. This helps prevent the screen from flexing. Always add extra layers of bubble wrap around the curve and support the shape with soft padding. Never stack anything on top of these models they’re not built to carry weight. If you’re planning a move, take the time to choose the right materials and follow proper steps. No matter the size, the goal is to make sure your TV arrives safely, without scratches or cracks. Loading the TV into the Moving Truck After you pack a TV for moving, the next important step is loading it into the truck the right way to avoid damage. Keep the TV Upright and Secure Always place the TV in an upright position, just like it stands in your living room. Laying it flat can cause pressure on the screen and lead to cracks, especially during bumps on the road. Use Straps or Barriers Once inside the truck, secure the TV using moving straps or place it between soft, stable items like mattresses or cushions. Avoid loose space that could let the TV shift or fall during the drive. Keep Heavy Items Away Never place heavy boxes, furniture, or tools near the TV. These items can shift and crush the screen. Reserve a protected corner or side wall of the truck just for your TV. By following these steps, you protect your device from damage even after you’ve taken the time to properly pack a TV for moving. When to Call Professional Help While it’s possible

How Much Do You Tip Movers for 2 Hours – Best Guide
Moving and Packing Services

How Much Do You Tip Movers For 2 Hours

How much do you tip movers for 2 hours depends on a few simple factors mainly the number of movers, service quality, and your personal budget. For short moves that last around two hours, the standard tip for movers usually falls between $10 to $20 per mover. This amount is a straightforward way to show appreciation for their effort and care during your move. Some people prefer to tip based on an hourly rate, while others use a flat rate regardless of time. In our movers tipping guide, we’ll explain both methods to help you choose what’s right for your situation. Tipping is never mandatory, but it’s always appreciated when movers go above and beyond. Importance of Tipping Movers Tipping movers is an important part of the moving experience. It’s not just about money it’s about respect and recognition for a job that demands both strength and skill. Movers handle your valuable items with care, protect your furniture, and ensure that everything arrives safely. Offering a mover tip is one of the few direct ways you can thank them for their efforts. It reinforces good service and shows that their hard work doesn’t go unnoticed. Appreciation for Hard Work Moving is physically and mentally draining, and professional movers often deal with tight schedules, stairs, heavy boxes, and unpredictable weather. Despite these challenges, many movers still offer friendly, efficient service. Tipping movers tells them you appreciate their patience, attention to detail, and dedication. It’s especially important if they go above and beyond like helping you arrange furniture or wrapping fragile items carefully. Common Practices in the U.S. In the United States, tipping service workers is a common and expected practice, and the moving industry is no exception. While not mandatory, most people tip their movers based on the overall cost of the move or the number of hours worked. A common guideline is $4 to $5 per mover per hour or 10%–20% of the total moving cost. Some also give a flat-rate mover tip for example, $20 per mover for short moves. Following these common standards not only builds good relationships with moving companies but also supports workers who rely on tips as a part of their income. Tipping is a personal decision, but when done fairly, it helps uphold the professionalism and reliability expected in the moving industry. How Tips Supplement Movers’ Income Average Mover Wages Most movers in the U.S. earn between $15 to $20 per hour, depending on their location, experience, and the moving company they work for. While this seems reasonable, the job is physically demanding, often includes long hours, and doesn’t always come with benefits like health insurance or paid time off. That’s why tips are more than just extra cash they help close the gap in income. Boosting Overall Earnings Tips can significantly increase a mover’s daily pay. For a short, two-hour move, a mover tip of $20 per person adds noticeable value to their earnings. When customers follow a fair movers tipping guide, it can mean the difference between an average and a rewarding day’s work. Tipping movers is one of the few ways customers can directly show appreciation for careful, respectful service. Seasonal and Unsteady Work Moving jobs aren’t always steady year-round. Many movers rely on the busy summer months to make the bulk of their income, while winter brings fewer bookings. This seasonal nature makes tips even more important. They help movers manage during off-peak times, especially when regular hours are cut short. Why Tips Matter Long-Term When you tip movers, you support the people who protect your belongings and make moving day less stressful. For many movers, tips aren’t a bonus they’re a core part of their earnings that helps them make ends meet, stay motivated, and continue delivering quality service. You may read about Do Moving Companies Pack For You? Impact of Tips on Service Quality Better Tips, Better Service? Yes better tips often lead to better service. While most professional movers are committed to doing a good job regardless of tipping, knowing there’s a fair standard tip for movers at the end of the job can boost morale and encourage even more care and effort. A good tip is not only a reward for past service but also a motivator for continued professionalism throughout the move. Real-Life Examples Many customers report that when they follow a movers tipping guide and tip generously, movers often go the extra mile. This includes helping arrange furniture, offering advice on unpacking, or taking extra time to wrap fragile items. One common story is movers staying behind to help assemble beds or organize a storage unit without being asked simply because the customer showed appreciation through a thoughtful tip. Tipping as a Motivator Movers deal with tight schedules, stairs, heavy furniture, and unpredictable weather. Knowing that a tip is coming can make those tough moments more manageable. A fair standard tip for movers doesn’t just say “thank you” it tells the crew their hard work is valued. When movers feel respected and appreciated, they’re more likely to be careful with your belongings, stay professional, and deliver service that exceeds expectations. Using a fair and transparent movers tipping guide helps you set the right tone. It shows you understand the work involved and are ready to reward it accordingly creating a win-win situation for both you and your moving team. Factors Influencing Tip Amounts Size and Complexity of the Move A small studio move on the first floor requires far less effort than moving a four-bedroom house with stairs and heavy furniture. The more complex the move, the more justified a higher tip becomes. Time, energy, and skill required all play a part in determining what’s fair. Quality of Service Received If the movers arrive on time, communicate clearly, protect your belongings, and maintain a professional attitude, it’s a strong sign they’ve earned a higher tip. On the other hand, if the service is rushed or careless, you may choose to tip less or

Our Client's Reviews

Get In Touch With Us!

Find Us

Office Address

    Los Angeles, California

Office Phone

    +1 310-895-3517

Email Address

  Chamomilemoving@gmail.com

Let’s get you moving! Grab your FREE quote now.

Chamomile Go offers premier moving services throughout Los Angeles County, CA, ensuring a hassle-free relocation experience for all our clients.

+1 310-895-3517

24/7 Support

© 2025 Created by LocalPro1