Get a Free Quote

Edit Template

Author name: 2m54a

How to Pack Legos for Moving | Safe & Easy Packing Guide
Moving and Packing Services

How To Pack Legos For Moving

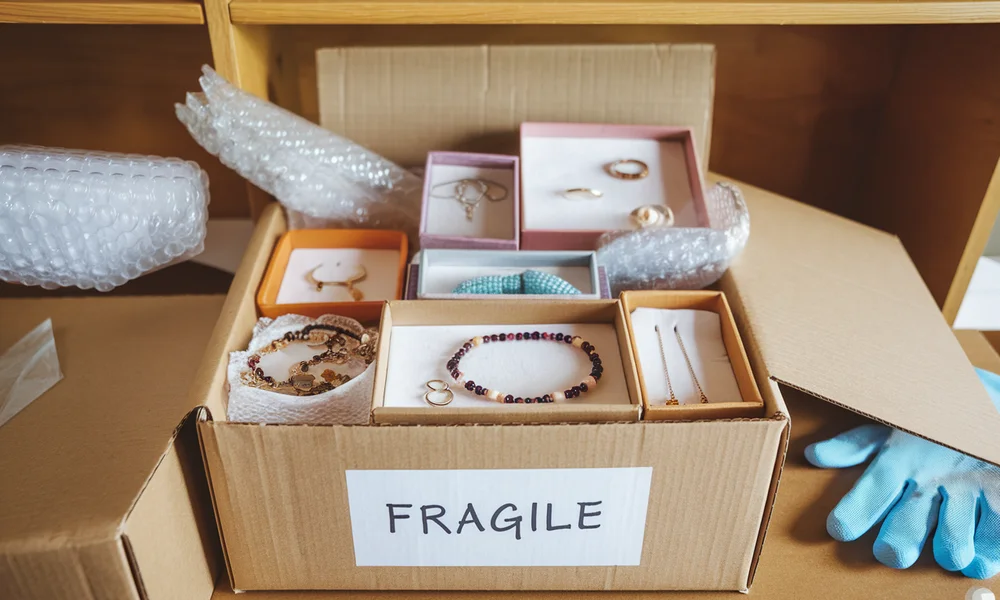
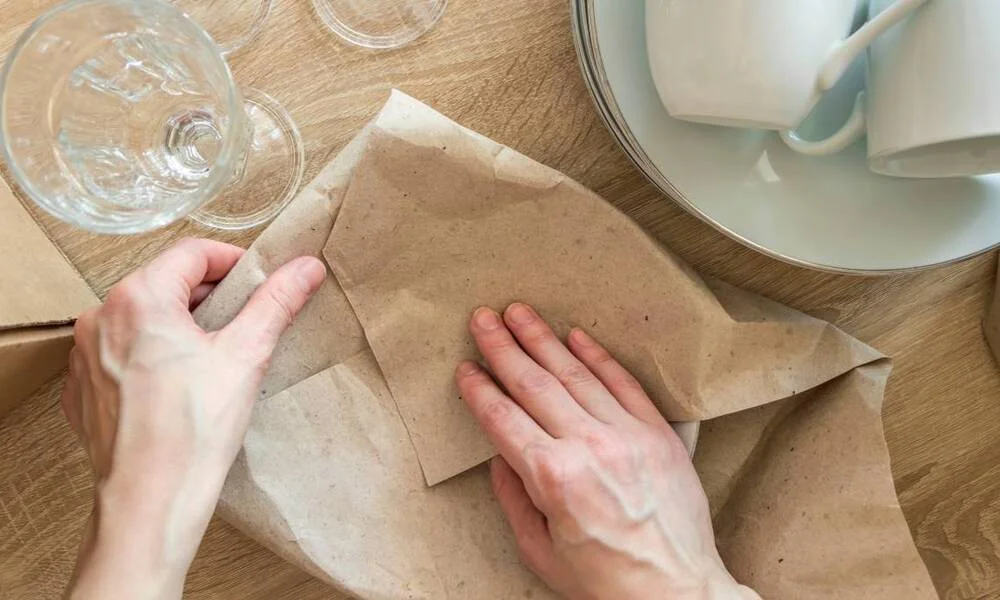
How to pack Legos for moving requires special care due to their intricate and often delicate nature. Unlike many other items, LEGO sets consist of small, easily lost pieces and can be complicated to reassemble if damaged or disorganized. Preserving the integrity of LEGO sets during a move is essential to ensure that none of the pieces are lost, broken, or damaged in the process. The key to successful moving LEGO sets lies in careful planning and the right packing techniques. This article will focus on providing practical packing tips, necessary equipment, and other essential moving considerations to help ensure your LEGO collection arrives at its new home intact and ready to be enjoyed again. Equipment & Supplies You Need to Pack LEGO Sets for Moving When preparing to move LEGO sets, it’s essential to have the right supplies to ensure that all your pieces are safe, organized, and easy to access during the move. Here’s a breakdown of the key equipment you’ll need for packing your LEGO sets: Bubble Wrap – Protecting delicate pieces and fragile components is crucial when moving LEGO sets. Bubble wrap offers excellent cushioning, keeping your sets intact during transport. Use it for larger components or delicate parts that might easily get damaged. Storage Bins & Boxes – Choosing the right size bins and boxes is important when moving LEGO sets. You’ll need enough space to sort and organize different sets. Opt for clear plastic bins, as they allow you to easily see the contents, making it easier to find what you need during the unpacking process. Ziplock Bags – These are great for storing smaller pieces and minifigures. When moving LEGO sets, it’s easy for small pieces to get lost, so using ziplock bags helps to keep everything organized. Label each bag according to the set or component, so nothing gets mixed up. Packing Paper – For additional cushioning inside boxes, packing paper is a great option. It provides extra padding for your LEGO sets and protects against bumps and shocks during the move. Wrap the LEGO sets in packing paper before placing them in storage bins to avoid any breakage. Markers/Labels – To keep everything organized, it’s essential to label your boxes and bags. Use markers to label the contents of each box or bag, especially if you’re moving multiple LEGO sets. This will save you time and frustration when it’s time to unpack. Plastic Containers – For easy storage and quick access during the move, plastic containers are incredibly useful. They’re sturdy and can keep your LEGO sets in good condition while offering portability and flexibility during the move. Packing Tape – Don’t forget packing tape to securely seal all your boxes. This ensures that your LEGO sets stay protected inside their containers and that nothing accidentally falls out during the move. With these supplies on hand, packing LEGO sets for moving becomes a much easier and more efficient task. By carefully sorting, wrapping, and labeling everything, you’ll be able to keep your collection safe and organized throughout the process. You can also read about moving services in Los Angeles. What to Do Before Packing LEGO Sets for Moving Before you begin the process of packing your LEGO sets for moving, there are a few important steps to take to ensure everything is organized, safe, and easy to reassemble later. Here’s a guide on how to prepare your LEGO sets for the move, making it the best way to move Legos: Sort and Organize Your Legos Sorting and organizing your LEGO pieces is a key step in making your move more manageable. Separate the sets by size, color, or type to keep everything easy to find. You can even organize smaller pieces or unique components into ziplock bags to prevent them from getting lost during the move. This will make it easier to reconstruct the sets later and help maintain the order of your collection. Disassemble Larger Models If you have large, complex models, it’s a good idea to disassemble them before packing. Breaking down these models into smaller sections will make them easier to pack and reduce the risk of pieces getting damaged during transit. This also helps avoid overloading boxes with too much weight. Disassembling your models is one of the best ways to move Legos, as it ensures every component stays safe and compact. Take Photos of Your LEGO Setups A simple yet effective trick when preparing to move LEGO sets is to take detailed photos of your setups. This can be extremely helpful for reassembling your sets later. By capturing the way each set is arranged, you’ll have a reference to guide you as you put everything back together after the move. Plus, it’s an easy way to ensure that nothing important is forgotten. Check for Missing Pieces Before packing your LEGO sets for the move, make sure to check for any missing pieces. Double-check the boxes and bags for any parts that might have been misplaced or lost. If you discover any gaps, consider ordering replacement parts ahead of time, so you’re not left searching for a missing piece when you’re ready to rebuild. 5 Steps of How to Pack Legos for Moving Packing your LEGO sets for a move can be a daunting task, but with the right approach, you can ensure everything stays safe and organized. Follow these five essential steps to make LEGO moving a breeze: Step 1: Sort & Organize the Pieces Before you start packing, it’s crucial to sort your LEGO pieces. Divide them into categories based on the sets or types of bricks. This will make it much easier to unpack and rebuild later. You can use bags or containers to separate different parts, ensuring that smaller pieces don’t get lost or mixed up during the move. This organization is key to keeping everything in order throughout the LEGO moving process. Step 2: Disassemble Larger Builds If you have large, complex LEGO models, disassembling them before packing is a good

How to Pack Jewelry for Moving | Safe Packing Tips
Moving and Packing Services

How To Pack Jewelry For Moving

How to pack jewelry for moving is an important part of ensuring your valuable items arrive safely at your new home. When packing jewelry to move, it’s essential to use the right materials and techniques to avoid damage. Necklaces can easily tangle, earrings may get lost, and rings can scratch if they’re not properly secured. Learning how to pack jewelry involves organizing each piece, using soft pouches or jewelry boxes, and labeling containers clearly. Bubble wrap, pill organizers, straws for necklaces, and small plastic bags can all help keep your jewelry safe and untangled. By taking time to pack each piece properly, you reduce the risk of loss or damage during transit. Understanding Jewelry Protection Basics When it comes to packing jewelry for moving, many people overlook how fragile and valuable their collection really is. Whether you’re relocating across town or cross-country, ensuring your jewelry arrives safely is essential. From preventing scratches to avoiding tangling and loss, protecting your pieces during a move requires care, the right packing materials, and smart organization. Why Is Jewelry Protection During Moving So Important? Jewelry isn’t just another household item. It holds emotional, sentimental, and financial value. But during a move, it’s extremely vulnerable to: Scratches and dents Tangles and knots Misplacement or total loss Even the smallest movement inside a box can cause damage. Necklaces can become tangled, stones may loosen, and fragile items like antique brooches or dainty chains can break easily. That’s why packing jewelry for moving demands extra attention and preparation. Common Causes of Jewelry Damage During a Move Understanding what causes jewelry damage helps you prevent it. Here are the most common risks: 1. Scratches and Dents Metals rubbing together or bumping into hard surfaces can scratch or deform your jewelry, especially delicate pieces like gold or silver chains. 2. Tangling Necklaces, bracelets, and chains can easily become a tangled mess. Detangling them later can lead to breakage or stretched links. 3. Loss of Small Items Tiny items like earrings, rings, or pendant clasps can easily go missing if not packed properly. Once lost in a big moving box, they’re almost impossible to find. Best Materials for Packing Jewelry Safely The good news? You don’t need expensive tools to protect your jewelry. Many affordable, easy-to-find materials can do the job well: Bubble Wrap Wrap each item individually with bubble wrap to prevent impact damage. This is especially important for larger items or anything with gemstones. Jewelry Pouches Use soft fabric or padded jewelry pouches for small or medium pieces. These protect against scratches and tangles. Velvet or Fabric Bags Velvet pouches offer gentle protection and are ideal for rings, earrings, and brooches. Jewelry Boxes with Dividers If you already own a compartmentalized jewelry box, it’s a great way to keep each item in its place. Just make sure the box itself is well-padded and securely closed. Cotton Balls or Toilet Paper If you’re in a pinch, wrap items in toilet paper or place them between cotton balls for cushioning. This DIY method adds softness and reduces movement during the move. Pro Tips for Organizing and Packing Jewelry for Moving Here are some expert-backed steps to make your packing smooth and secure: Pack Each Item Separately Never throw multiple pieces into a single pouch or box. Wrap or store each piece on its own to avoid scratches or tangles. Label Containers Clearly Use labels like “Rings,” “Necklaces,” or “Fine Jewelry” on your pouches or boxes. This helps you stay organized and makes unpacking easier. Keep Jewelry with You If possible, don’t place your valuable jewelry in a moving truck. Pack it in a personal bag or carry-on to keep it secure and within reach. Take Inventory Make a list of all jewelry items you’re packing. You can even take photos for insurance purposes, especially for valuable or heirloom pieces. For packing services in Sherman Oaks you can contact us. Professional Packing Techniques When it comes to packing jewelry for moving, taking a professional approach is crucial, especially for valuable or delicate pieces. Jewelry is often one of the most precious items we own, and its protection during a move is paramount to ensuring it arrives safely at its destination. Professional packing techniques not only safeguard against damage, but they also help to maintain the jewelry’s integrity and value. Why Professional Packing is Important for Valuable or Delicate Jewelry Professional packing is important because jewelry, due to its small size and delicate nature, is vulnerable to various risks during a move. Without the right protection, jewelry can become scratched, bent, tangled, or even lost. Moreover, valuable items like diamonds, gold, and silver require extra care and attention to ensure they don’t sustain irreversible damage. Professional packing provides specialized techniques that help prevent these issues and ensure that your jewelry is transported safely, regardless of how far you’re moving. Step-by-Step Professional Packing Methods Here is a step-by-step guide to packing jewelry for moving using professional techniques to ensure its safety: 1. Cleaning and Sorting Jewelry Before packing, always take the time to clean and sort your jewelry. Cleaning helps to prevent dirt or oil from causing stains or damage during the move. Sorting is equally important; group jewelry items by type and value, as this will help you organize and pack them more efficiently. This step allows you to assess whether anything needs special care, such as pieces with loose stones or items that are particularly fragile. Tip: Use a jewelry cleaning solution or a soft cloth to gently clean your items. Avoid harsh chemicals or abrasive materials that could scratch or tarnish your jewelry. 2. Using Individual Compartments or Jewelry Boxes For an organized and secure packing process, consider using jewelry boxes with individual compartments. These boxes help to keep pieces separated, preventing them from rubbing against each other and causing damage. Compartmentalized boxes are ideal for packing jewelry for moving, as they help organize everything neatly and securely. For rings, earrings, and small items, a box with padded inserts works

How Much Does Moving a Mobile Home Cost? Get an Estimate
Moving and Packing Services

How Much Does Moving A Mobile Home Cost

How much does moving a mobile home cost? Understanding the cost to move a mobile home is essential for anyone considering relocating their mobile home. Moving a mobile home can be a complex process that involves various factors, including distance, size of the home, and the services required. By knowing the costs upfront, homeowners can plan their budget accordingly, avoid unexpected expenses, and ensure that they are prepared for the logistics of the move. Whether it’s a local move or a long-distance relocation, having a clear understanding of the costs involved will help individuals make informed decisions and avoid any financial surprises. How Much Does Moving a Mobile Home Cost in Los Angeles? Moving a mobile home in Los Angeles can be a complex and costly process, influenced by several local factors such as traffic, permits, and regional regulations. The mobile home transport cost in Los Angeles is typically higher than in many other areas due to these unique challenges. Here’s a detailed breakdown of the price to move a mobile home in LA: 1. Distance The farther you need to move your mobile home, the more expensive it becomes. The mobile home transport cost for a local move within Los Angeles, where distances are often short, typically ranges from $1,000 to $5,000. However, if you’re moving a mobile home across a significant distance, such as from Los Angeles to a neighboring city, the cost could rise to $5,000 to $10,000 or more, depending on the specific distance. 2. Size and Weight The size of the mobile home is another important factor. Larger mobile homes (e.g., double wides) are more expensive to move because they require more equipment and manpower. A typical price to move mobile home will range from $2,000 to $5,000 for a single-wide mobile home, and from $4,000 to $10,000 for a double-wide. Heavier homes may also incur additional charges due to the need for specialized equipment and transport. 3. Permits and Inspections In Los Angeles, the need for various permits and inspections can significantly increase the total cost of moving a mobile home. The local government requires permits for moving large structures on public roads, and these permits may cost anywhere from $100 to $1,000 depending on the route and specific regulations. Additional inspections to ensure the mobile home is roadworthy might also be required, adding to the overall cost. 4. Labor and Equipment Los Angeles’ high labor costs, especially for specialized workers like crane operators or heavy equipment drivers, can drive up the mobile home transport cost. On average, labor can account for around $500 to $2,500 of the total price. Heavy-duty trucks, trailers, and other moving equipment may add another $1,000 to $5,000, depending on the complexity of the move. 5. Traffic and Route Considerations Los Angeles’ notorious traffic can also impact the price. Moves scheduled during peak traffic hours might need to factor in additional costs due to delays or permits for road closures and traffic control. The route also plays a role if there are narrow streets or overhead obstructions, additional planning and equipment might be needed. 6. Regional Price Differences Compared to other regions, moving a mobile home in Los Angeles tends to be more expensive. Areas like Riverside, San Bernardino, or Ventura may have lower costs due to less traffic, easier routes, and fewer regulations. In smaller, rural towns, the price to move a mobile home can be much lower, sometimes only a few thousand dollars for a short-distance move, without the heavy regulatory burden found in LA. 7. Additional Costs Setting up the mobile home: Once moved, you may also need to pay for utilities hook-up, foundation work, and securing the home to the site. These costs can range from $1,000 to $5,000 depending on the complexity. Insurance: Insurance for the move itself is often recommended, which can add another $200 to $500 to the overall price. You should read about moving services in Los Angeles. What Costs Are Involved in Moving a Mobile Home? When moving a mobile home, several costs are involved. Each aspect of the move, from transportation to insurance and preparation, adds to the overall mobile home movers cost. Here’s a breakdown of the key costs you should expect when moving a mobile home: 1. Transportation Costs The primary expense in moving a mobile home is the mobile home movers cost for transportation. This includes the actual hauling or trucking of the mobile home from one location to another. The total transportation cost depends on several factors: Distance and Route: The mobile home movers cost increases with distance. A short-distance move (within the same city or nearby area) may range from $1,000 to $5,000, while long-distance moves (across state lines or long distances) can cost anywhere from $5,000 to $15,000 or more. The route you choose also plays a role narrow roads, bridges, or areas with difficult terrain can add to the cost. Size of the Mobile Home: Larger homes, such as double-wide mobile homes, require more equipment, longer trucks, and more manpower to move, which increases the mobile home movers cost. A smaller single-wide mobile home will generally cost less to move. 2. Permitting Fees Moving a mobile home requires several permits. These fees are required to legally transport a mobile home on public roads and ensure compliance with local and state regulations: Local Permits: Cities or counties may require permits for the transport of oversized loads. These permits can range from $100 to $1,000, depending on the local laws and the complexity of the move. State Permits: Many states also require special permits for mobile home moves, which can add $500 to $1,500 or more. The cost may vary based on the state’s requirements, the route, and the size of the home. Escort Vehicles: If the mobile home is particularly large or if the route requires it, you may need to hire escort vehicles to guide the move. These vehicles help ensure safe passage, especially on busy roads or highways, and they

How to Pack a Suit for Moving | Easy Step-by-Step Guide
Moving and Packing Services

How To Pack A Suit For Moving

How to pack a suit is a crucial skill, especially for those who frequently travel or attend special events. Properly packing a suit ensures it stays wrinkle-free, well-preserved, and ready to wear. However, packing a suit presents a unique set of challenges depending on the purpose. Whether you’re traveling for business, moving to a new home, or preparing for an important event, each scenario requires careful attention to detail. The key to successful packing a suit lies in choosing the right method to minimize creases and protect the fabric. Missteps in packing can lead to unwanted wrinkles or even damage, making it essential to understand the best techniques for different situations. Why Packing a Suit Properly is Essential When it comes to traveling, one of the most important items you might pack is your suit. Whether it’s for a business trip, a wedding, or a formal event, packing a suit in a suitcase requires careful consideration to maintain its integrity and appearance. Here’s why packing a suit properly is essential: Protecting the Fabric and Structure of the Suit A suit is often made from delicate fabrics like wool, silk, or linen, which can easily be damaged during travel if not packed correctly. The structure of a suit, including the lapels, shoulders, and seams, can also lose its shape if not treated with care. By taking the time to pack a suit in a suitcase properly, you ensure that the fabric is protected from friction, pressure, and other elements that might cause snags, stretching, or discoloration. Using a proper packing technique will maintain the suit’s original design and prevent the risk of irreversible damage. Ensuring You Look Sharp and Polished When You Arrive One of the main reasons you wear a suit is to look sharp, polished, and professional. When you pack a suit in a suitcase without taking the proper precautions, wrinkles and creases are almost inevitable. These wrinkles can make your suit look disheveled and unprofessional. Whether you’re attending an important business meeting or a formal event, you want to feel confident and look well put together. By packing your suit carefully, you’ll arrive at your destination with it looking crisp, clean, and ready to wear, saving you time and effort when you need to look your best. Preventing Wrinkles and Damage During Transportation Traveling can be tough on your clothes, especially when it comes to something as structured as a suit. Without the right packing techniques, your suit could end up wrinkled or even damaged due to improper handling. To prevent wrinkles and maintain the suit’s shape, consider using a garment bag, a suit carrier, or rolling methods that reduce folding. Wrinkle-free and damage-free, your suit will be ready for whatever the occasion requires. Maintaining the Suit’s Lifespan A high-quality suit is an investment, and with proper care, it can last for years. Proper packing plays a significant role in extending the lifespan of your suit. When packed correctly, the suit retains its shape and fabric integrity, avoiding the need for costly repairs or dry cleaning. Ensuring that the suit stays free from wrinkles, stains, or damage will preserve the suit’s overall value, making it worth the investment in the long run. Using Tools and Accessories to Assist in the Process There are several tools and accessories you can use to make packing a suit in a suitcase even more effective. Garment bags, for instance, are a great solution to protect your suit from any potential damage during travel. Many modern suit carriers are designed with special compartments that help distribute weight evenly, ensuring that the suit is not crushed. Additionally, using packing cubes for smaller accessories like ties, cufflinks, and dress shirts ensures that everything stays organized and prevents unnecessary pressure on the suit itself. These small investments can make a big difference in keeping your suit in perfect condition. Creating a Stress-Free Travel Experience Packing a suit in a suitcase properly also makes your travel experience much smoother. When your suit is neatly packed and wrinkle-free, you don’t have to worry about last-minute touch-ups or running to the nearest hotel iron. You can focus on your trip and handle your commitments with peace of mind, knowing that your suit is ready to impress when you need it most. How to Pack a Suit for Moving Packing a suit for a move requires extra care to prevent wrinkles, fabric damage, and crushing, especially if the suit will be in long-term storage or subjected to rough handling. Here’s how to pack your suit properly for a move: Specific Needs for Packing a Suit for Moving Long-Term Storage: If the suit will be stored for an extended period, it needs breathable protection to prevent wrinkles, stains, or fabric damage. Heavy-Duty Packing: During a move, the suit may be jostled around, so it needs extra cushioning to prevent damage. Step-by-Step Guide to Folding and Storing the Suit Use a Garment Bag Start by placing your suit in a breathable garment bag to protect it from dust and moisture. Fold the Suit Lay the jacket flat and fold the shoulders inward. Then fold the jacket in half. Fold the trousers in half lengthwise, then fold them in half to match the jacket. For long-term storage, use tissue paper between folds to avoid pressure marks. Prepare the Box Use a medium-sized, sturdy box, preferably a wardrobe box with a hanging bar. Line the bottom with bubble wrap or tissue paper for extra cushioning. Place the Suit in the Box If using a wardrobe box, hang the garment bag. If using a regular box, carefully place the folded suit with padding around it. Label the Box Mark the box as “Fragile” to ensure movers handle it with care. Best Practices for Avoiding Damage Garment Bags or Suit Covers protect against dust and moisture. Padded or Wardrobe Boxes prevent crushing. Avoid Overpacking to give the suit room to breathe. Climate Control helps preserve the suit’s fabric for long-term storage. Keep Boxes Upright to

What Is Picking and Packing? A Quick Process Breakdown
Moving and Packing Services

What Is Picking And Packing

What is picking and packing? In logistics and supply chain management, picking and packing are essential processes that ensure products are accurately selected and securely prepared for shipment to customers. Picking involves the retrieval of items from inventory based on specific order details, while packing involves safely enclosing the items in appropriate packaging to prevent damage during transportation. This process is crucial for businesses as it directly impacts order accuracy, customer satisfaction, and operational efficiency. An effective picking and packing process helps reduce errors, streamline workflows, and improve delivery times, all of which contribute to a company’s reputation and profitability. What Is the Pick and Pack Process? The pick and pack process is an essential part of the fulfillment operations in a warehouse. It involves two main tasks: picking, where items are identified and selected for an order, and packing, where those items are safely packaged for shipment. This process ensures that products reach customers efficiently and safely. 1. Picking: Identifying and Selecting Items The first step in the picking packing process is identifying the items in an order and retrieving them from the warehouse shelves. Here’s how this part works: Order Receipt: The process begins when a customer places an order, either online or through another channel. The order information is sent to the warehouse management system (WMS). Picking List Creation: The WMS generates a picking list that details the items needed for the order, including their locations in the warehouse. Selection of Items: Warehouse workers, often called “pickers,” go to the specified locations to retrieve the items listed on the order. Depending on the warehouse setup, picking can be done manually, with handheld devices, or using automated systems like robots or conveyor belts. Verification: To ensure accuracy, workers often double-check items by scanning barcodes or using RFID technology to match the items to the order. Key Considerations for Accurate Picking: Location Accuracy: The efficiency of picking relies on the organization and layout of the warehouse. Properly labeled shelves and clearly defined storage areas are essential. Inventory Control: Real-time tracking of inventory helps prevent mistakes such as picking the wrong items. Training: Well-trained pickers are crucial for minimizing errors and improving speed. 2. Packing: Safely Packaging Items for Shipment Once the items are picked, the next step in the picking packing process is packing the items. This ensures that products are protected during transit and that the right items are shipped to the customer. Packaging Material Selection: Depending on the size, weight, and fragility of the items, appropriate packaging materials (e.g., boxes, bubble wrap, or packing peanuts) are chosen to protect the goods during transit. Assembly of Items: If the order contains multiple items, they are assembled together in a single package, and any additional documentation (such as invoices or return instructions) is included. Weighing and Labeling: After packing the items, the package is weighed to calculate the shipping cost. Shipping labels with addresses, tracking numbers, and barcodes are applied. Quality Check: Some warehouses have a final inspection step where a worker verifies that the correct items were packed and that the package is properly sealed and labeled. Key Considerations for Accurate Packing: Correct Packaging Size: Choosing the right size box is critical for minimizing shipping costs and protecting the items. Fragile Item Protection: Fragile items must be securely packed to avoid damage during transit. Documentation: Accurate and complete documentation must accompany the shipment to ensure smooth delivery and easy returns if necessary. 3. Role of Inventory Management in the Pick and Pack Process Effective inventory management is vital for the success of the pick and pack process. Without accurate and up-to-date inventory records, picking and packing can become inefficient or error-prone. Here’s how inventory management plays a role: Stock Levels: Real-time tracking ensures that stock levels are always current, preventing out-of-stock situations and backorders. Order Prioritization: A good inventory management system helps prioritize orders based on stock availability, ensuring timely fulfillment. Automated Replenishment: Automated systems can trigger restocking when inventory levels are low, ensuring that popular products are always available for picking. Accuracy and Efficiency: By linking inventory data directly to the picking packing process, inventory management helps ensure that only available products are picked and shipped, reducing errors and delays. 4. Key Considerations for Accurate Picking and Packing To achieve a seamless picking packing process, several factors should be considered: Technology Integration: Utilizing barcode scanners, RFID, and warehouse management systems (WMS) can increase accuracy and reduce human errors. Organization of Warehouse Space: Proper organization of inventory in the warehouse—such as grouping similar items together or arranging fast-moving products near the packing area—can enhance the efficiency of both picking and packing. Worker Training: Regular training for warehouse workers is essential to maintain high accuracy rates and speed during the picking and packing process. Quality Control: Implementing quality checks during both the picking and packing stages helps minimize the chances of errors and ensures that the right product is shipped to the right customer. Returns Management: Having a system in place for handling returns is important, as it ensures that returned items are processed quickly and accurately, helping maintain a balanced inventory. You can also read about packing services in Los Angeles. Why Is Efficiency in the Pick and Pack Process Important? Efficiency in the pick and pack process is a cornerstone of effective warehouse and order fulfillment operations. The speed and accuracy with which items are picked and packed directly influence customer satisfaction, operational costs, and overall business performance. In this section, we’ll explore the impact of efficiency on order fulfillment, the consequences of inefficiency, and the benefits of improving the pick and pack process. 1. Impact of Efficiency on Order Fulfillment Speed and Accuracy Efficiency in the pick and pack process directly impacts the speed and accuracy of order fulfillment. When the process is streamlined: Faster Order Fulfillment: An efficient pick and pack process means that items are picked quickly and accurately, reducing the time between receiving an order and shipping it out. This leads to

How to Pack Clothes for Moving | Easy and Organized Packing
Moving and Packing Services

How To Pack Clothes For Moving

How to pack clothes for moving can be challenging, as it requires careful organization to avoid damage and maximize space. Packing clothes when moving involves not only protecting delicate fabrics but also ensuring everything fits neatly to save room. Improper packing can lead to wrinkles or even damage, making unpacking a hassle. Packing clothes properly is crucial to prevent these issues and keep your wardrobe in good condition. Using techniques like rolling or packing in garment bags can help save space and avoid damage. For a hassle-free move, consider professional packing services. At Chamomile Go, we specialize in packing clothes when moving, ensuring your clothing is packed securely and efficiently for a smooth relocation experience. Why Packing Clothes Efficiently Matters Packing clothes efficiently is a crucial step in ensuring a smooth and stress-free move. It not only helps to keep your clothes safe but also optimizes space, making the entire process quicker and more organized. Here’s why it matters: Minimizing Wrinkles and Damage Packing your clothes properly prevents unnecessary wrinkles, creases, and potential damage during transport. By folding or rolling clothes in a way that minimizes pressure and friction, you’ll be able to unpack a wardrobe that’s ready to wear. Additionally, using garment bags for delicate items can help preserve their shape and integrity. Maximizing Space in Moving Boxes Efficient packing allows you to make the most of every inch in your moving boxes. Instead of throwing clothes in haphazardly, consider using techniques like rolling, bundling, or vacuum-sealing to save valuable space. The more space-efficient your packing, the fewer boxes you’ll need, and that’s one less thing to worry about during your move. Ensuring a Quicker and More Organized Unpacking Process Packing your clothes in an organized way ensures a more streamlined unpacking process. By labeling boxes properly and sorting clothes by season or category, you can avoid the frustrating scavenger hunt for your favorite sweater or pair of jeans. When it’s time to settle into your new home, you’ll be able to unpack and get comfortable in no time. If you’re looking for professional services for moving and packing, Chamomile Go can help streamline the process with expert techniques and care. Not only will they ensure your belongings are properly packed, but they’ll also share valuable moving hacks for clothes to make your move as smooth as possible. 10 Hacks You Have To Try for Packing Clothes Efficiently Packing clothing for moving can often feel like a daunting task, but with these 10 simple and effective hacks, you’ll save time, space, and ensure your clothes arrive in great condition. Let’s dive in: Hack 1: Use Large Trash Bags to Cover Hanging Clothes Instead of folding every single item of clothing, use large trash bags to cover your hanging clothes. Simply bunch them together, poke a hole in the bag for the hanger hook, and drape the bag over the clothing. This will protect your clothes from dirt and wrinkles while keeping them organized. Hack 2: Create DIY Garment Bags with a Trash Bag and a Hanger For a more budget-friendly option, create your own garment bags using trash bags. Insert your clothes onto a hanger and pull the trash bag up over them. Make a small hole for the hook to peek through and secure with a knot. This makes transporting your clothes hassle-free and protects delicate items. Hack 3: Pack Clothes in Suitcases Suitcases are perfect for packing clothing for moving. Not only do they offer sturdy protection, but they also maximize the space you have, preventing clothes from shifting around during transport. Plus, if you already have one, it saves you from needing additional packing supplies. Hack 4: Use Clear Plastic Bins for Easy Visibility Clear plastic bins are a game-changer for packing clothing. They help you easily see what’s inside without having to open every box, making unpacking more efficient. Plus, they’re stackable, so you can organize your clothes neatly in your new space. Hack 5: Utilize Drawer Space for Lighter Clothing Instead of wasting time removing clothes from drawers, leave lighter items like t-shirts, shorts, or scarves inside and simply tape the drawers shut. This will make the process faster while still providing some protection for your clothes. Hack 6: Pack Socks Inside Shoes to Save Space Shoes take up a lot of room, but packing socks inside each shoe is a great space-saving hack. This method ensures you make the most of every inch of space and prevents the shoes from losing their shape during transit. Hack 7: Roll Delicate Fabrics to Minimize Creases Instead of folding delicate fabrics, try rolling them. This technique minimizes creases and helps maintain the shape of your clothes. It’s especially useful for items like cotton blouses, lightweight dresses, or wool sweaters. Hack 8: Use Packing Cubes for Neatness and Space-Saving Packing cubes are perfect for keeping your clothes organized and maximizing space. By compartmentalizing different types of clothing, you can fit more in each box and avoid the chaos of rummaging through a disorganized pile. Hack 9: Label Boxes by Clothing Type or Room When packing clothing for moving, take the time to label boxes by clothing type or room. For example, mark boxes “Winter Clothes,” “Casual Wear,” or “Bedroom Closet.” This way, when you arrive at your new home, unpacking will be quick and easy. Hack 10: Consider Color-Coding Your Boxes Color-coding your boxes is an easy way to stay organized during the move. Assign each room a specific color and use colored stickers or tape on your boxes. This helps movers or anyone helping with the move quickly identify which box goes where, ensuring a smooth transition into your new space. By incorporating these packing hacks for clothing, you’ll not only make your move more efficient but also reduce stress and save space. These simple tricks can make all the difference in how quickly you settle into your new home! You can also read about packing services in Los Angeles. When to Consider Professional Services

How to Pack Kitchen for Moving | Step-by-Step Guide
Moving and Packing Services

How to Pack Kitchen for Moving

A crucial stage that calls for meticulous preparation and close attention to detail is how to pack the kitchen for relocating. The combination of breakable objects, big equipment, and a wide variety of cookware makes the kitchen one of the hardest areas to pack. Every item needs a different strategy to guarantee it is adequately safeguarded, from heavy pots, pans, and utensils to delicate glassware and fragile ceramics. Using the appropriate packing materials and techniques is essential to preventing damage during the relocation because of the special combination of size, weight, and fragility. However, you may streamline this process and protect your kitchenware for transportation with careful planning. What You’ll Need for Packing the Kitchen Talk To A Moving Company Expert Having the appropriate supplies and organizing equipment will make packing your kitchen for relocation simpler and more effective. Packing Materials: Bubble wrap, packing paper, and dish packs: These materials are essential for wrapping fragile items such as glassware, plates, and cups to keep them safe during transport.  Cardboard boxes in various sizes: You’ll need boxes that can hold everything from small utensils to large pots and pans. Make sure the boxes you choose can accommodate larger items. Labels, markers, and packing tape: Securely seal boxes with tape. Mark each box with its contents and the room it belongs to for easier unpacking. Tools for disassembling appliances (if necessary): If you need to disassemble large kitchen appliances, make sure you have the necessary tools, such as screwdrivers, to take them apart. Organization Items: Ziplock bags for screws and small parts: When disassembling appliances or taking apart anything in your kitchen, store screws, small parts, or pieces in ziplock bags and label them. Plastic bins for utensils and smaller items: These are perfect for organizing smaller kitchen items like utensils, measuring cups, or kitchen gadgets, so they stay together and are easy to find. It will be easier and less stressful to pack your kitchen for relocating if you have these supplies and do a little planning beforehand. How to Pack Kitchen for Moving in 5 Easy Steps Getting ready to move? One of the most time-consuming tasks is figuring out how to pack your kitchen for moving. With all the fragile items, odd-shaped cookware, and daily-use utensils, packing the kitchen can feel like a big job. But don’t worry here’s a simple 5-step plan to help you pack it safely and efficiently. Step 1: Declutter Before You Pack Start by going through your cabinets and drawers. Toss expired food, broken gadgets, or chipped dishes. Then decide which items you really need in your new kitchen. Donate gently-used appliances or cookware. Sell high-end items you rarely use. Anything that is broken or unusable should be thrown away. This will make packing kitchen items much easier and reduce the number of boxes you’ll need. Step 2: Start With Non-Essentials After decluttering, begin packing items you don’t use daily—like holiday dishes, serving platters, or backup utensils. Wrap each item in bubble wrap or packing paper.. Use dish boxes with dividers for extra protection. Label each box so you can find things easily later. This step helps you pack efficiently without interrupting your daily kitchen routine. Step 3: Pack Pots, Pans & Cookware Carefully When you pack kitchen for moving, your heavier items need special care. Wrap each pan in bubble wrap or a kitchen towel. Place cushions between pots of comparable sizes. Use sturdy boxes and label them clearly especially if you’ll need them right away at your new place. Step 4: Secure Plates, Glasses & Mugs These are among the most fragile kitchen items to pack. Each plate should be wrapped separately and stacked upright rather than flat. Use dish boxes with cardboard dividers if possible. Place glasses and mugs standing up in a padded box with crumpled paper or foam around them to avoid chips and cracks. Step 5: Organize Utensils, Gadgets & Appliances Now it’s time for the smaller items. Group utensils (spoons, forks, knives) in zip-top bags or bins. Remove batteries from appliances like blenders or coffee machines. If you still have the original packaging, use it! If not, place appliances in sturdy boxes and wrap them in towels or bubble wrap. How to Pack Small Kitchen Appliances for Moving Packing small kitchen appliances properly is key to ensuring they arrive at your new home in one piece. Here’s a step-by-step guide on how to pack kitchen appliances for a smooth move: Preparing Appliances for the Move Before packing, it’s important to prepare each appliance for the journey ahead. This helps prevent damage and ensures they’re ready for use once you arrive at your new home. Unplug and clean appliances thoroughly: Always unplug small appliances like your coffee maker, microwave, or toaster and clean them well. A clean appliance will not only stay in better condition during the move but will also prevent any dirt or leftover food from transferring to your new kitchen. Remove any detachable parts: Many appliances have detachable parts that could get damaged during transit if left attached. For example, remove blender blades, toaster crumb trays, or microwave turntables. These smaller pieces can be packed separately in bubble wrap or ziplock bags to prevent loss or damage. Using Original Boxes If you still have the original boxes for your appliances, they can be a great way to protect your items during the move. Here’s why and how to use them effectively: Advantages of using the original boxes for small appliances: The original boxes are designed specifically for your appliances, making them the best fit and providing extra protection. The boxes often come with custom foam or padding to keep the appliance secure, reducing the risk of movement and damage. How to protect the appliances if you don’t have the original packaging: If you no longer have the original box, you can still pack the appliance safely by using alternative materials: Bubble wrap: Wrap the appliance in several layers of bubble wrap to cushion it

How Much Does It Cost to Move Cross Country? Get Estimate
Moving and Packing Services

How Much Does It Cost To Move Cross Country

How much does it cost to move cross country? This is a crucial question for anyone considering relocating to a new state or coast. Moving cross country involves a variety of logistical challenges and considerations that can significantly impact the overall cost. From hiring professional movers to managing the expenses of transportation, packing materials, and temporary accommodations, the moving cross country cost can quickly add up. Understanding these factors and planning ahead is essential to avoid unexpected financial strain. By exploring different options and calculating the associated expenses, you can ensure a smoother and more manageable move. How Much Does It Cost to Move Cross Country? Moving cross country can be a significant expense, and the cost can vary widely depending on several factors. Generally, the price range for a cross-country move can fall anywhere between $2,000 and $10,000, depending on the specifics of your situation. General Range of Moving Costs The cost of moving cross country can be influenced by various factors: Distance: The farther you are moving, the more expensive it will be. A move from New York to California will typically cost more than a move from Texas to Florida. Size of the Move: Larger moves that require more space (like a full household) will be more expensive. Smaller moves, such as only transporting a few items, will cost less. Additional Services: Services like packing, storage, or moving specialty items (such as a piano) can add to the overall cost. Typically, moving a one-bedroom apartment could cost between $2,000 and $3,000, while moving a larger home with more belongings could range from $5,000 to $10,000 or more, depending on the distance and services included. Factors That Impact the Cost Distance: Longer distances generally increase the cost of the move. However, the price per mile usually decreases with larger moves, so a longer move with more items may not be proportionally more expensive than a shorter move. Size of the Move: The more items you have to move, the more space you’ll need, which can increase costs. Larger homes with more rooms and furniture will typically be at the higher end of the cost range. Timing: The timing of your move can impact costs as well. Summer is the busiest time for movers, so prices may be higher during peak season. Moving during the off-peak season (like winter) can save you money. Services: Extra services like packing, unpacking, and insurance will increase the cost. Some moving companies offer full-service packages that include everything, while others charge for specific services. National Average The national average cost for moving cross country typically ranges from $2,000 to $5,000 for a smaller, more straightforward move (like a one-bedroom apartment). For larger homes (3+ bedrooms), the average cost can be higher, ranging from $5,000 to $10,000 or more. State-to-State Variations There are differences in moving costs depending on the states involved. For example: Moving from the East Coast to the West Coast tends to be more expensive due to longer distances and higher demand in those areas. Moves between neighboring states or regions can be more affordable, especially if you’re staying within the same region (e.g., moving within the Midwest). Overall, the moving cross country cost will depend on your specific needs, but understanding these factors will help you get a clearer idea of what to expect. Factors Affecting the Price of Cross-Country Relocation When planning to move across the country, it’s important to understand the various factors that will influence the cost to move across country. Below are the main factors that can impact your moving expenses: 1. Distance The distance between your origin and destination plays a significant role in the overall moving cost. Longer distances generally increase the cost of your move because the moving company needs to cover more miles, fuel costs rise, and there may be added time and labor involved. Long-distance vs. local moves: Long-distance moves, which typically span hundreds or thousands of miles, are more expensive than local moves. For example, a move from New York to California will cost significantly more than a move from one city to another within the same state. 2. Size of the Move (Volume of Belongings) The size of the move is another critical factor in determining the cost to move across country. The number of items you are moving directly affects the amount of space and labor required. Cost variations based on the number of items: The more items you need to move, the higher the cost. A move from a one-bedroom apartment will naturally be much cheaper than a move from a large four-bedroom house. One-bedroom apartment vs. a four-bedroom house: Moving a one-bedroom apartment could cost anywhere from $2,000 to $3,000, while moving a larger home could range from $5,000 to $10,000 or more, depending on the distance and specific services required. 3. Timing and Seasonality The timing of your move can greatly affect the overall cost to move across country. Peak seasons (summer, holidays): Moving during the peak season, which typically occurs in the summer or around major holidays, can significantly increase the cost. Many people move during these times, so demand for moving services is higher, which leads to higher prices. Off-season moves: Moving during the off-season (fall and winter months) can help you save money. Since fewer people tend to move during these periods, moving companies may offer discounts or lower rates due to less demand. For Moving services in Los Angeles you can contact Chamomile Go. 4. Moving Insurance Moving insurance is an additional cost you may need to consider when calculating the cost to move across country. Depending on the level of coverage you choose, this can add to your moving expenses. Cost of insuring belongings: Basic coverage is often included in the price of the move, but it typically only covers a small portion of the value of your belongings. For full protection, you may need to purchase additional insurance. Types of moving insurance: Released Value Protection: This is basic

How to Hire a Moving Company | A Quick Guide
Moving and Packing Services

 How to Hire a Moving Company

How to hire a moving company is a crucial decision when you’re preparing for a move. With the complexities of packing, transporting, and ensuring the safety of your belongings, finding the right professionals can make all the difference. Moving can be stressful and overwhelming, especially if you don’t have the expertise or the right equipment. This is where hiring moving company becomes essential. It not only alleviates the physical burden but also ensures your items are moved securely and efficiently. Choosing a reputable company, like Chamomile Go, helps ensure a smooth, hassle-free experience, allowing you to focus on settling into your new home. Professional movers bring expertise, the right tools, and the experience to handle everything from fragile items to heavy furniture, making your transition as seamless as possible. Understanding When To Hire Professional Movers Moving to a new home or office can be an overwhelming task, and sometimes it’s best to seek help. While DIY moves can be an option for some, there are certain situations where hiring moving company is not only convenient but essential. Understanding when it’s time to call in the professionals can make a significant difference in the ease and safety of your move. Signs It’s Time to Hire Professionals Complexity of the Move (Long-Distance, Large Items, Etc.) If you’re moving across the country or even to a neighboring state, hiring a moving company can make the transition much easier. Long-distance moves require proper logistics, the right equipment, and experienced movers who understand how to handle the complexities of transportation. Additionally, if you have large or fragile items—like furniture, antiques, or a piano—a professional mover has the tools and expertise to move these safely. Lack of Time or Physical Ability Moving involves more than just packing boxes. There’s heavy lifting, transportation, and setup that can take a serious toll on your body and your schedule. If you find yourself pressed for time, overwhelmed by other commitments, or unable to physically handle the strain of lifting heavy objects, hiring a moving company can be a lifesaver. Lack of Experience or Knowledge in Handling Moving Logistics Not everyone has the experience to plan and execute a smooth move. A lack of knowledge on how to properly pack items, secure furniture, or navigate the logistics of getting everything into your new home can result in mistakes, damage, or unnecessary stress. If you’re unsure about how to handle your move, it’s a sign that hiring a moving company could help you avoid costly errors. Advantages of Hiring Professional Movers Efficiency and Speed Professional movers are trained to handle moves efficiently. They are experienced in packing, loading, transporting, and unloading, which means your move will happen much faster than if you try to do everything on your own. Hiring a moving company can save you time and allow you to settle into your new home or office much sooner. Expertise in Handling Fragile or Heavy Items One of the biggest advantages of hiring a moving company is the expertise they bring to the table. Whether you have fragile artwork, expensive electronics, or large, cumbersome furniture, professionals know how to secure and transport your belongings without damage. They have the necessary equipment, like dollies, straps, and padding, to protect your items during the move. Insurance and Protection for Your Belongings When you hire a moving company, your belongings are typically covered by insurance. This provides peace of mind in case of accidents, damage, or loss. Professional movers have the right coverage to protect your items during transit, which is especially important for valuable or delicate possessions. Save Time and Reduce Stress A move is already a stressful process, and handling it on your own can make things even more challenging. By hiring moving company, you save time, reduce stress, and allow yourself to focus on other important tasks—like setting up your new home or office. Types of Moving Services Available When it comes to moving, there’s no one-size-fits-all approach. The type of moving service you choose depends on the scope of your move, your budget, and the level of assistance you need. Whether you’re hiring movers for a full-service experience or opting for a DIY approach, understanding the different services available can help you make an informed decision. 1. Full-Service Movers Full-service movers provide a comprehensive range of services that cover every aspect of the move. This typically includes: Packing: Professional movers will pack your belongings safely and efficiently, ensuring everything is properly protected for transport. Loading: Movers will carefully load all your items onto a moving truck, securing them for the journey. Transportation: Full-service movers handle the driving, navigating roads and getting your items to the new location. Unloading: Upon arrival, they will unload and place your items in the designated areas. 2. Loading/Unloading Only This service focuses only on the physical labor of loading or unloading your belongings. If you have already arranged for transportation (such as renting a truck or moving container), hiring movers just to assist with the heavy lifting can be an efficient and cost-effective option. How This Service Works and When It’s Suitable: If you’re renting a moving truck or using a moving pod, you can hire movers simply to load or unload the truck or container. This is especially helpful if you have large furniture or fragile items that require special handling, but you’re already handling the packing and transportation yourself. When it’s suitable: You may want to opt for loading/unloading only if you want to save on costs but still need professional help with the lifting. If you have a smaller move and just need assistance with the heavy lifting. Cost and Time Savings: Hiring movers for only loading and unloading is typically more affordable than full-service moves. This option saves you time and energy, while also reducing the physical toll of moving heavy objects. 3. Specialized Moving Services Specialized moving services are tailored to handle specific types of moves that require extra care, equipment, or expertise. These services can be a

How to Pack Knives for Moving | Easy Step-by-Step Guide
Moving and Packing Services

How To Pack Knives For Moving

How to pack knives for moving is a crucial step to ensure safety and avoid damage. Properly packing knives not only protects them from potential harm but also reduces the risk of injuries. Knives are sharp, and if not securely packed, they can easily cause cuts or puncture other items. Additionally, improper packing can lead to damage to the blades or handles, which could render the knives unusable. When you pack kitchen knives, it’s essential to use materials that cushion and safeguard the edges, such as knife blocks, protective sheaths, or sturdy wrapping. This attention to detail ensures that your knives will arrive at your new home safely and ready to use. Gather Your Packing Supplies Talk To A Packing Company Expert When preparing to move or ship knives, proper knife packaging is essential to ensure their safety and protection. Here’s a guide to help you gather the right packing supplies: Essential Packing Supplies for Knives: Sturdy Cardboard Boxes: Choose boxes that are strong enough to hold your knives securely. They should fit your knives comfortably, with enough space for padding to prevent any shifting. Plastic Bags: Place each knife in a plastic bag to protect it from dirt, moisture, or potential scratches during the move. Bubble Wrap or Packing Paper: Wrap your knives carefully in bubble wrap or packing paper to cushion them. This will absorb shocks and prevent damage. Packing Tape: Use high-quality packing tape to seal the boxes and ensure they stay secure throughout transit. Knife Sheaths or Covers (If Available): If your knives have sheaths or covers, use them to provide additional protection to the blades. Optional Supplies: Towel or Cloth for Extra Padding: If you don’t have bubble wrap, a soft towel or cloth can be used for additional padding. Ziplock Bags for Smaller Knives: Smaller knives can be placed in ziplock bags to keep them safe and organized. Packing Peanuts or Foam for Cushioning: Adding packing peanuts or foam into the box will help keep knives from shifting and provide extra cushioning. Tips for Choosing the Right Supplies: Use strong, secure materials to avoid breakage during the move. You want the boxes to be sturdy enough to protect the knives from external pressure or impacts. Make sure the knife packaging materials you use provide a snug fit around each knife. This minimizes the risk of them moving around inside the box. If you’re shipping or storing multiple knives, it’s worth investing in knife-specific packaging solutions like knife rolls or padded cases for easier storage and organization. By using the right packing materials and following these tips, you can ensure your knives are well-protected during transport or storage. You can also read about packing services in Los Angeles. How to Pack Knives Using Plastic Bags When learning how to pack knives, using plastic bags can be a simple yet effective way to protect the blades and prevent damage during transit. Here’s why plastic bags work well and a step-by-step guide on how to use them: Why Plastic Bags Work: Barrier for Blade Exposure: Plastic bags act as a protective barrier, ensuring that the blade doesn’t come into direct contact with other items, which could cause it to dull or get scratched. Prevents Scratching: By keeping knives separated inside the bag, plastic bags help avoid the risk of knives rubbing against each other or other objects, minimizing the potential for damage. Step-by-Step Packing: Wrap the Blade with a Plastic Bag: Start by wrapping the blade of the knife with a plastic bag. Make sure the blade is completely covered to prevent any exposure that could lead to injury or damage. Double bagging is a good idea for extra protection, ensuring the bag is strong and secure. Secure the Bag: Once the blade is wrapped, use a twist tie or tape to secure the bag tightly. This ensures the blade remains fully covered and the plastic stays in place throughout the moving or shipping process. Extra Layer of Protection: For added safety, you can place the wrapped knives inside another plastic bag. This gives an extra layer of protection and helps keep the knives organized and separated from other items in the box. Arrange the Knives Neatly in a Box: After wrapping and securing the knives, arrange them neatly in a sturdy box. Be sure to pack them tightly, but not so tight that they shift around during transport. This will help prevent movement that could cause damage. How to Pack Knives in Containers Using containers to pack knives is an excellent way to keep them organized and secure during a move or shipment. Here’s how you can safely pack knives in containers: Using Containers to Keep Knives Organized: Small Containers for Individual Knives: You can repurpose items like old cereal boxes or small plastic bins for each knife. These containers will keep knives separate, preventing them from bumping against each other or other items. Divided Boxes or Knife Blocks: For more extensive knife collections, divided boxes or specialized knife blocks offer an excellent way to store knives. They provide organized slots to ensure the blades are safely placed and easy to retrieve, while also offering added protection. Step-by-Step Packing: Place Knives in a Container with Each Knife Separated: Start by placing each knife in a container, making sure that each knife is separated from the others. This prevents the blades from rubbing against each other, which can lead to scratches or dulling. For example, using small bins or repurposed boxes works well for individual knives. Use Dividers, Foam Inserts, or Towels for Cushioning: Add a layer of protection by placing dividers, foam inserts, or even a towel between the knives. This cushioning prevents the knives from moving around in the container and absorbs any shocks during transport. Close the Container Securely and Label It: Once the knives are neatly packed and cushioned, close the container securely. Make sure it is sealed tightly to avoid accidental openings. Don’t forget to label the container as “Fragile” to

Our Client's Reviews

Get In Touch With Us!

Find Us

Office Address

    Los Angeles, California

Office Phone

    +1 310-895-3517

Email Address

  Chamomilemoving@gmail.com

Let’s get you moving! Grab your FREE quote now.

Chamomile Go offers premier moving services throughout Los Angeles County, CA, ensuring a hassle-free relocation experience for all our clients.

+1 310-895-3517

24/7 Support

© 2025 Created by LocalPro1